
by Lance Hill | Oct 17, 2023 | How To, Mirliton
The Louisiana Mirliton Two-Step
Because of increased extreme weather events like Heat Domes and frequent hurricanes, we need to think entirely differently about when and how to grow mirlitons. We have two chances at a mirliton crop: Spring and Fall. We need to especially take advantage of our cool months, October through May.
Step One
Plant your mirliton seed or container plant in the fall and build a trellis for the vine to grow on all winter. When necessary, temporarily cover it with 4-mil plastic and warm it with a portable heater to protect it on frost/freeze days. By the following spring, the vine will have a large canopy to support flowering–and you will get a spring crop.
Step Two
To help your vine get through the summer, use the same trellis to support a 30% shade cloth to shade the vine from June through August, if necessary. That will give you a a good chance at another crop in the Fall
10’ X 25’ 4-mil plastic sheets
Space Heater
Shade Cloth
Remote Thermometer for Enclosure
by Lance Hill | Apr 30, 2023 | How To, Mirliton
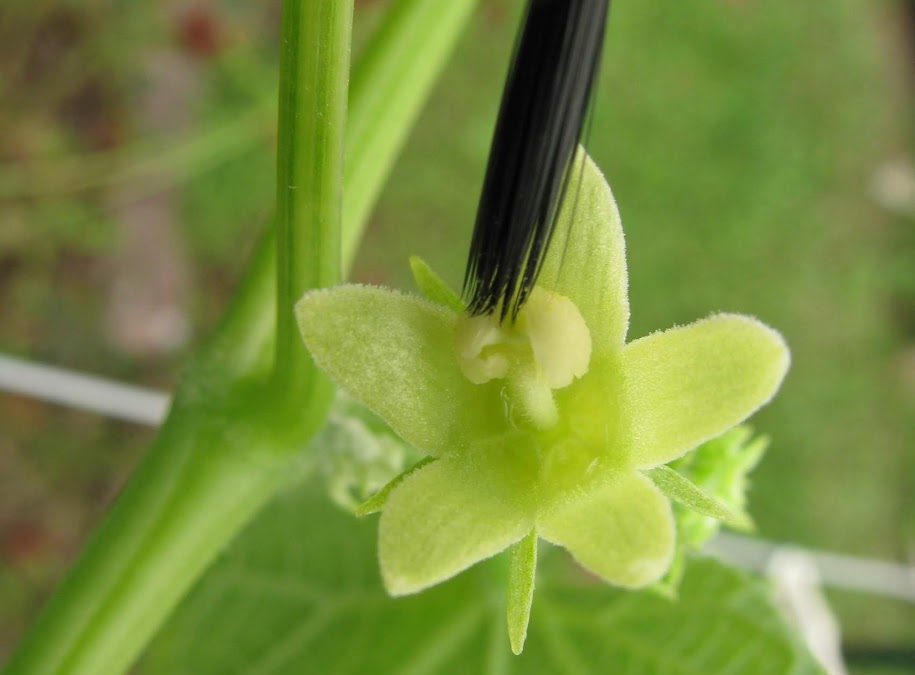
Sometimes bees and other pollinators are not doing their job, and you want to ensure that your female flowers are pollinated. Gardeners are often advised to remove male flowers and apply them to the females. But this destroys the male nectar, which attracts pollinators. Instead, the simplest way is to hand-pollinate with a slender artist’s brush with dark horse hair bristles (the nylon brushes won’t work). The bristles make it clear that you have collected yellow pollen from the males. Using a brush means you do not destroy the males and can return to them for additional pollen.
Click here to see how to do it.
by Lance Hill | Apr 23, 2023 | How To, Mirliton
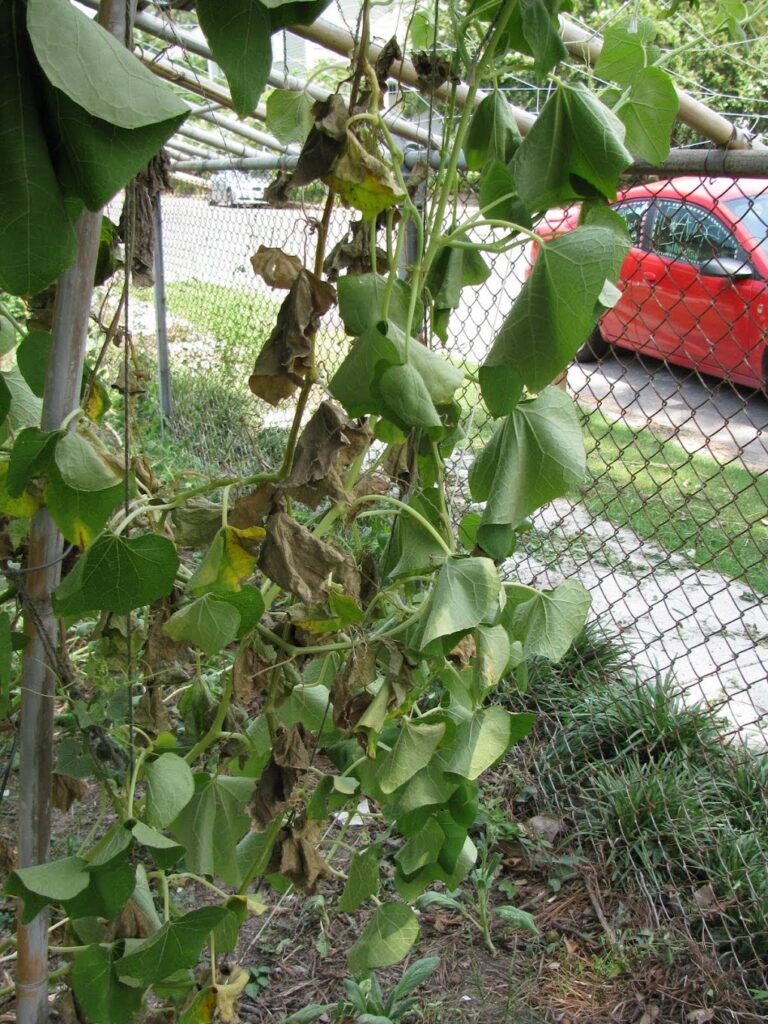
Sudden wilt and dead leaves caused by anthracnose.
Anthracnose is a summer disease caused by many fungi, but the pathogen that affects mirlitons is Colletotrichum orbiculare. For the purposes of this article, I will call Colletotrichum orbiculare the “anthracnose fungus. It is a chronic problem with mirlitons, and it’s the main reason plants die in the first year. There is no known synthetic or biological fungicide that can prevent or eradicate anthracnose in mirlitons, although Mirliton.Org is testing some new biofungicides.
But anthracnose is like a sprained ankle; you can’t prevent it or take a pill to cure it, but you can minimize the risk of getting it and speed up the healing process.
Anthracnose and powdery mildew (PM) are fungal diseases that start with a common sign: leaf yellowing (chlorosis). It’s important to recognize the difference because powdery mildew can be treated, while anthracnose can’t. The PM fungus spreads on the surface of leaves, initially as faded yellow dots and then yellows the whole leaf until it wilts and dies.
Anthracnose, in contrast, grows inside the leaf cells and spreads cell-to-cell (intercellularly), so it tends to spread between the leaf veins and form sharp wedges. It kills the tissue within the wedge, spreading across to the whole leaf, so you will see both yellow and brown tissue in the same wedge photo.
The anthracnose fungus also penetrates the stems, leaving brown lesions on the surface that emit a gummy exudate–another distinctive of the disease. Once inside the stem, it blocks the flow of water and nutrients downstream to the rest of the plant. The “girding” process is why you will see a sudden wilt and death of a stem branch. Brown stem lesions and sudden wilting are key signs that the vine has an anthracose infection.

Anthracnose leaf spots.
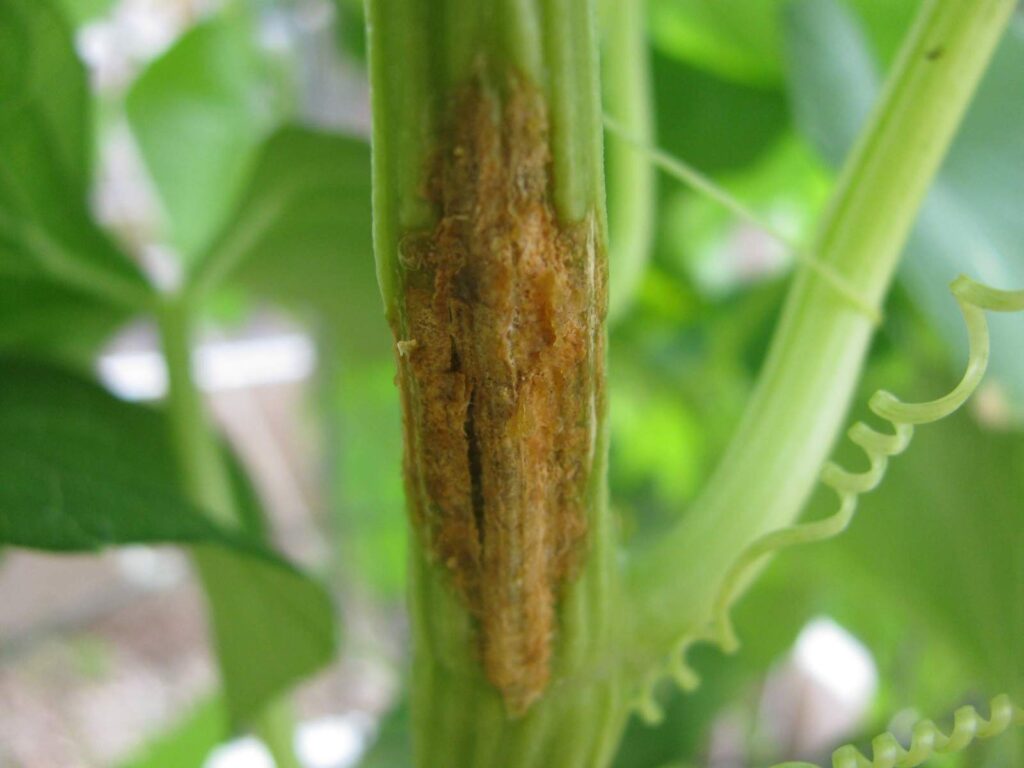
Anthracnose lesion with gummy exudate on the stem.
Mirlitons tend to experience anthracnose epidemics in July and August due to rainfall patterns. Intensive rains splash up anthracnose fungi from the ground onto the plant stem. The fungus incubates during warm nights and produces thousands of spores that are contained in a sticky base. Rainstorms dissolve the sticky film, which releases the spores. Then, raindrops splash the spores to adjacent leaves, and that’s why anthracnose epidemics occur during the hot, rainy season.
The good news is that for every stem lost, a healthy, usually a mature vine, will send up a new shoot. It is a tug-of-war with the disease through the summer, but generally, the disease will disappear by September in time for flowering and fruiting. Additionally, once infected, that mirliton plant will acquire increased resistance to anthracnose every time it gets the disease. So, if your vine develops anthracnose this year, it is less likely to develop it next year. However, first-year plants are more vulnerable and can die from the disease.
The key to surviving an anthracnose epidemic is to have a healthy vine in place before the epidemic. That means a well-drained and aerated vine. When the soil is water-saturated and oxygen is unavailable in the root zone, plants undergo dramatic changes to survive. They are literally in anoxic soil, similar to the dead zones in the Gulf of Mexico. They shift from aerobic to anaerobic metabolism, resulting in only 5% of the energy efficiency found in healthy, aerated soil.
As a consequence, they produce toxic organic and inorganic compounds and deprive leaves of potassium, a crucial element for maintaining leaf functions. After 24-48 hours, the roots have been damaged, making it more difficult for them to uptake water and nutrients. Leaf functions are weakened, and the whole plant is vulnerable to anthracnose and other diseases–and will reduce vegetative growth and fruiting.
The challenge for us is that, unlike most of the U.S.A., well-drained soil is difficult to find along the Gulf Coast. Most of the suburbs and many new developments were built on reclaimed swamps that were filled with soil from local rivers. That soil was never intended for agricultural use, and it drains poorly, has a high water table, and intense rains can quickly saturate the soil, leaving it anoxic.
So, drainage is a key factor in disease prevention.
Solutions: The most reliable way to prevent anthracnose is to protect the roots.
Ground Planting:
Make sure the soil is well-drained and aerated. Plant on your highest available area, use planting hills, and avoid planting near roofs. Plant near a tree if you have one; trees are natural sponges and tend to stabilize soil moisture. If you already have the vine planted, you can dig shallow drainage trenches to remove excess rainfall away from the vine or add a corrugated drain pipe or a French drain.
Raised-bed Planting:
Raised beds are particularly vulnerable to anthracnose and should be avoided if possible. Remember that a raised bed can’t drain into a saturated yard, so you need to construct a bed that will permit excess rainfall to escape laterally through the sides. Add a lateral route for excess water to exit above ground level by drilling 1/4 “ holes along the side panels.
Play the Odds:
Raising one mirliton is tricky, but raising several increases the odds that you will make it through the first year. Mirlitons acquire resistance to some plant diseases over time, so there is a benefit to keeping a plant alive for several years.
Summary:
For now, the best protection against anthracnose is (1) to use only locally grown heirloom mirlitons for seed since they are likely to have some resistance to anthracnose; (2) plant in well-drained, aerated sites; (3) provide plenty of trellis space so leaves on top can spread out and get maximum exposure to the sun (a natural fungicide) and air circulation; (4) minimize leaf/soil contact by using an overhead horizontal trellis at least 4 feet above the soil; (5) remove all dead leaves after an anthracnose infection and dipose of them in a plastic bag; and (6) always irrigate gently with a hose set on low on the surface or drip irrigation to prevent splash-up of soil-borne fungi. Do not water mirlitons from the top down. Once leaves and stems are brown and dead, remove them and dispose of them away from the vine.
We are testing a new biofungicide, Timorex Act, and will report on our findings when the trials are complete
Click here to learn the signs of anthracnose.
How the anthracnose fungus works:
Colletotrichum orbiculare is a versatile fungus because it feeds on all kinds of tissue–living or dead. The scientific terms for its mode of parasitic activity are biotrophic, saprotrophic, and necrotrophic, which simply mean it can live off living tissue, dead tissue, or both.
Understanding necrotrophic helps diagnose anthracnose. This means the fungal pathogen will destroy a section of the leaf, turning it yellow, and then consume the remaining section until it is brown (necrotic), effectively eating a hole through the plant. The brown spot on the leaf or on the edges is a reliable indicator of anthracnose. PM, in contrast, is an airborne spore that can deposit at the top of a plant and is not as versatile; normally, the leaf will simply uniformly turn yellow and wilt before dying (necrotic), with paper-like spots and holes appearing.
Click here to see photos of anthracnose infection signs on leaves and stems at different stages (click on each photo for descriptions)
Click here for information on identifying and managing powdery mildew.
by Lance Hill | Apr 9, 2023 | How To, Mirliton
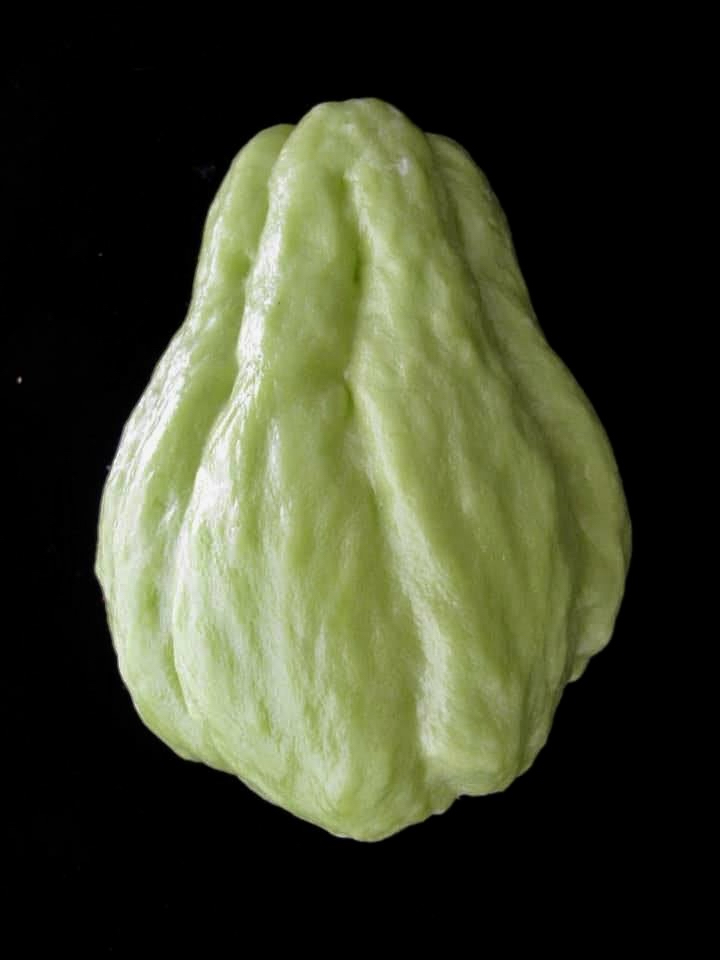
Mirliton is the name people gave the chayote (Sechuim edule) when it first arrived in Louisiana. Chayote is the main species, and there are many subspecies (subvarieties) worldwide with different names. They are what botanists call a “landrace.” Landraces are open-pollinated domesticated plants that have developed over time, adapted to their natural environments, and are not the product of human manipulation, such as plant breeding or modern genetic science. Haitians brought the first mirlitons to Louisiana over two centuries ago, and that landrace thrived because it was adapted to our altitude, climate, pests, and diseases.
Since the Louisiana variety has never been analyzed genetically, we have had to classify it and its subvarieties based on fruit appearance. The Louisiana mirliton landrace has distinctive fruit traits (morphology); they are large, slightly pear or egg-shaped, with smooth skin, longitudinal furrows (though a few may be unfurrowed), and either green or white. Over the years, other varieties were probably introduced from Mexico and Central America and interbred with the Louisiana landrace. The resulting landrace was what generations of Louisianians simply called “mirlitons.” And for most of the last two centuries, there was only one variety.
Then things changed. Hurricane Katrina wiped out almost all the mirlitons in New Orleans, so I began searching for growers of our Louisiana landrace to replace them. I eventually found many growers in rural areas, and when I did, I would name the mirliton after the grower so that we could track and preserve it.
I soon noticed differences within Louisiana mirlitons — there were clearly distinct subvarieties within the landrace. Mirlitons were more complex than we thought. I decided to classify the subvarieties by fruit morphology and then interview the growers to determine the strain’s history. If it were a unique variety, we would name the variety so we could track and preserve it. That’s how “named varieties” came to be.
In 2024, we have reached the point where we have identified most of the Louisiana subspecies. To simplify matters, from this point forward, we will classify mirlitons into two categories:
- Certified Heirloom Mirlitons: These are the common Louisiana mirlitons and make up the majority of our landrace that has grown here for decades. They are largely indistinguishable from each other. They have been submitted to Mirliton.Org for certification, and after review, Mirliton.Org determined they met all the visual criteria for heirlooms. If we certify it, you can say that you are growing a “certified mirliton” or “certified heirloom.” If someone asks you the name, just say it’s an unnamed variety. (If you are growing a mirliton of unknown origin, you can submit for certification at lance@mirliton.org)
- Certified Named Heirloom Mirlitons: These are the unique subvarietiies ot the Louisiana landrace that we named so we can track and preserve them. Like the Ishreal Thibodeaux mirliton, they are morphologically unique enough that we can visually recognize them. When growers say they are a Papa Sylvest or a Dupuy-Prejean, it means that Mirliton.Org has certified them as a unique subvariety.
Certified Named Louisiana Heirloom Mirliton Varieties:
Ervin Crawford
Ishreal Thibodeaux
Boudreaux-Robert
Papa Sylvest
Bogalusa whites
Chauvin-Rister
Miss Clara
Remondet-Perque
Joseph Boudreaux
Bebe Leblanc
Maurin
Jody Coyne
Dupuy-Prejean
Certified Louisiana Heirloom Mirlitons:
Here is an updated list of people who have submitted photographs of mirlitons they are growing for certification as part of the Louisiana Heirloom Mirliton landrace. We have examined them, and the fruit matches all the characteristics (morphology) of the traditional Louisiana Heirloom Mirliton landrace. Accordingly, we have determined that they are the Certified Louisiana Heirloom Mirliton variety. The owners are entitled to refer to them as “Certified Mirlitons.”
(photographs and date submitted are on file)
Why We Track Heirloom Varieties:
Why is it important to continue tracking heirlooms? Beginning in 2020, several large grocery store chains began importing chayote (mirlitons) that looked exactly like our heirloom varieties. People began buying them, using them as seeds, and growing mirlitons indistinguishable from our heirloom varieties. The problem is that imported chayote may carry a seed-transmissible virus that can destroy our heirlooms. It’s called Chayote Mosaic Virus (ChMv), which devastated crops in other countries. Recent research has also discovered new strains of anthracnose in Brazilian chayote that can be transmitted inside the fruit.
We created the certification process to help preserve and popularize the Louisiana heirloom variety. We recommend that the best way to accomplish this is to use only certified heirloom seeds.
by Lance Hill | Apr 1, 2023 | How To, Mirliton
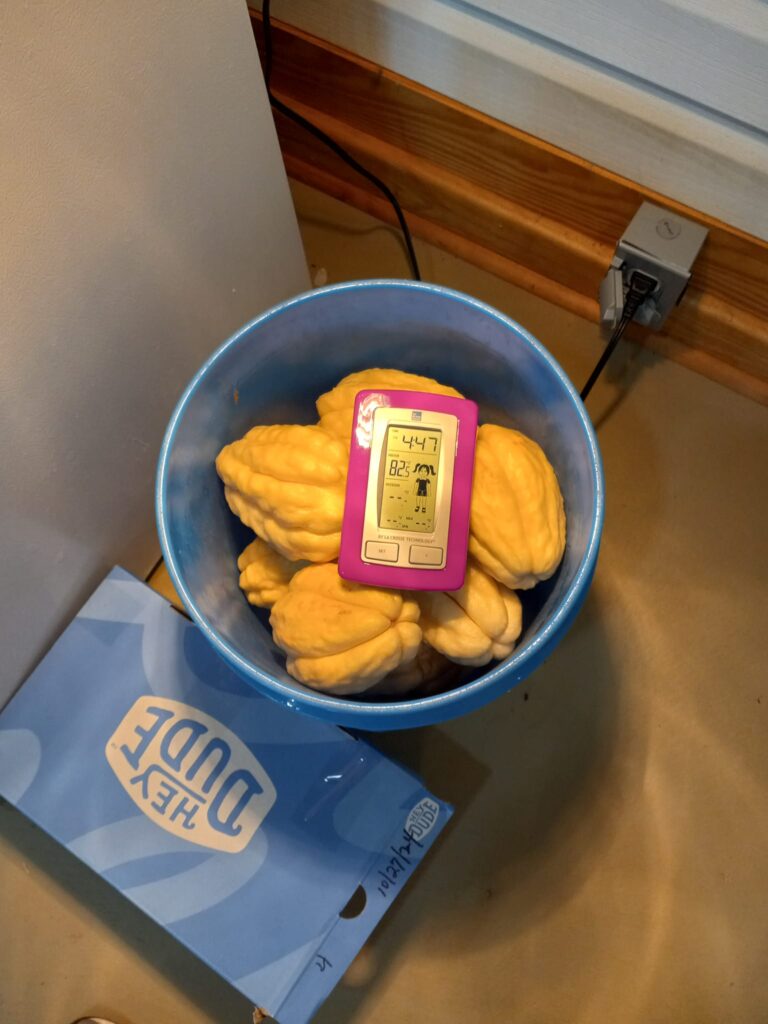
Angela Joan incubated her mirlitons in a 5-gallon bucket with a 125w heat lamp above. They sprouted in 11 days.
Growers typically attempt to delay mirliton sprouting by placing new fruit in paper bags and storing them in a cool part of the house. Cool temperatures promote dormancy and prevent sprouting. But you may want to promote quick sprouting so you can plant them immediately in the ground or container, especially if you want to plant them in the fall. Normally, you would place the mirliton in the warmest part of your house — on top of the refrigerator. But if it hasn’t sprouted within a week or two, here’s an “incubation” trick that Joseph Boudreaux of Broussard taught me that speeds up sprouting.
You can incubate them inside your home in the fall or winter using a small plastic trash can and a heat lamp. Put the mirlitons in a 5-gallon bucket and place a thermometer on top. You can cover the bucket with cardboard, as shown in the photo below, but it’s not necessary.
You want to maintain a temperature of 80°-85°F. You may have to experiment with the distance between the lamp and the bucket. When kept warm in this manner, the fruit will typically begin to sprout within 7-14 days. Sprouting is defined as when the internal seed pushes its way to the large end of the seed (“sticks its tongue out) and a small green shoot emerges. Alternatively, you can place a heating pad underneath the container.
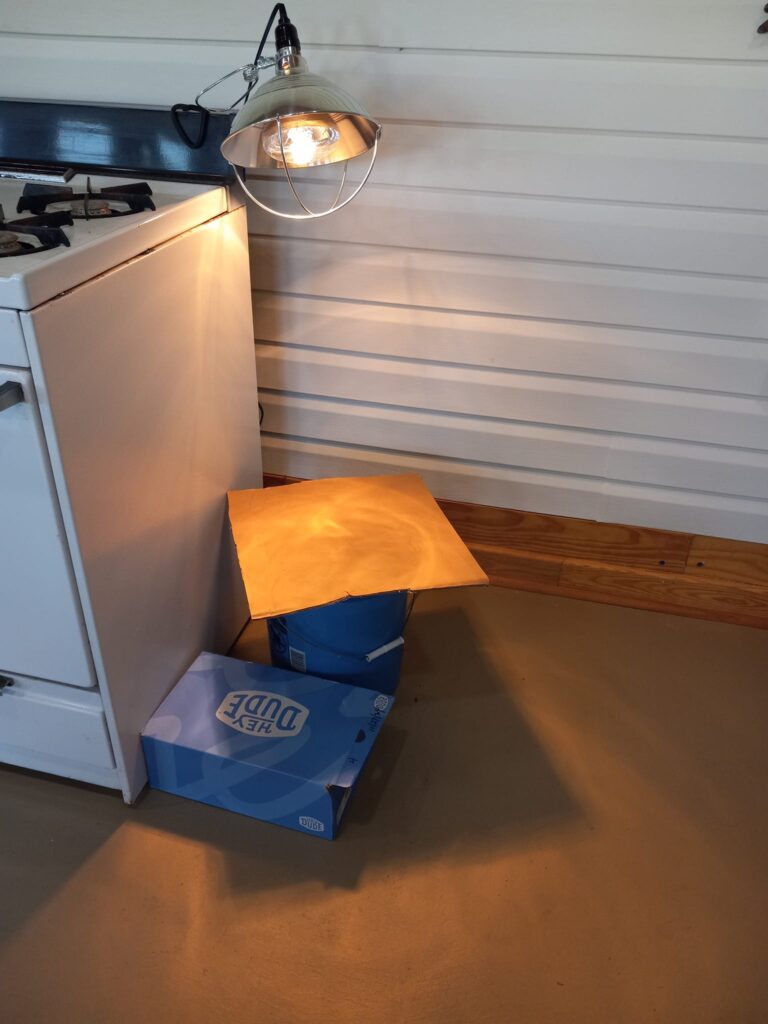
Angela covered the bucket with cardboard, used a remote thermometer, and kept it at 85 degrees.
If the outside temperatures are in the 90s, you can do this outside in a cardboard box without a heating pad. Once you pick the fruit, place it in a shaded warm area with a constant temperature of at least 75-80°F to encourage sprouting. If storing them outside, use chicken wire or netting to protect the seed from pests that enjoy eating the new sprouts.
Once a mirliton sprouts, it means the seed is viable and can be planted. It’s important not to distribute or sell the seed until it has sprouted because sometimes, especially with Spring mirlitons, the fruit can look healthy but have not been properly pollinated and will not sprout and grow a new vine (it’s called parthenocarpy). That occurs more frequently in the spring when there are fewer pollinators and they have more flowers to distract them from the mirlitons.
by Lance Hill | Mar 28, 2023 | How To, Mirliton
There has never been a scientific study for home gardeners on how to best fertilize mirlitons, so we get to invent the science ourselves. Any balanced fertilizer like 8-8-8 or Miracle-Gro is a good choice. A couple of tablespoons at planting and again in July is sufficient, as long as the vine is vigorously growing and green.
But there are two important fertilizing principles I have learned from experienced growers:
(1) Use a slow-release fertilizer such as manure. A mirliton’s nitrogen needs vary throughout the growing season. You don’t want to jolt their tender young roots when you first plant them. They like a buffet where they can eat light but return for more help when they need it. Manure provides that. Ideally, work into your soil or planting pit before you plant, but you can side-dress throughout the season. Rabbit manure is the best choice, but any manure will do the job.
(2) Generally, don’t fertilize after July–unless necessary. If you are using fast-release fertilizers with a high nitrogen content, stop fertilizing in July, before the flowering season begins. A strong dose of nitrogen-rich fertilizer can delay and disrupt flowering. It will cause the vine to direct all its energy into new vegetative growth rather than into reproduction (flowering).
However, sometimes if your vine failed to develop an adequate canopy over the summer and you think you need more canopy for more fruiting, go ahead and apply a light foliar spray of nitrogen in August. Many growers have done that and not experienced delays in flowering. It may be at the expense of flowering, but it may be a tradeoff you are comfortable with.
You can also treat the vine in August and September with a high-phosphate fertilizer (0-45-0), which does increase blooms.
I asked our home gardener, Mirliton scientists, last year to tell us how they fertilized mirlitons. What were the signs it was helping or hurting? Did you do the experiment with different techniques? I got these thoughtful responses. Click here to read them.
Recent Comments