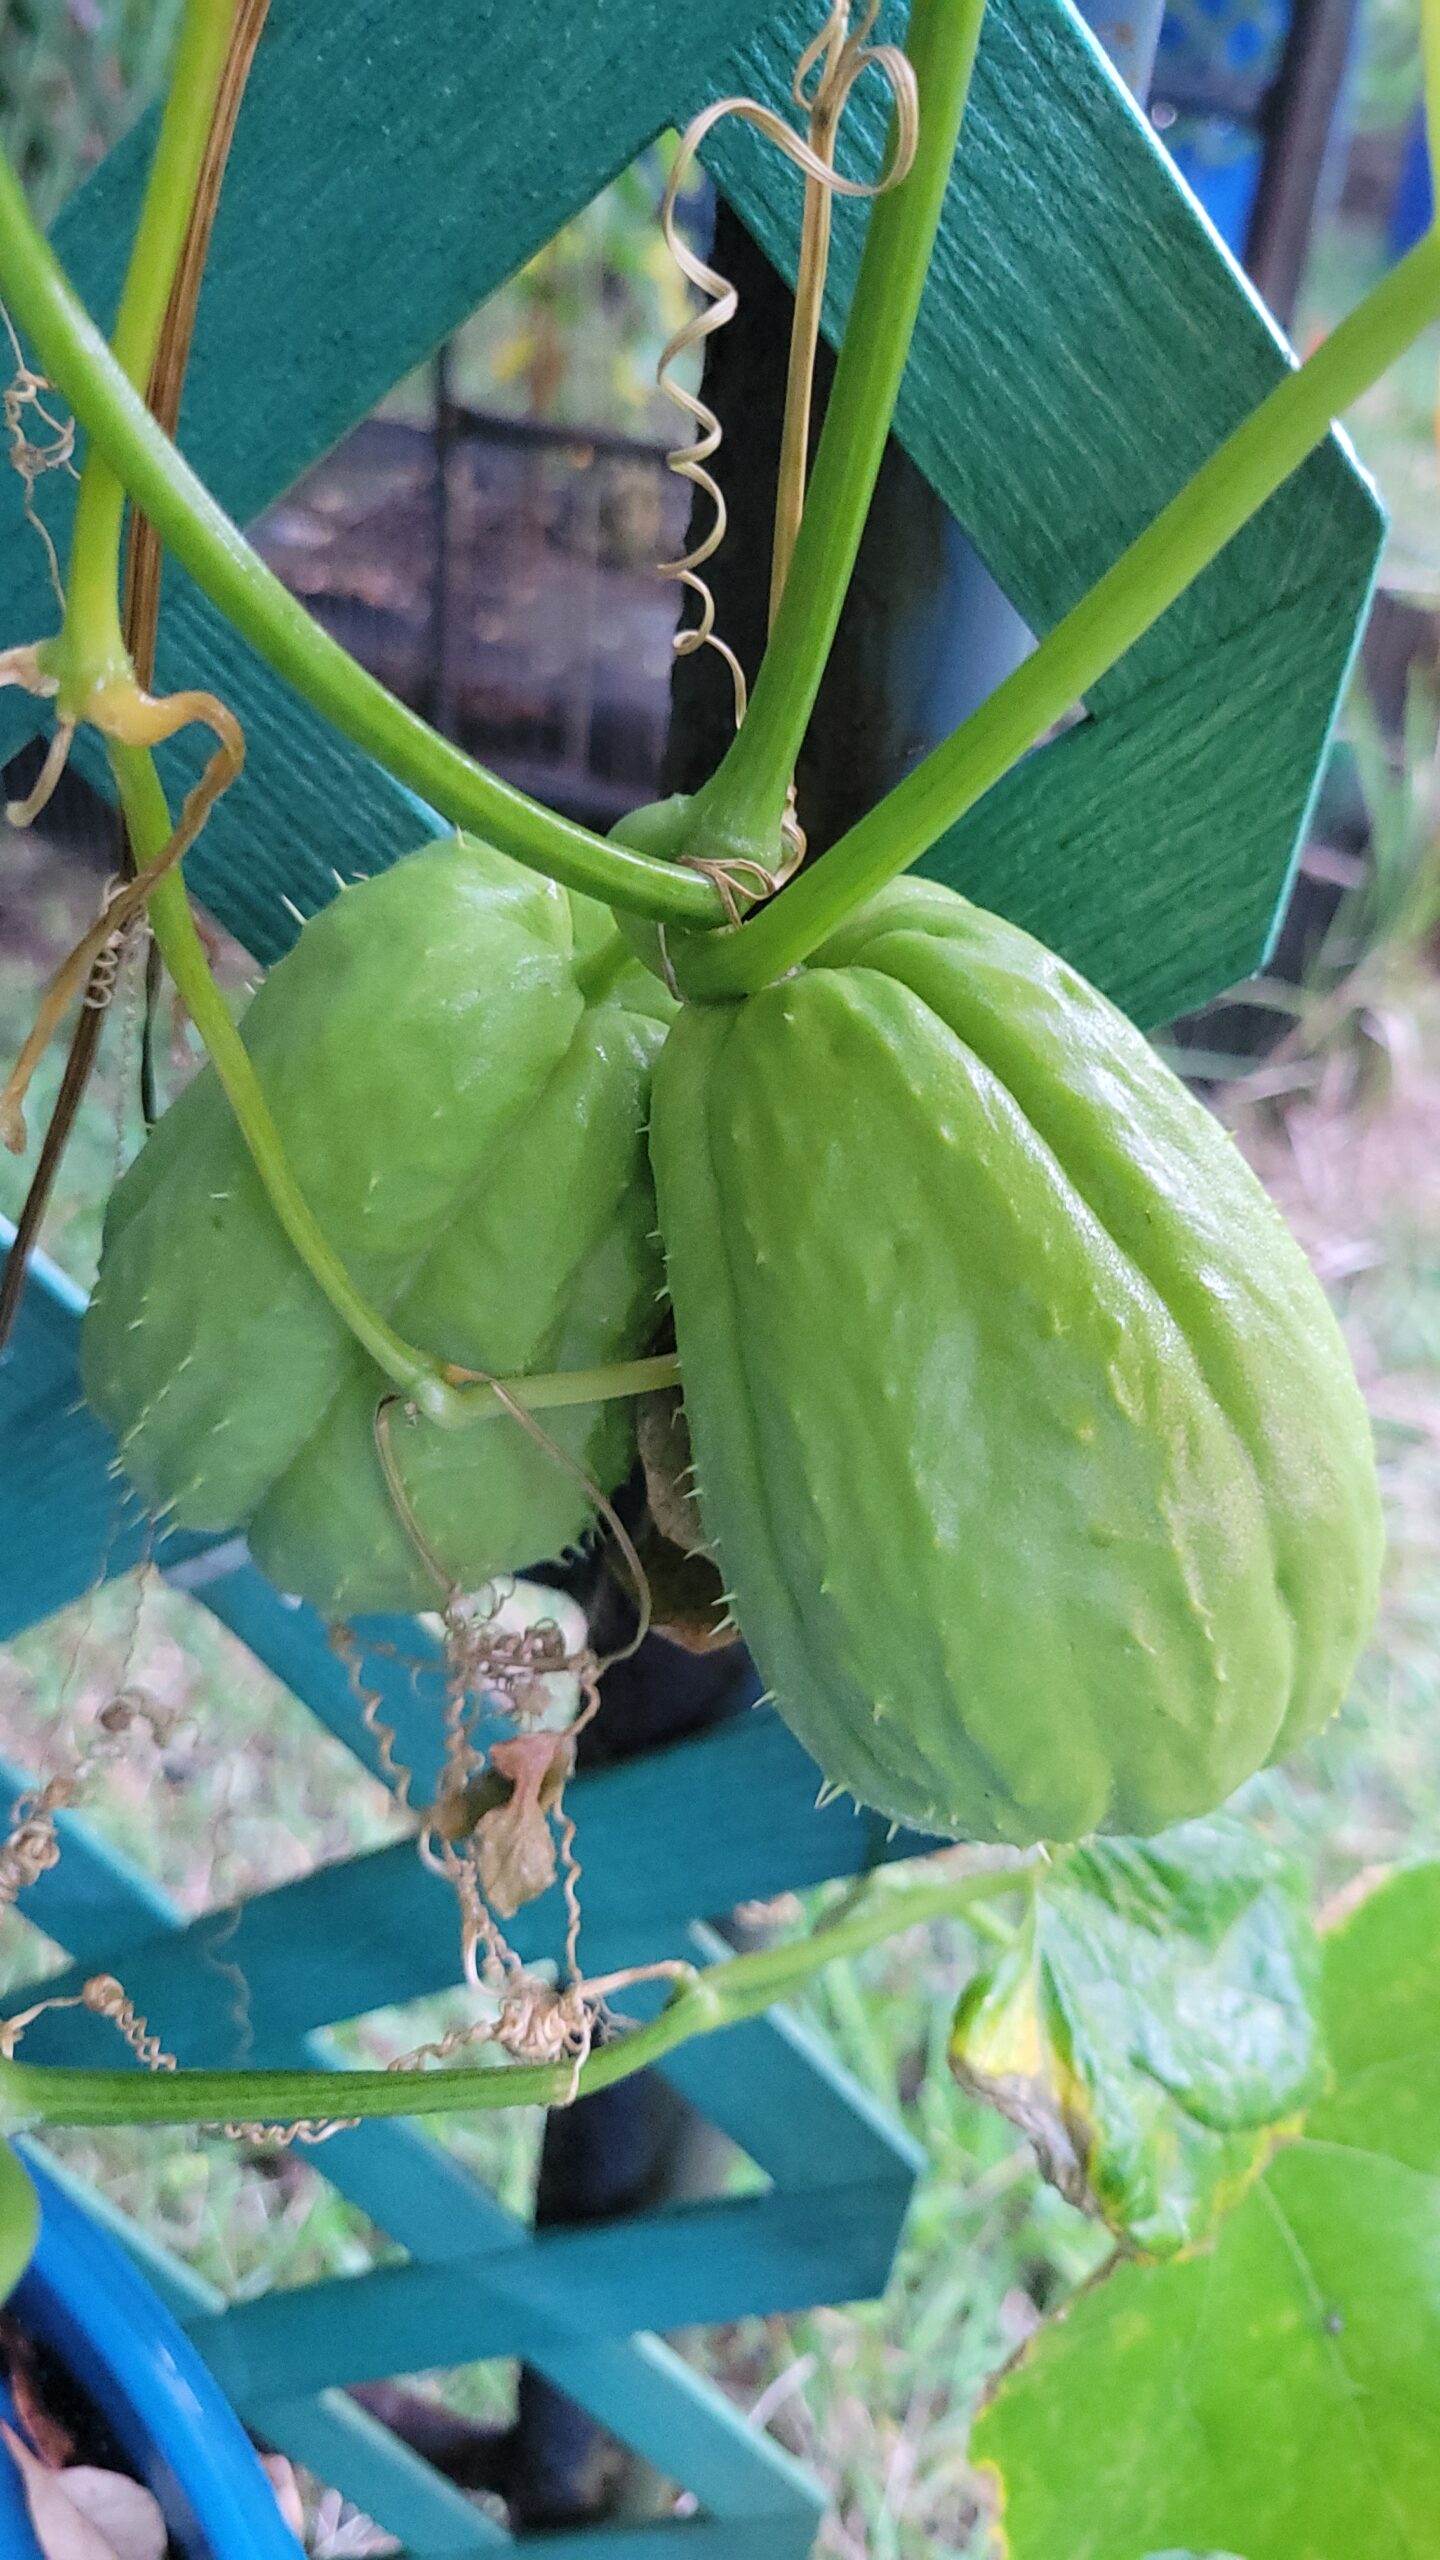
Two fruits on the DeBay Hydroponically-Grown Mirliton Vine
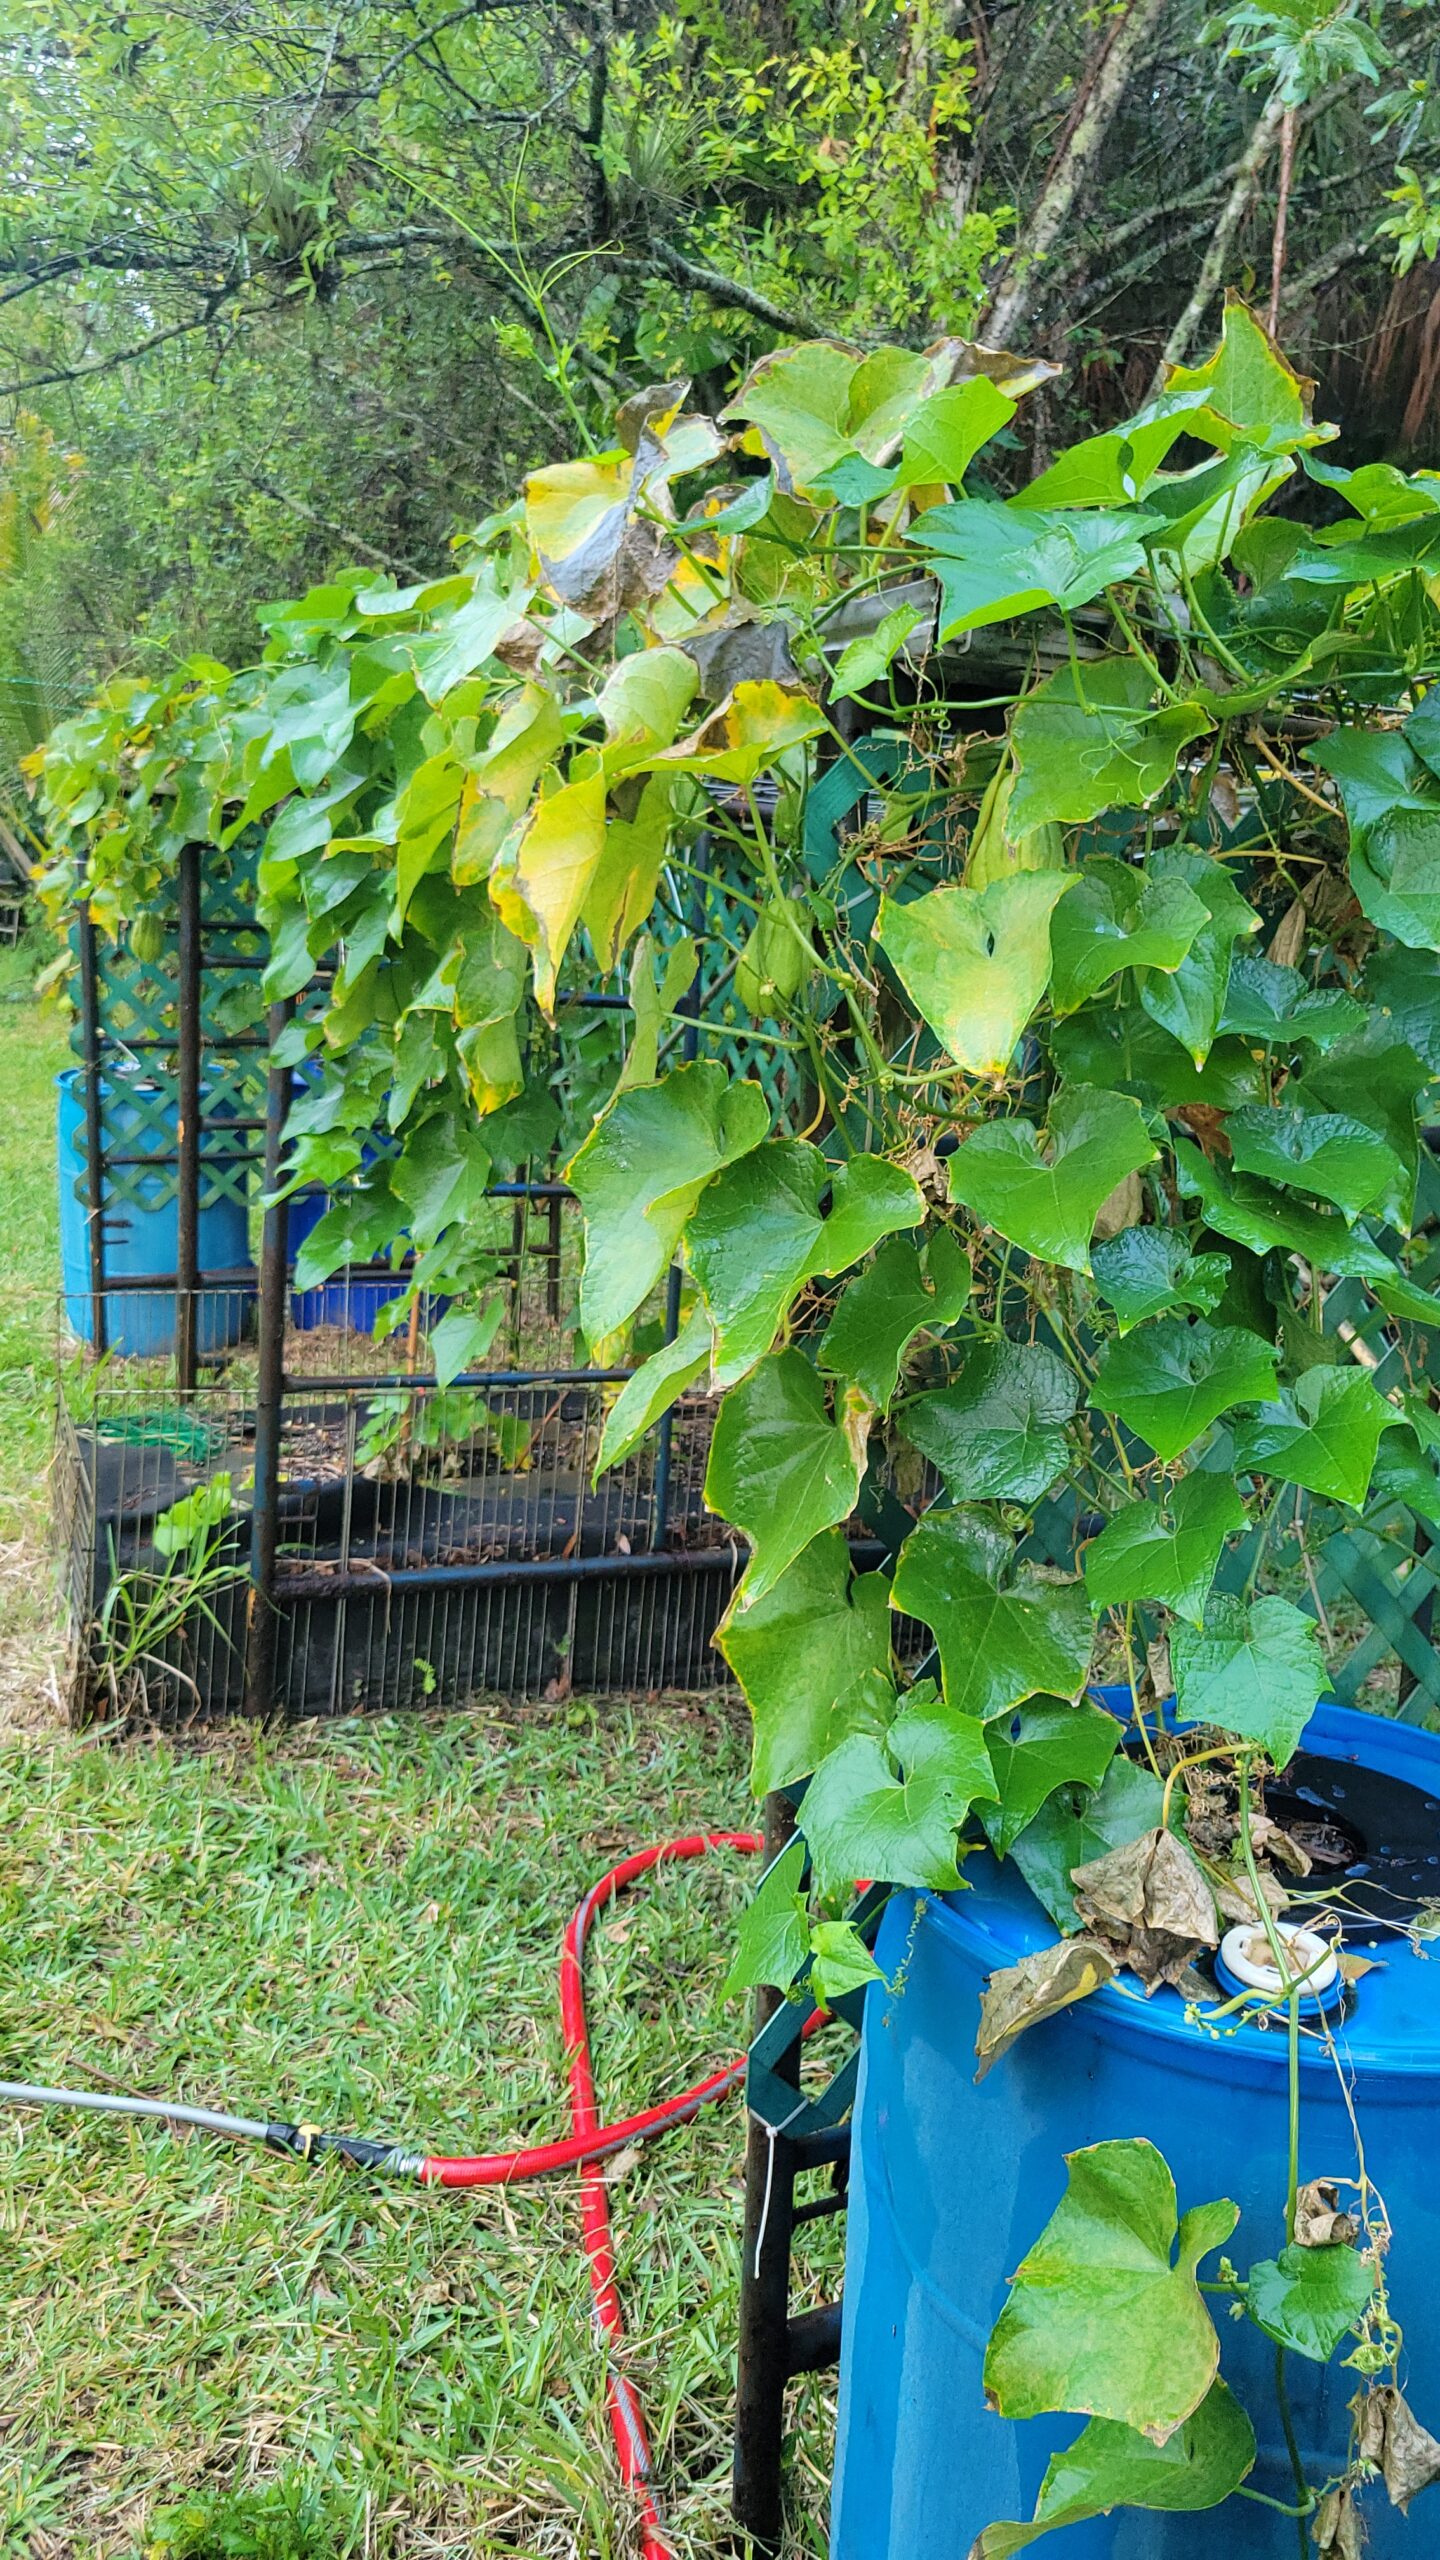
A Cool Weather Hydroponic Method of Growing Mirliton (Chayote) Vines and
Fruit in a 55 Gallon Blue Barrel
Perfected use of “Kratky Method” by William DeBay, on location in Haverhill, Florida
DeBay Hydoponically-Grown Mirliton
The following method was used in a 95-day period from January 10, 2026, to April 15, 2026, to achieve sprouting, vine growth, flowering, fruit set, and harvest of germinating Mirlitons.
This method is best suited for producing a quick harvestable crop in the cooler, short-day months of spring or fall. It should not be used in the summer months. Don’t use a smaller container, and keep the barrel out of direct sunlight because, as the water temperature rises, nutrient uptake is hindered. Wrap the barrel in silver reflective insulation, a radiant barrier, to mitigate the potential for hot water temperatures and algae growth. The nutrient solution is generally not changed during the process. It is allowed to drop to a certain level and then kept there with periodic small additions of nutrient solution.
Supplies:
Sprouting (germinating) mirliton fruit
Clean 55-gallon blue barrel (with fixed lid and 2 bungholes with screw caps)
5-gallon bucket
6” Net Pot Bucket Lid Insert
6” hole saw (or other preferred cutting tool)
Drill and 1⁄4” drill bit
Reflective insulation radiant barrier
Nutrients: (MasterBlend (4-18-38), Epsom Salt (Magnesium Sulfate), Calcium Nitrate (15.5-0-0)
Grams scale
pH measure (strips or meter)
EC (Electrical Conductivity) meter
pH Up and pH Down solution
Planting medium: PRO-MIX Premium Organic Garden Mix (or other preferred non-organic medium)
Procedures:
1. Place the 6” Net Pot Bucket Lid Insert on top of an empty 5-gallon bucket (on a level surface).
2. Add enough chlorine-free water to the bucket so that the bottom inch of the net pot is
submerged in water.
3. Remove the 6” Net Pot Bucket Lid from the bucket. For future reference, measure the distance
from the surface of the water to the top of the 5-gallon bucket rim.
4. Add to the water 4g Masterblend (4-18-38) and stir until dissolved.
5. Add to the water 2g Epsom Salt and stir until dissolved.
6. Add to the water 4g Calcium Nitrate (15.5-0-0) and stir until dissolved. This prescribed order in
which the nutrients are added to the water should never be changed. Masterblend (4-18-38)
should always be the first item. The next item should always be Epsom Salt. The last item should
always be the Calcium Nitrate (15.5-0-0).
7. Fill the net pot with moist planting medium.
8. Plant the sprouting mirliton into the planting medium in the same manner as it would be
planted in the ground. Plant the whole sprouting fruit at a 45-degree angle about 2/3 of the way
down with the sprouted end down in the planting medium. A thin support stick can be inserted
in the planting medium at this time.
9. Return the Net Pot Bucket Lid (with planted mirliton) to the 5-gallon bucket. The water level will
initially wet the bottom inch of the planting medium.
10. Place the assembled bucket planter under cover in indirect sunlight. Monitor the plant, being
sure that the planting medium stays moist but not wet. Mist with water if it looks dry.
11. The mirliton will grow one or more vines and will send roots down through the medium and into
the diluted nutrient solution.
12. The lid can be lifted periodically to check on the root growth progress. When several roots have
extended at least 5 inches out of the bottom of the net pot and into the water, the vine can be
hardened off for the final planting location. Leave the lid and the vine on the bucket during the
hardening process.
13. Cut a 6-inch hole in the center of the barrel end (the top end that includes the bungholes).
14. Drill several 1⁄4 inch drain holes along the edge of the same end of the barrel. There is a ridge
around that end of the barrel. The drain holes must be made to prevent water from collecting
on top of the barrel. Be careful not to drill into the inside of the barrel.
15. Rinse out the barrel.
16. Wrap the barrel in a reflective insulation radiant barrier.
17. Place the insulated barrel (hole side up) in the location you plan to grow the mature vine.
18. Fill the barrel half full with unchlorinated water.
19. Add to the barrel water 120g Masterblend (4-18-38) and stir until dissolved.
20. Add to the barrel water 60g Epsom Salt and stir until dissolved.
21. Add to the barrel water 120g Calcium Nitrate (15.5-0-0) and stir until dissolved.
22. A measurement was made in step 3. Now, add 3 inches to the measurement in step 3.
23. Fill the barrel with additional water until the level below the hole is the measurement distance
computed in step 22. Stir the contents of the barrel.
24. Check the pH of the nutrient solution in the barrel and adjust if not between 5.5 and 6.0. pH Up
and pH Down can be used to adjust the pH.
25. Move the Net Pot Bucket Lid (with rooted and hardened mirliton vine) from the 5-gallon bucket
and place the pot into the center hole of the barrel. Be careful not to damage any roots. If step
23 was done correctly, the roots will be in the water, but the water will not be touching the
bottom of the Net Pot.
26. The Kratky method is a passive, low-maintenance hydroponic technique developed by Dr.
Bernard Kratky, who grows plants without pumps, electricity, or aeration. As roots consume
water, an air gap forms for oxygen, allowing plants to grow to maturity, ideally, with a single
initial fill. However, a mirliton vine will require the addition of replacement nutrient water as it
matures. Do not let the water level drop by more than 50%. If the level is going below fifty
percent, it should be replenished, but do not replenish more than a gallon of nutrient fluid per
day. Adding too much liquid at a time runs a risk of killing the “air roots” that develop in the air
space. Refill nutrient solution can be mixed in a separate 5-gallon bucket of water as follows:
1. Add to the water 12g Masterblend (4-18-38) and stir until dissolved.
2. Add to the water 6g Epsom Salt and stir until dissolved.
3. Add to the water 12g Calcium Nitrate (15.5-0-0) and stir until dissolved.
Store this bucket of refill nutrient solution, with the lid on, in a cool, dark location. Temporarily
remove the bunghole caps to test and refill the nutrient solutions in the barrel.
27. Monitor the pH and EC level on a regular basis and adjust accordingly. pH should ideally be
between 5.5 and 6.0. EC should ideally be between 2.0 and 2.5.