
by Lance Hill | Oct 2, 2026 | How To, Mirliton, Uncategorized
Tired of heat and disease killing your vine? Here are two simple ways to grow them in cool, disease-free weather — and get a crop.
(1). Plant your sprout in the fall, then heavily mulch it for the winter. When it pops up the next spring, it will flower and fruit. We’ve seen this work.
(2). Plant the sprout in the fall in a 3-gallon container and overwinter it in a window. Then, transplant it into the ground the first week of March. I guarantee it will flower and produce a small crop in the spring. We’ve learned this from past experience.
by Lance Hill | Jul 6, 2026 | How To, Mirliton, Uncategorized
 We Have Changed the Two Categories of Certified Mirlitons
In the past, Mirliton.Org had two categories of mirlitons that we certified as Louisiana heirlooms: named and unnamed. This was a little cumbersome for some people, so we have modified it to “Named Mirliton” and “Certified Mirliton.” If you are growing an unnamed variety, all you need to say is that it’s a “Certified Mirliton” or “Certified heirloom mirlitons.” If someone asks for the name, say it’s unnamed.
by Lance Hill | Jul 5, 2026 | How To, Mirliton, Uncategorized

Summary:
The standard advice we hear is to remove diseased leaves and stems to reduce the spread of anthracnose and other fungal diseases. It’s wrong; in fact, rummaging around in a mirliton vine, pinching off or clipping infected leaves will increase the spread of the disease. That’s because plant diseases are dispersed differently, depending on the disease and the plant. Anthracnose spreads differently from other fungi. And mirlitons, unlike pepper or bean plants, are dense, climbing vines that you can’t prune without rubbing up against the leaves. Those leaves can look perfectly healthy, but be covered with fungal toxins and their spores. When you brush up against them, you become a human transport of the deadly sticky anthracnose spores.
Your vine is better off left alone.
Here’s the Science:
Rummaging around in your Mirliton vine to prune off infected leaves probably spreads the disease even more. Anthracnose pathogens (Colletotrichum spp.) produce conidia (spores) in slimy, mucilaginous masses that are specifically adapted for water-splash dispersal, not wind. That sticky mucilage matters here: the spores are sticky and suspended in a wet matrix, which is exactly what makes them transferable by contact. When you push through a dense, wet vine, you are doing what a rain splash does — picking up conidia on hands, sleeves, and tools and depositing them on healthy tissue and at fresh wounds
This is well established for Colletotrichum in general and is why the standard advice across many crops is to avoid working plantings when foliage is wet. That’s nearly impossible along the Gulf Coast, where morning dew and daily afternoon coastal showers keep the vines moist — as well as the sweat-soaked clothes you wear while gardening.
Moreover, even if most of your vine looks healthy, those healthy-looking leaves can be covered with anthracnose fungi and their spores. The pathogens and their sticky spores can be on the leaves long before any visible symptoms, such as brown or yellowing spots or stem lesions, appear. Which means while you are brushing up against what appear to be healthy leaves to get what are clearly infected ones. You are spreading more disease to the healthy leaves than you accomplish by removing the clearly infected ones. This is why we constantly advise growers not to remove dead leaves–even when there are no signs of disease. You get a pretty vine, at the risk of spreading diseases!
There have been numerous scientific studies on human-borne spore transport.
In one study on bean anthracnose (Colletotrichum lindemuthianum), workers and equipment moving through wet fields were identified as a significant dispersal route, and the standard recommendation became to stay out of bean fields when foliage is wet. There’s comparable documentation for strawberry anthracnose (C. acutatum), where workers’ hands, clothing, pruning tools, and picking activity have been shown experimentally to move conidia from plant to plant during harvest. They tested transmission on denim, leather, metal, and rubber (i.e., clothing and equipment surfaces) using prepared spore inoculum in both wet and dry crop canopies, and found that equipment and workers transmit pathogens from infected to clean plants.
So, both science and plain common sense tell us:
Leave the leaves if you don’t want more disease!
by Lance Hill | Jun 14, 2026 | How To, Mirliton, Uncategorized
If excessive rainfall is chronically flooding your mirliton bed, consider building a large, deep, elevated raised bed with bottom and lateral drainage. You can still do a ground planting, but place the elevated raised bed under the same trellis and shade cloth structure to provide you with a backup vine.
It doesn’t have to be as fancy as these photos, but the principle is the same: separate the bed from the ground soil.
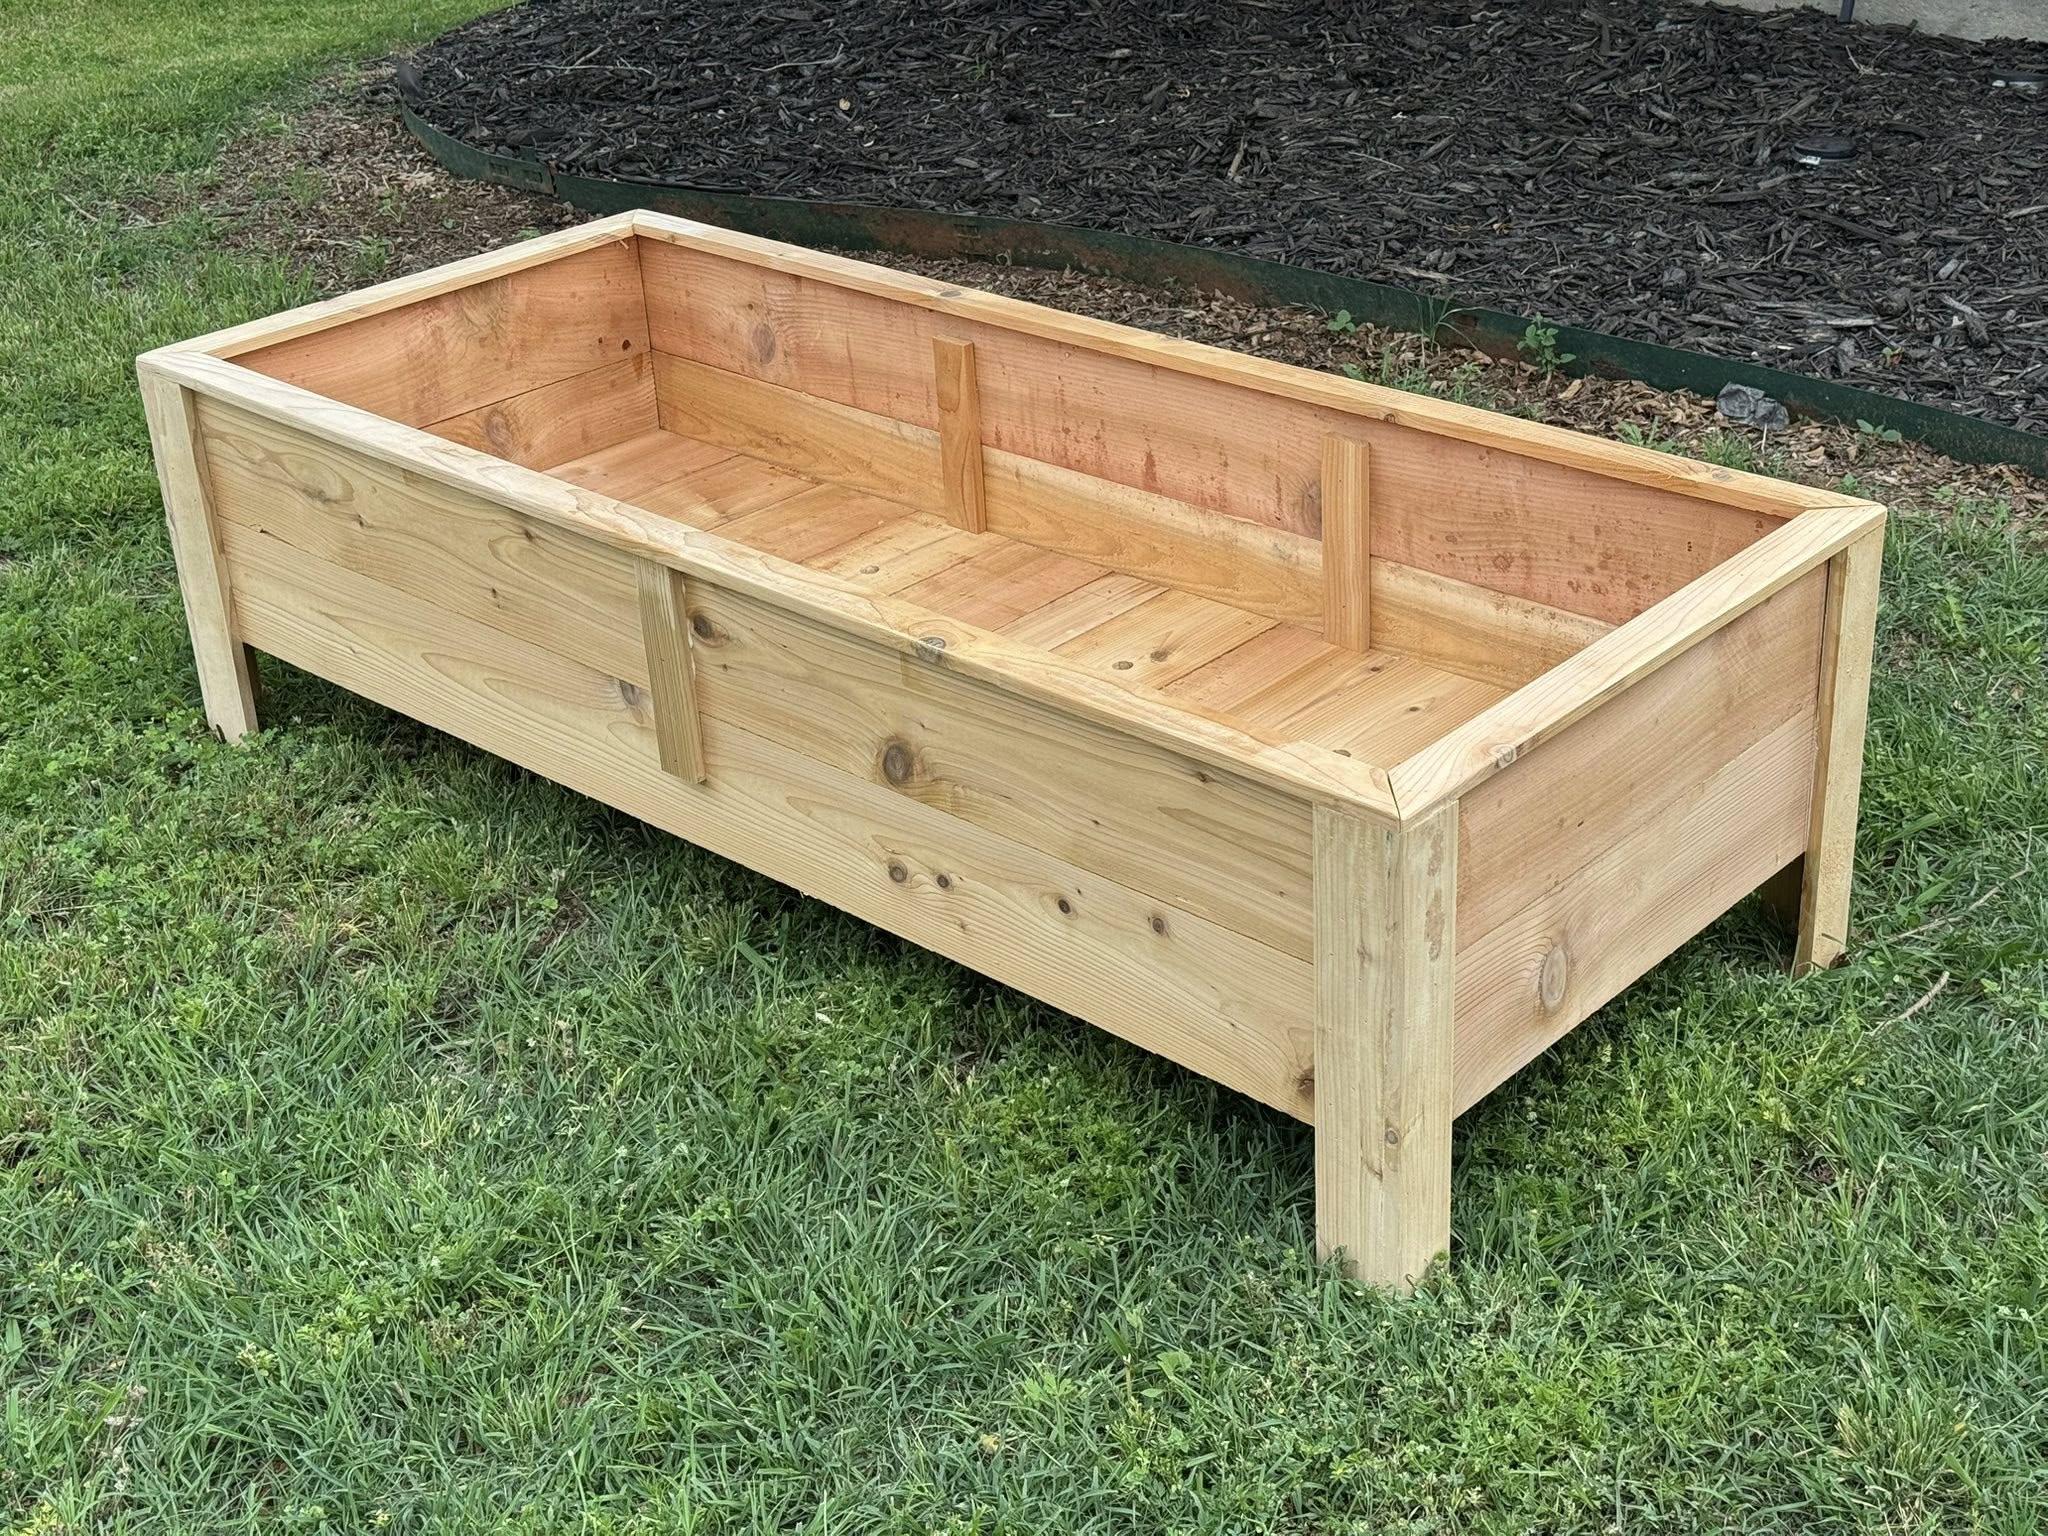
Elevated Raised Bed.
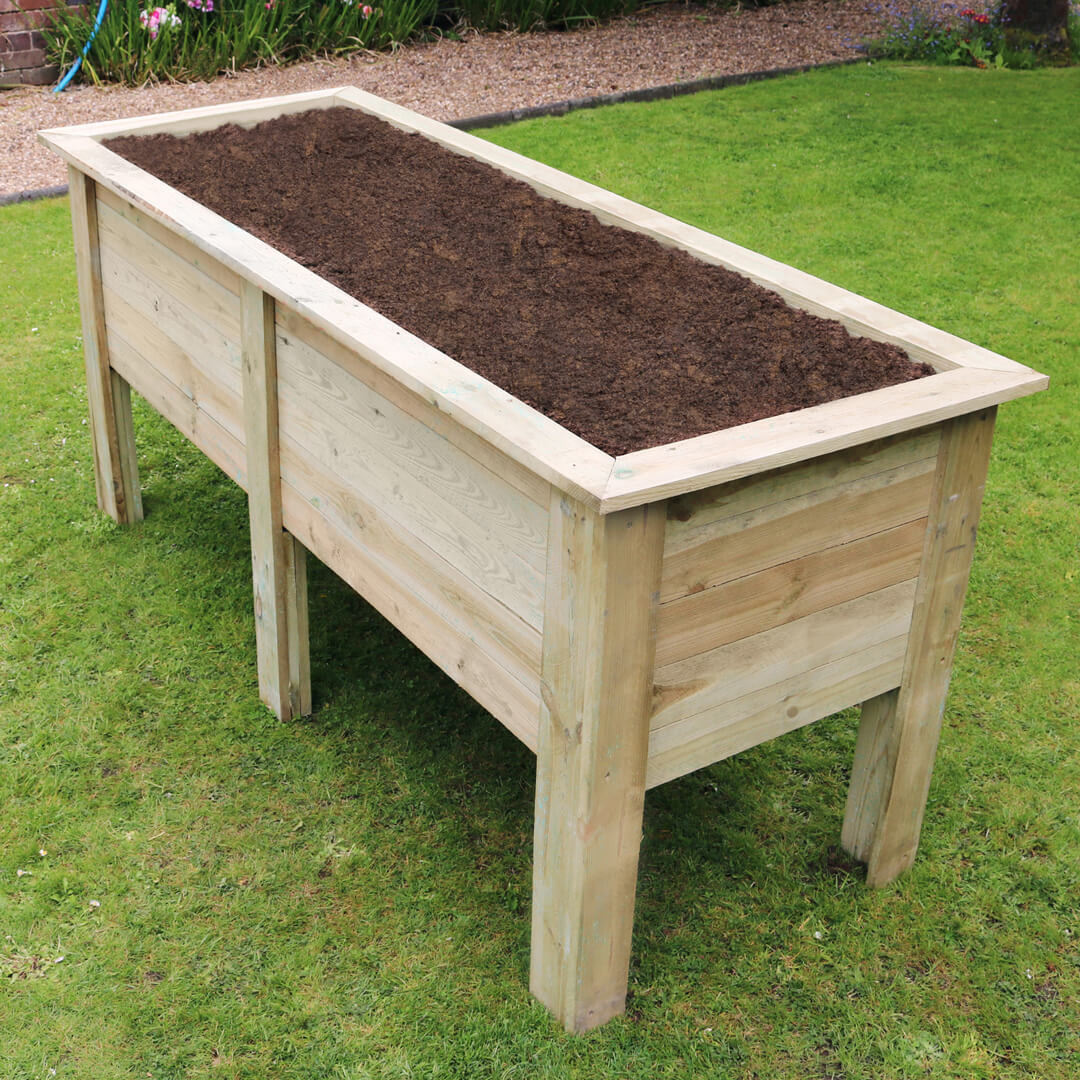
Elevated Raised Bed.
by Lance Hill | Jun 2, 2026 | How To, Mirliton, Uncategorized

Mirlitons don’t like wet feet. They spent some 26 million years evolving on the mountainsides of Mexico and Central America, where rain races downhill and barely gets a chance to soak into the porous slope soil before it’s gone. Our job as growers is to recreate those fast-draining, mountainside conditions down in the root zone. When we don’t, the vine lets us know — and the first thing it does is turn yellow.
Why a Waterlogged Mirliton Turns Yellow
Yellowing leaves — what botanists call chlorosis — aren’t always cause for alarm. Mirlitons constantly drop old leaves and push out new ones, so a little yellowing is just part of how the vine grows. Yellowing can also be a sign of disease, like powdery mildew or anthracnose. But when it shows up after a stretch of excessive rain, the most likely culprit is waterlogging: so much moisture in the soil that the roots can’t get any oxygen. Scientists call that oxygen starvation hypoxia.
Here’s what’s actually happening, step by step.
When water fills all the air spaces in the soil, the roots can no longer “breathe.” In response, the plant closes its stomata — the tiny pores on the leaf surface that handle gas exchange and keep the leaf from overheating. Meanwhile, down at the roots, the lack of oxygen forces them into an emergency metabolism that causes real damage and shuts down their ability to extract nutrients from the soil.
One of those nutrients is nitrogen — and nitrogen is a key building block of chlorophyll, the green pigment that captures sunlight and feeds the plant. So as the waterlogged roots stop delivering nitrogen, the chlorophyll breaks down, the green fades, and the leaf yellows and begins to die.
It gets worse underground. Waterlogged soil becomes chemically hostile: toxic compounds and acids accumulate around the roots, further crippling their ability to take up the little nutrition available. At this point, the plant is both drowning and starving.
Here’s what you can do. All these treatments are supported by scientific research (citations below)
1. You can do nothing. Most vines will recover from waterlogging on their own once the soil drains. The catch is time: the longer the roots sit in saturated soil, the more the vine weakens. Prolonged waterlogging lowers the plant’s resistance to anthracnose, stunts vine growth, and cuts into your harvest. Doing nothing is a gamble that gets riskier the longer the wet spell lasts.
2. Directly feed the roots oxygen: You can deliver oxygen directly to the suffocating roots with ordinary drugstore hydrogen peroxide (3%). When it hits the wet soil, it breaks down into water and oxygen, briefly re-oxygenating the root zone. Here’s how to use it: Mix the 3% peroxide with water at about 1 part peroxide to 4 parts water, and pour it slowly around the root zone — not on the leaves. Apply at most every 2–3 days, and only when a soil core still comes up saturated. Skip an application the moment the soil sampler core shows the soil is draining and crumbly again, even if “it’s been three days.” You can also look for new growth on the vine. That’s a sign the vine is recovering
3. Directly feed the leaves: Since the roots can’t take up nutrients while they’re drowning, you can deliver nitrogen straight to the plant through its leaves instead, bypassing the impaired root system. Potassium nitrate (13-0-46) is the right tool — you can buy it here. How to use it: Mix 1 teaspoon into a gallon of water and spray the leaves once a week, in the evening, so the solution has time to absorb before the sun hits it. If your vine is badly stressed, start at half a teaspoon per gallon to be safe, and watch for any leaf-tip burn. Important: Avoid all ammonium-based fertilizers while the vine is waterlogged — in oxygen-starved soil, ammonium actually makes things worse. Stick with the nitrate form.
4. Rain Guard it. You should have a rain guard in place before you even plant the mirliton. Only a rain guard can prevent waterlogging.
5. Soil sample it. Get a soil sampler. If you post a photo of the core sample that you pull, that’s the only way we can help you determine if your vine is waterlogged and when it’s safe to water it again.
4. Shade It. A waterlogged vine is already under stress, and its sun-capturing machinery is impaired. Piling hot, full-sun conditions on top of that just adds heat stress to water stress. A temporary shade cloth (around 30–40%) during peak afternoon sun eases that double burden while the vine recovers. Take it down after the rains pass so you don’t trap moisture and invite fungal trouble.
A few cautions: don’t make it stronger than this, since too much peroxide kills the helpful soil microbes along with everything else; test a small area first
Sources
by Lance Hill | May 19, 2026 | How To, Mirliton, Uncategorized

Overview:
As most of you know, I provide free diagnosis and treatment for mirliton plant diseases and problems to this group. I’m also training Tedra Stanley and Michelle Impastato Glore to do the same. I’m not a formally trained plant pathologist, but have learned through over 40 years of growing mirltons and researching scientific studies on plant diseases.
Expertise matters: You don’t go into your doctor’s waiting room and ask other patients, ‘What’s wrong with me?’ You wait until you see the doctor.
Here are the six steps that we follow when diagnosing and treating your mirliton problems, and the underlying theory behind our approach to handling plant problems whenever you post a photo and ask, “What’s wrong with my mirliton?”
- First, we ask questions:
Lots of them. Because each grower is unique, different varieties, different soils, different beds, different weather, and different watering methods (overhead or base). We need this information to accurately diagnose the problem. When you take a child to a doctor with what you think may be measles, you reasonably expect the first question out of the doctor’s mouth will be, “Has your child been around anyone who has measles?” We need this information because, unlike a professional plant pathology laboratory, we don’t examine the fungi on leaves and stems with a microscope, so we must rely on visible photographic signs of the disease and the plant symptoms-in-context (the plant’s response and its full history).
After you answer the questions, we may ask for additional close-up photos of the plant’s leaves and of the affected leaf or stem. Good close-up photos of the leaves are indispensable because we rely on visible signs of the diseases to diagnose them.
After that, we move forward with our approach to remedying the problem and the theory on which it is based, borrowed from medical doctors: a stepped care model.
2. Can You Get a Quick Diagnosis? Maybe:
If you walk into a doctor’s office with a nail in your foot, no questions are necessary. Same with mirlitons; sometimes we can immediately recognize the problem and recommend treatment. But generally, we need to proceed in smaller steps to give you the most accurate diagnosis and effective treatment.
3. Preliminary Diagnoses:
We will offer a tentative diagnosis of the problem — and it may not even be a disease. It may be due to environmental factors — hardening off, transplant shock, chill damage, insects, over-watering, excessive rain, or sun. We will ask you to flag healthy leaves to see if the symptoms are spreading,
4. Eliminate the Possible Causes other Than Disease:
We first try to eliminate all other possible causes before we progress to the more disease-focused ones. Using the stepped care model, we will start with the least complicated remedies, ruling out other causes before progressing to more disease-focused ones. The problem might be insects or soil moisture, so we want to try insecticides, adding shade, or changing soil moisture to see if that remedies the problem. We don’t want to amputate limbs if you just need a bandage. We want to minimize your work and costs. Medical doctors refer to it as “starting with conservative treatment.”
5. Disease Diagnoses and Treatment Plan:
If we go through all these steps and none of them correct the problem, we will go to the final step: identifying the disease and providing a treatment plan. We will recommend the simplest and least expensive fungicide.
Powdery Mildew and Anthracnose:
The two principal diseases that most frequently afflict mirlitonst are powdery mildew and anthracnose.
Powdery mildew has a simple cure. There’s a time-tested, inexpensive fungicide that will eradicate it: potassium bicarbonate. You only have to apply until the symptoms are gone.
Anthracnose is not so easy. There is no inexpensive and proven solution. The fungus that causes the disease has developed resistance to most chemical fungicides. We are currently testing an organic biofungicide — Timorex Act — but we have not yet obtained conclusive results. And it is very expensive because the company that makes it sells it only by the gallon.
The good news is that although most vines will eventually contract anthracnose, almost all will survive the infection without fungicide and will emerge with some acquired resistance to protect them from the disease the next year.
The most effective way to naturally protect the vine is to reduce water stress (over-saturation) and excessive exposure to solar radiation (by using shade cloths in the summer).
6. Final Step: Report Back so We Can do our job better:
The final step is to ask you to report back the results of any of the solutions we suggest, so we can get better at what we do!
Recent Comments