by Lance Hill | May 19, 2026 | How To, Mirliton
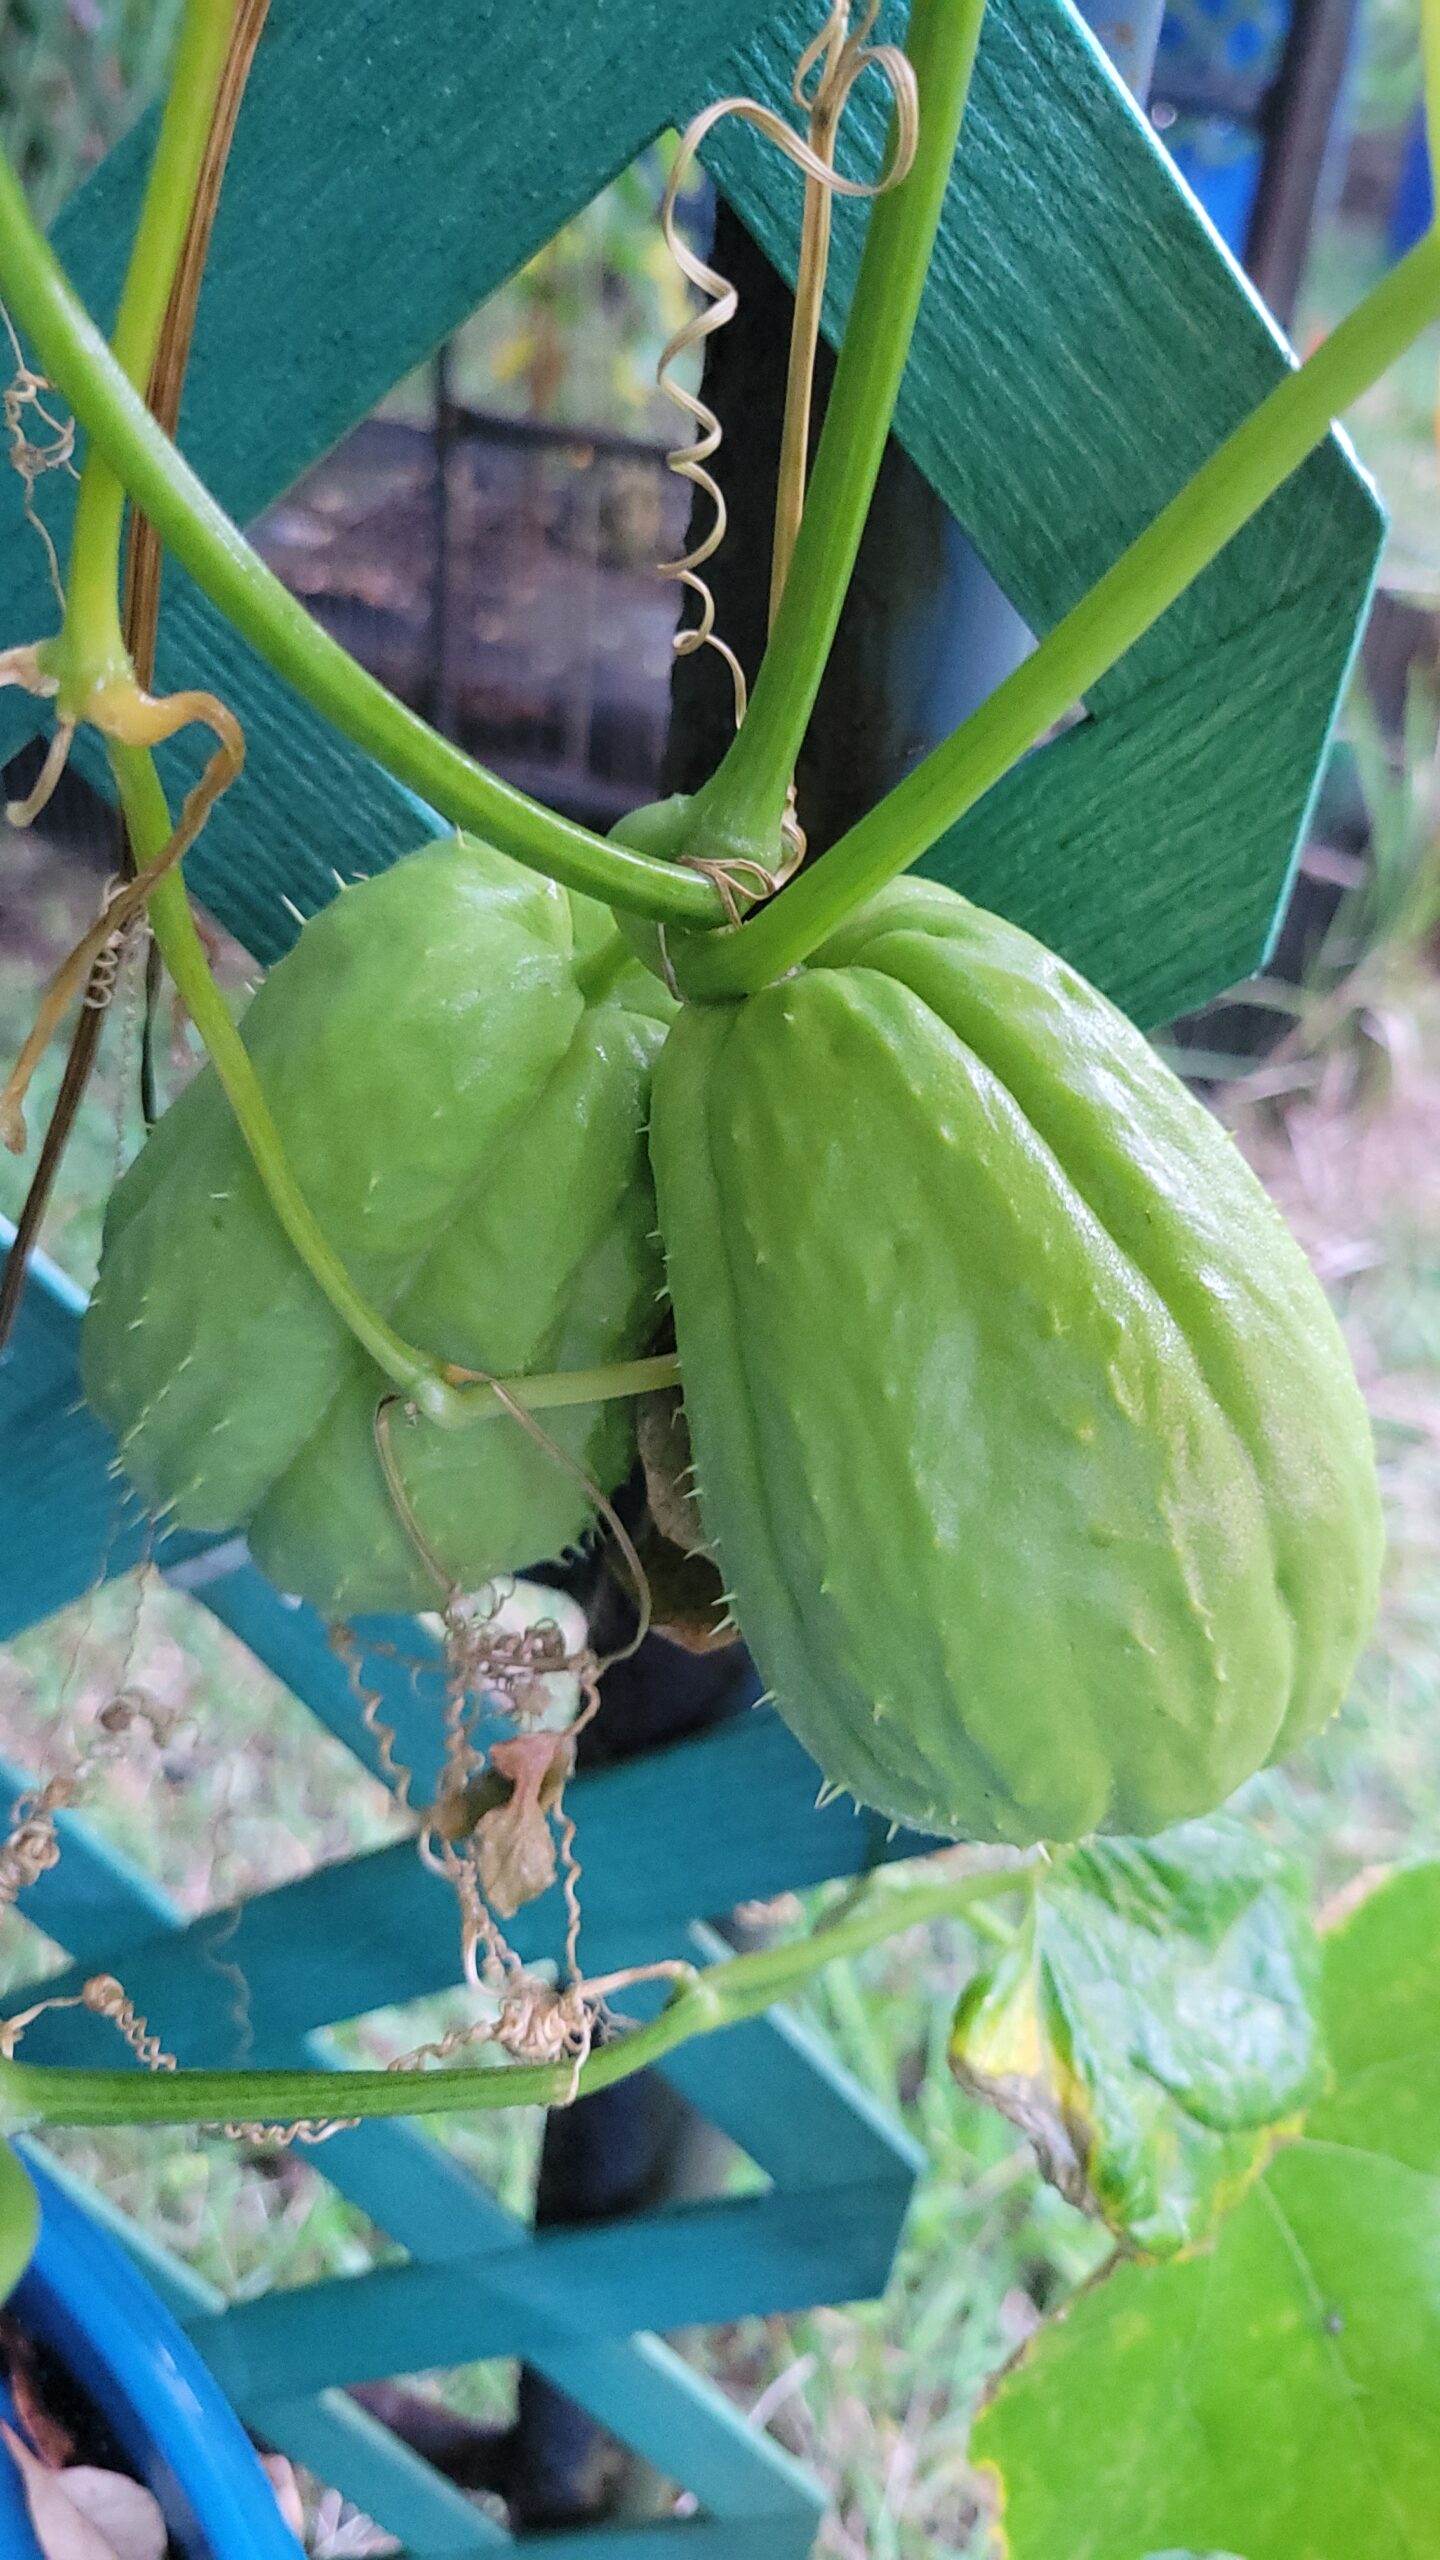
Two fruits on the DeBay Hydroponically-Grown Mirliton Vine
A Cool Weather Hydroponic Method of Growing Mirliton (Chayote) Vines and
Fruit in a 55 Gallon Blue Barrel
Perfected use of “Kratky Method” by William DeBay, on location in Haverhill, Florida
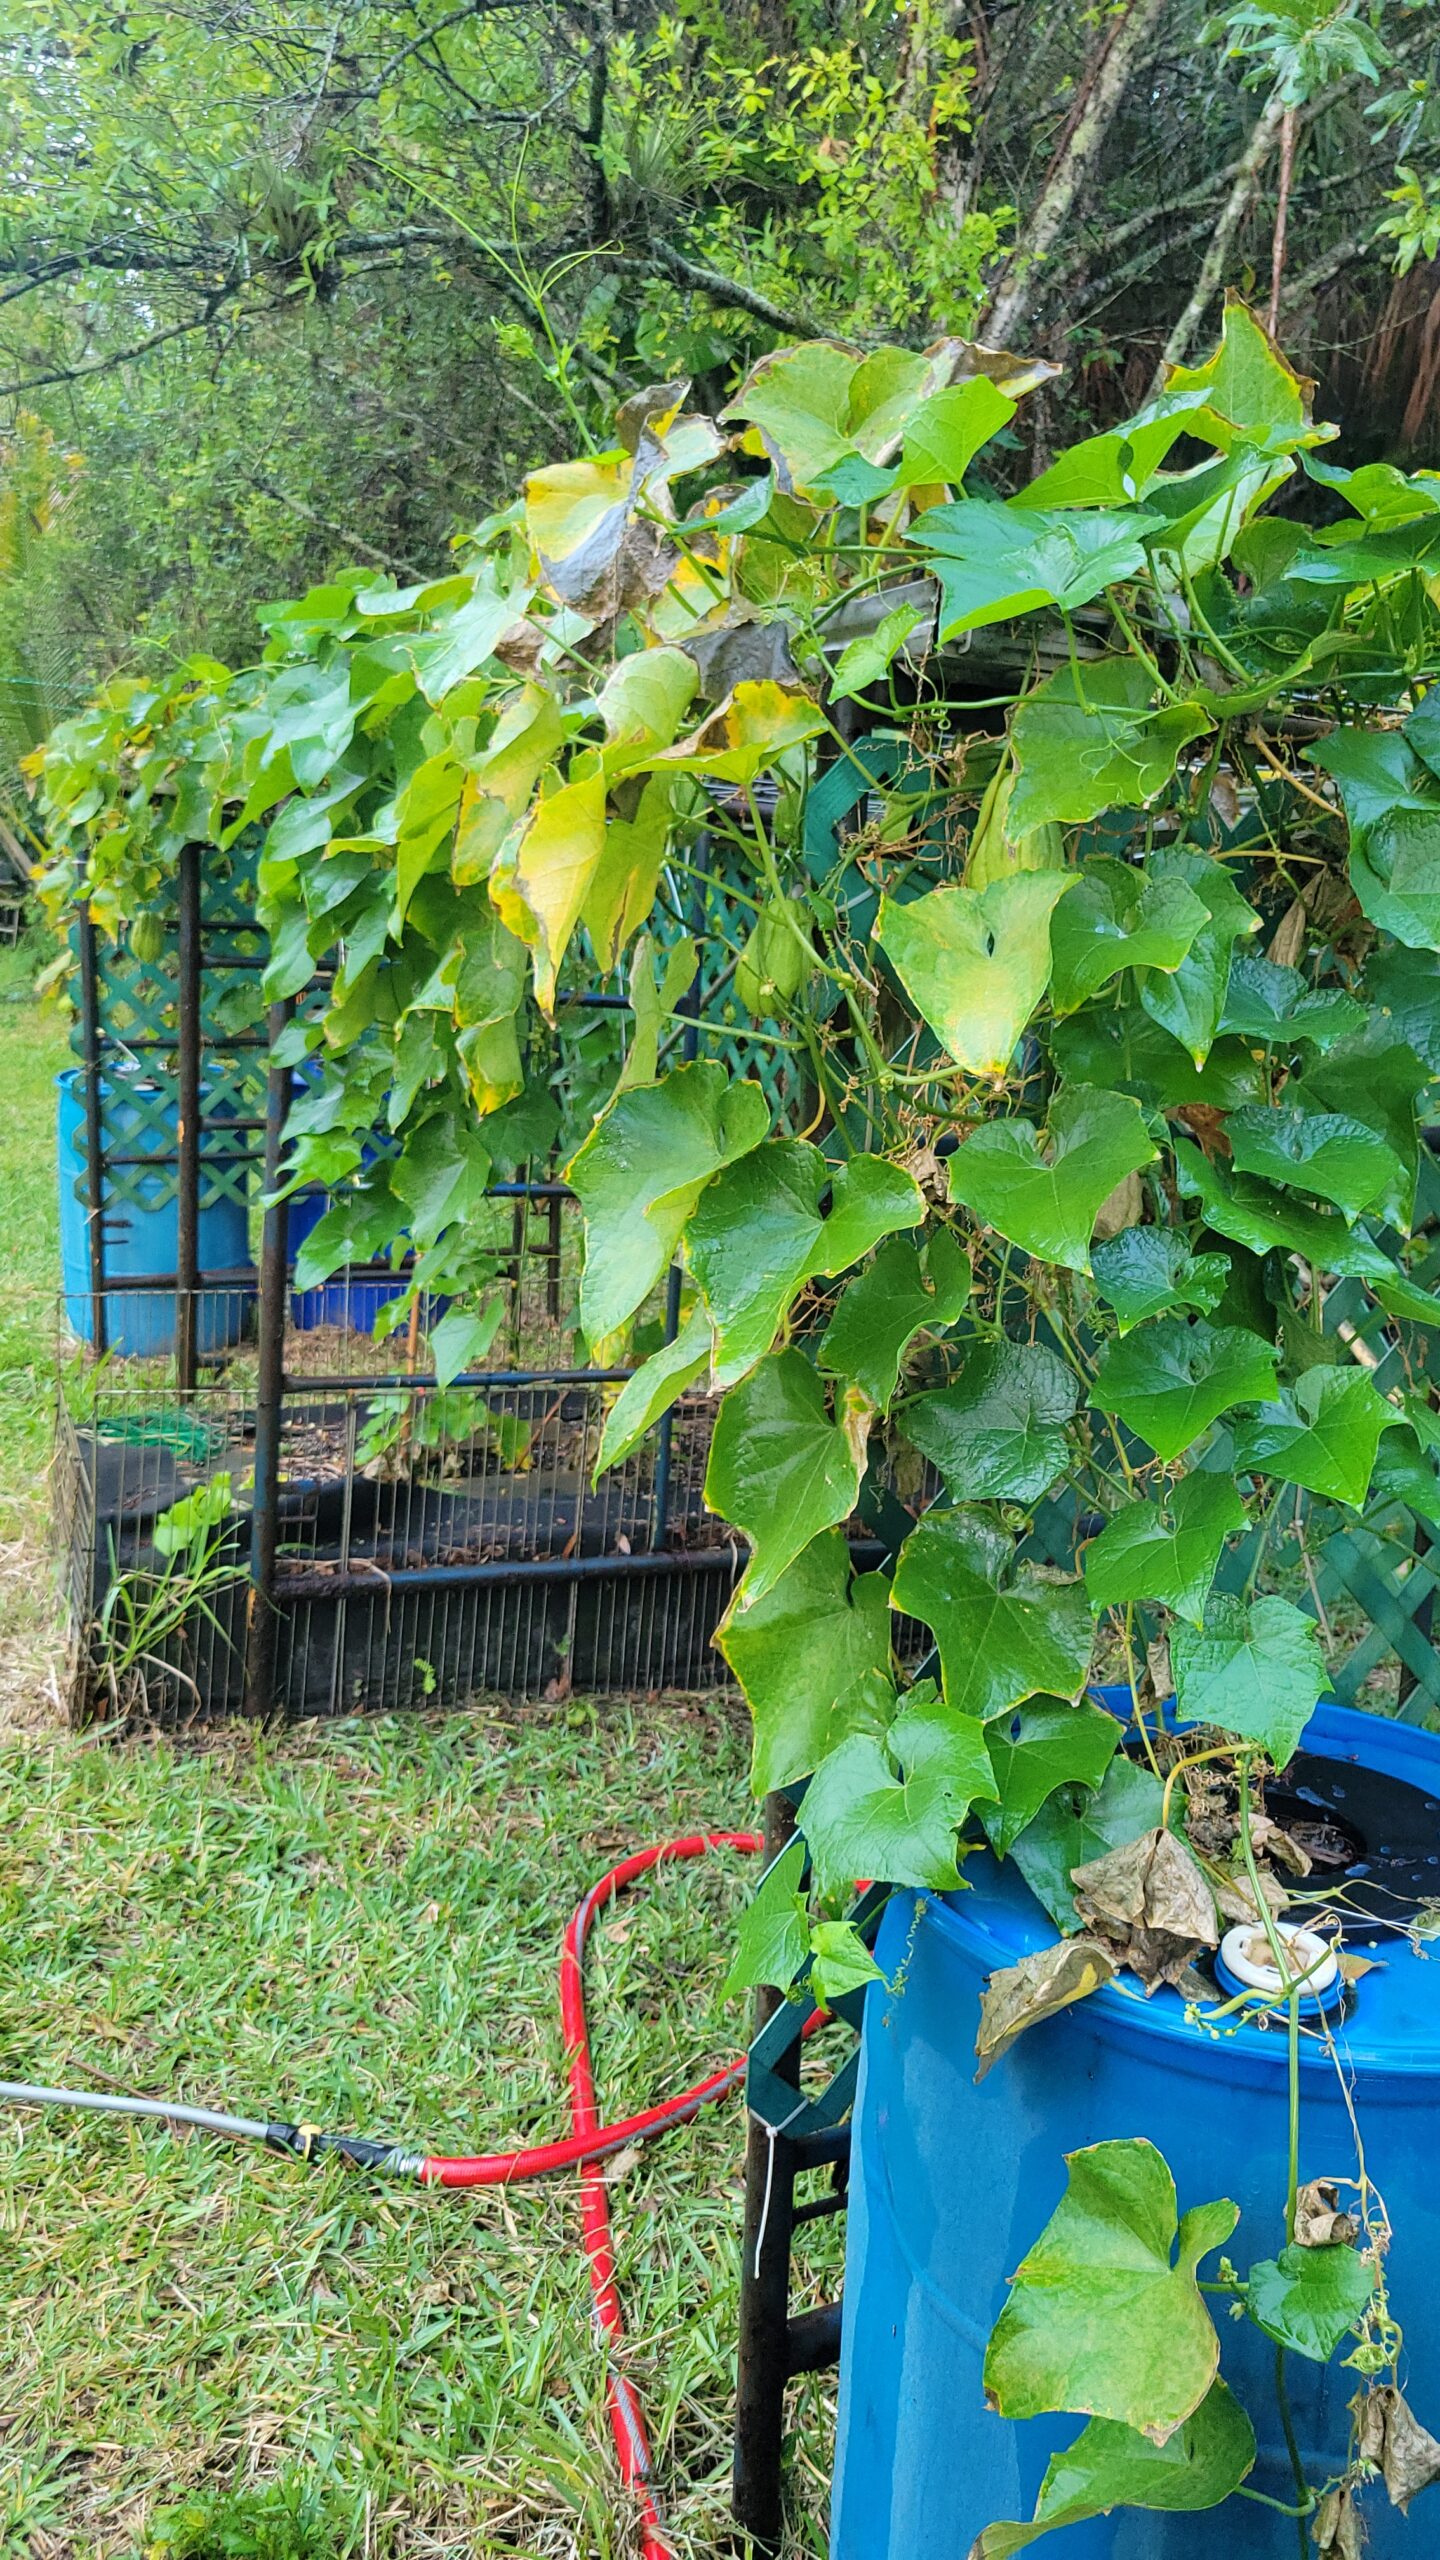
DeBay Hydoponically-Grown Mirliton
The following method was used in a 95-day period from January 10, 2026, to April 15, 2026, to achieve sprouting, vine growth, flowering, fruit set, and harvest of germinating Mirlitons.
This method is best suited for producing a quick harvestable crop in the cooler, short-day months of spring or fall. It should not be used in the summer months. Don’t use a smaller container, and keep the barrel out of direct sunlight because, as the water temperature rises, nutrient uptake is hindered. Wrap the barrel in silver reflective insulation, a radiant barrier, to mitigate the potential for hot water temperatures and algae growth. The nutrient solution is generally not changed during the process. It is allowed to drop to a certain level and then kept there with periodic small additions of nutrient solution.
Supplies:
Sprouting (germinating) mirliton fruit
Clean 55-gallon blue barrel (with fixed lid and 2 bungholes with screw caps)
5-gallon bucket
6” Net Pot Bucket Lid Insert
6” hole saw (or other preferred cutting tool)
Drill and 1⁄4” drill bit
Reflective insulation radiant barrier
Nutrients: (MasterBlend (4-18-38), Epsom Salt (Magnesium Sulfate), Calcium Nitrate (15.5-0-0)
Grams scale
pH measure (strips or meter)
EC (Electrical Conductivity) meter
pH Up and pH Down solution
Planting medium: PRO-MIX Premium Organic Garden Mix (or other preferred non-organic medium)
Procedures:
1. Place the 6” Net Pot Bucket Lid Insert on top of an empty 5-gallon bucket (on a level surface).
2. Add enough chlorine-free water to the bucket so that the bottom inch of the net pot is
submerged in water.
3. Remove the 6” Net Pot Bucket Lid from the bucket. For future reference, measure the distance
from the surface of the water to the top of the 5-gallon bucket rim.
4. Add to the water 4g Masterblend (4-18-38) and stir until dissolved.
5. Add to the water 2g Epsom Salt and stir until dissolved.
6. Add to the water 4g Calcium Nitrate (15.5-0-0) and stir until dissolved. This prescribed order in
which the nutrients are added to the water should never be changed. Masterblend (4-18-38)
should always be the first item. The next item should always be Epsom Salt. The last item should
always be the Calcium Nitrate (15.5-0-0).
7. Fill the net pot with moist planting medium.
8. Plant the sprouting mirliton into the planting medium in the same manner as it would be
planted in the ground. Plant the whole sprouting fruit at a 45-degree angle about 2/3 of the way
down with the sprouted end down in the planting medium. A thin support stick can be inserted
in the planting medium at this time.
9. Return the Net Pot Bucket Lid (with planted mirliton) to the 5-gallon bucket. The water level will
initially wet the bottom inch of the planting medium.
10. Place the assembled bucket planter under cover in indirect sunlight. Monitor the plant, being
sure that the planting medium stays moist but not wet. Mist with water if it looks dry.
11. The mirliton will grow one or more vines and will send roots down through the medium and into
the diluted nutrient solution.
12. The lid can be lifted periodically to check on the root growth progress. When several roots have
extended at least 5 inches out of the bottom of the net pot and into the water, the vine can be
hardened off for the final planting location. Leave the lid and the vine on the bucket during the
hardening process.
13. Cut a 6-inch hole in the center of the barrel end (the top end that includes the bungholes).
14. Drill several 1⁄4 inch drain holes along the edge of the same end of the barrel. There is a ridge
around that end of the barrel. The drain holes must be made to prevent water from collecting
on top of the barrel. Be careful not to drill into the inside of the barrel.
15. Rinse out the barrel.
16. Wrap the barrel in a reflective insulation radiant barrier.
17. Place the insulated barrel (hole side up) in the location you plan to grow the mature vine.
18. Fill the barrel half full with unchlorinated water.
19. Add to the barrel water 120g Masterblend (4-18-38) and stir until dissolved.
20. Add to the barrel water 60g Epsom Salt and stir until dissolved.
21. Add to the barrel water 120g Calcium Nitrate (15.5-0-0) and stir until dissolved.
22. A measurement was made in step 3. Now, add 3 inches to the measurement in step 3.
23. Fill the barrel with additional water until the level below the hole is the measurement distance
computed in step 22. Stir the contents of the barrel.
24. Check the pH of the nutrient solution in the barrel and adjust if not between 5.5 and 6.0. pH Up
and pH Down can be used to adjust the pH.
25. Move the Net Pot Bucket Lid (with rooted and hardened mirliton vine) from the 5-gallon bucket
and place the pot into the center hole of the barrel. Be careful not to damage any roots. If step
23 was done correctly, the roots will be in the water, but the water will not be touching the
bottom of the Net Pot.
26. The Kratky method is a passive, low-maintenance hydroponic technique developed by Dr.
Bernard Kratky, who grows plants without pumps, electricity, or aeration. As roots consume
water, an air gap forms for oxygen, allowing plants to grow to maturity, ideally, with a single
initial fill. However, a mirliton vine will require the addition of replacement nutrient water as it
matures. Do not let the water level drop by more than 50%. If the level is going below fifty
percent, it should be replenished, but do not replenish more than a gallon of nutrient fluid per
day. Adding too much liquid at a time runs a risk of killing the “air roots” that develop in the air
space. Refill nutrient solution can be mixed in a separate 5-gallon bucket of water as follows:
1. Add to the water 12g Masterblend (4-18-38) and stir until dissolved.
2. Add to the water 6g Epsom Salt and stir until dissolved.
3. Add to the water 12g Calcium Nitrate (15.5-0-0) and stir until dissolved.
Store this bucket of refill nutrient solution, with the lid on, in a cool, dark location. Temporarily
remove the bunghole caps to test and refill the nutrient solutions in the barrel.
27. Monitor the pH and EC level on a regular basis and adjust accordingly. pH should ideally be
between 5.5 and 6.0. EC should ideally be between 2.0 and 2.5.
by Lance Hill | May 15, 2026 | How To, Mirliton, Uncategorized
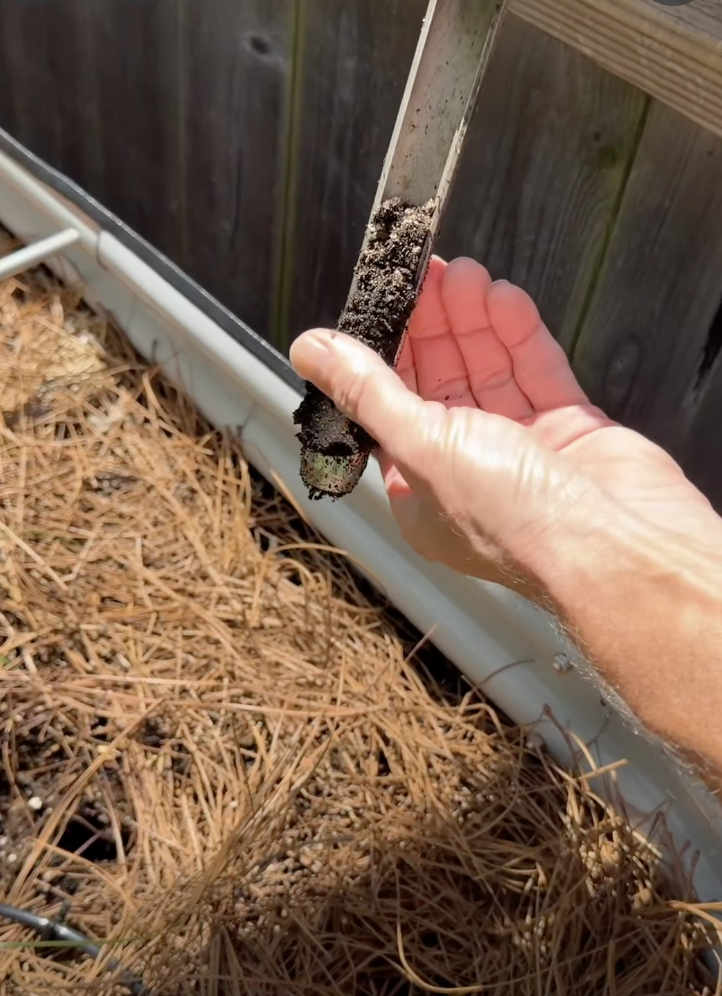
Michelle Impastato Glore takes a soil sample from her raised bed.
If you felt feverish and wanted to check your temperature, you wouldn’t guess; you would get a thermometer and take your temperature. Your garden soil is no different, and we now have a way to determine exactly how much soil moisture your mirliton has available: the soil sampler.
The soil sampler is the simplest way to see how much moisture your mirliton roots are getting. It’s the quickest and most inexpensive way to determine if you have overwatered or underwatered your vine and to help prevent anthracnose. Knowing what is happening several inches below the surface is even more important during droughts — many growers lost their vines during the heatwaves in 2023 and 2024 because the soil was starved of moisture.
The “knuckle” method of sticking your finger into the soil only tells you what the soil moisture is near the surface; that method does not work with mirlitons because the roots extend downward 8″. Electric meters are also ineffective because they measure electrical conductivity–not soil moisture. The only way to know the available soil moisture beneath your mirliton is to see and feel it, and that’s exactly what a soil sampler lets you do. Mirliton growers in Brazil have used this method for years.
Michelle Impastato Glore demonstrates how easy it is to take a sample and check moisture levels at all root zone levels. First, insert the sampler, twist 180°, and pull a core sample. Then, examine the soil by pressing down on it in the sampler at intervals of about every inch. Feel for moisture and how it compresses. That will indicate the amount of moisture present at each level. If it’s bone-dry and crumbly, it needs more water. If it’s muddy–it has too much. After a while, you will be able to easily take a reading by touch and sight. The soil will generally be moist at the surface, and it should even out as you go down about 8 inches.
See how Michelle does it here.
Buy a 12″ soil sampler here
If you have a deep raised bed, some growers prefer the 20″ soil sampler, which you can buy here.
by Lance Hill | Apr 28, 2026 | How To, Mirliton, Uncategorized
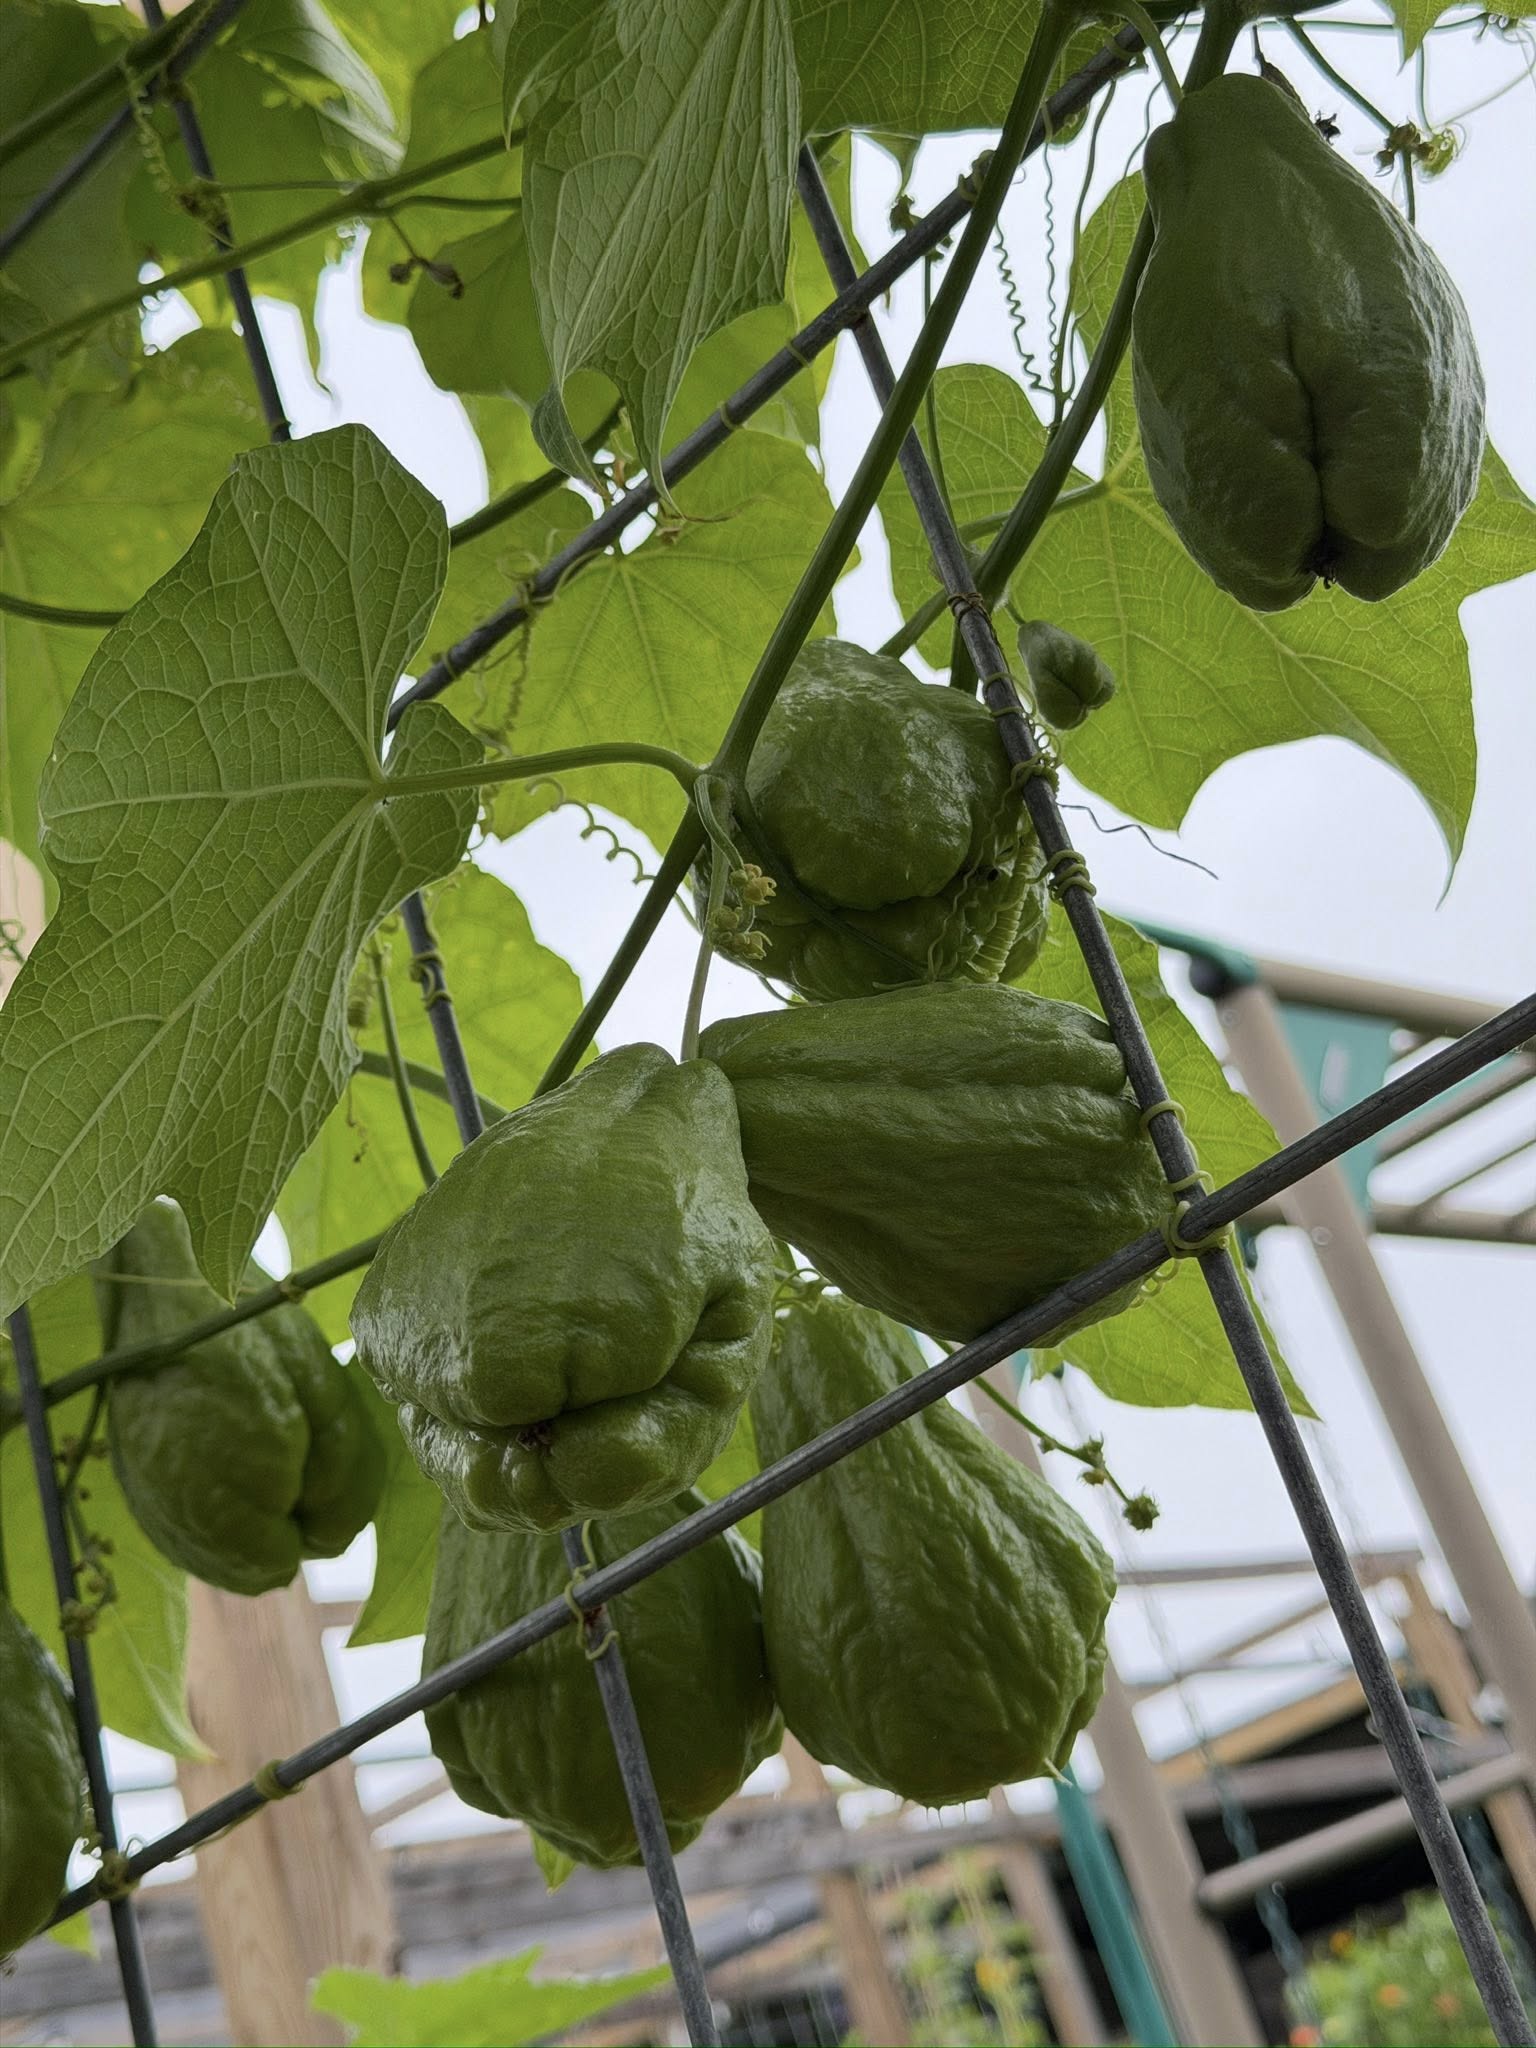
Michelle Impastato Glore’s 2026 Spring Mirlitons
We’ve made an important discovery that may change how we grow mirlitons in the U.S.A.
I say “we” because it was the observations made by growers in the Mirliton Facebook group that sparked my interest in why spring mirlitons were flowering females long before males–the exact opposite of the fall flowering sequence. And the reason is that one of the best ways to consistently harvest amid radically changing weather patterns is to focus on getting a spring crop. The fall crop is bedeviled by summer anthracnose epidemics, heat waves, heat domes, droughts, and then fall hurricanes and near-miss traumatic winds. The spring is not.
And here’s why.
The reason mirltons tend to produce females (pistillates) first in the spring is cool weather. This tendency for cool weather to produce female blooms earlier has long been observed in other cucurbits such as cucumber, melon, and squash, and we used that insight to extrapolate that mirlitons were doing the same. All mirliton flowers originate at the axil where the buds emerge. They can turn into a male or female flower. While initial flowering is stimulated by daylight length, the sex of the flower depends on cool night temperature and light intensity. All these factors combine to release hormones that determine whether a floral bud becomes a boy (staminate) or a girl (pistillate). That explains how the cool nights, short days, and lower light in the spring generally accelerate the appearance of females first.
That’s good news because it means that spring flowering and fruiting occur long before the summer heatwaves, droughts, the anthracnose epidemic, and fall hurricanes.
The spring may be your best bet for a crop–not your only crop–but your best bet for at least one crop.
So, how can we take advantage of this discovery?
- If you are starting with a sprout, container plant it as soon as possible in the fall in a 3-gallon container so the biological clock starts ticking. We know that when a sprout has been in the soil–any soil–it will flower and fruit within 110-120 days. So if it is transplanted in the first week of March, it will have time to develop a good canopy and flower lots of females during the ideal spring weather. Always overwinter in containers, then plant in the first week of March. (You can run out and tarp it in the event of a frost)
- If you have an established vine, don’t cut it back in the fall. If you cut back your vine at the end of the fall, you are eliminating your chances for a crop during the safest growing season of the next year—the spring. Frost-protect it through the fall and winter so it emerges with a large canopy that can host hundreds of female flowers in spring. That canopy will receive the full benefit of the cool temperatures during January-April that trigger female flowering. Growers who tent and heat their vines will be blessed with a sure-fire spring crop. And if all things go well in the summer, you will also get a fall crop — that’s just a bonus crop.
- Freeze the male pollen. Males tend to arrive late in the spring, long after the females appear, and this can be a temporary problem because there’s no one to pollinate the females. But we know that Mirliton pollen can be frozen and is viable for at least a year. You can collect male pollen the previous fall, freeze it, and then hand-pollinate the females in the spring. We are working out the specifics of freezing pollen, and we will post the instructions separately–but it’s easy.
So Spring Up to Success Through Science!
by Lance Hill | Mar 20, 2026 | How To, Mirliton

Checklist for Transplanting a Containerized Mirliton Plant
✔ Harden off the potted plant before transplanting–or erect a shade cloth for the first week
✔ Plant in fast-draining, composted soil
✔ Add manure or slow-release fertilizer
✔ Water thoroughly the first time.
✔ Use a bamboo stake or soil sampler to determine when to water subsequently
✔ Protect from cold damage if the temperature drops below 50℉
by Lance Hill | Mar 14, 2026 | How To, Mirliton
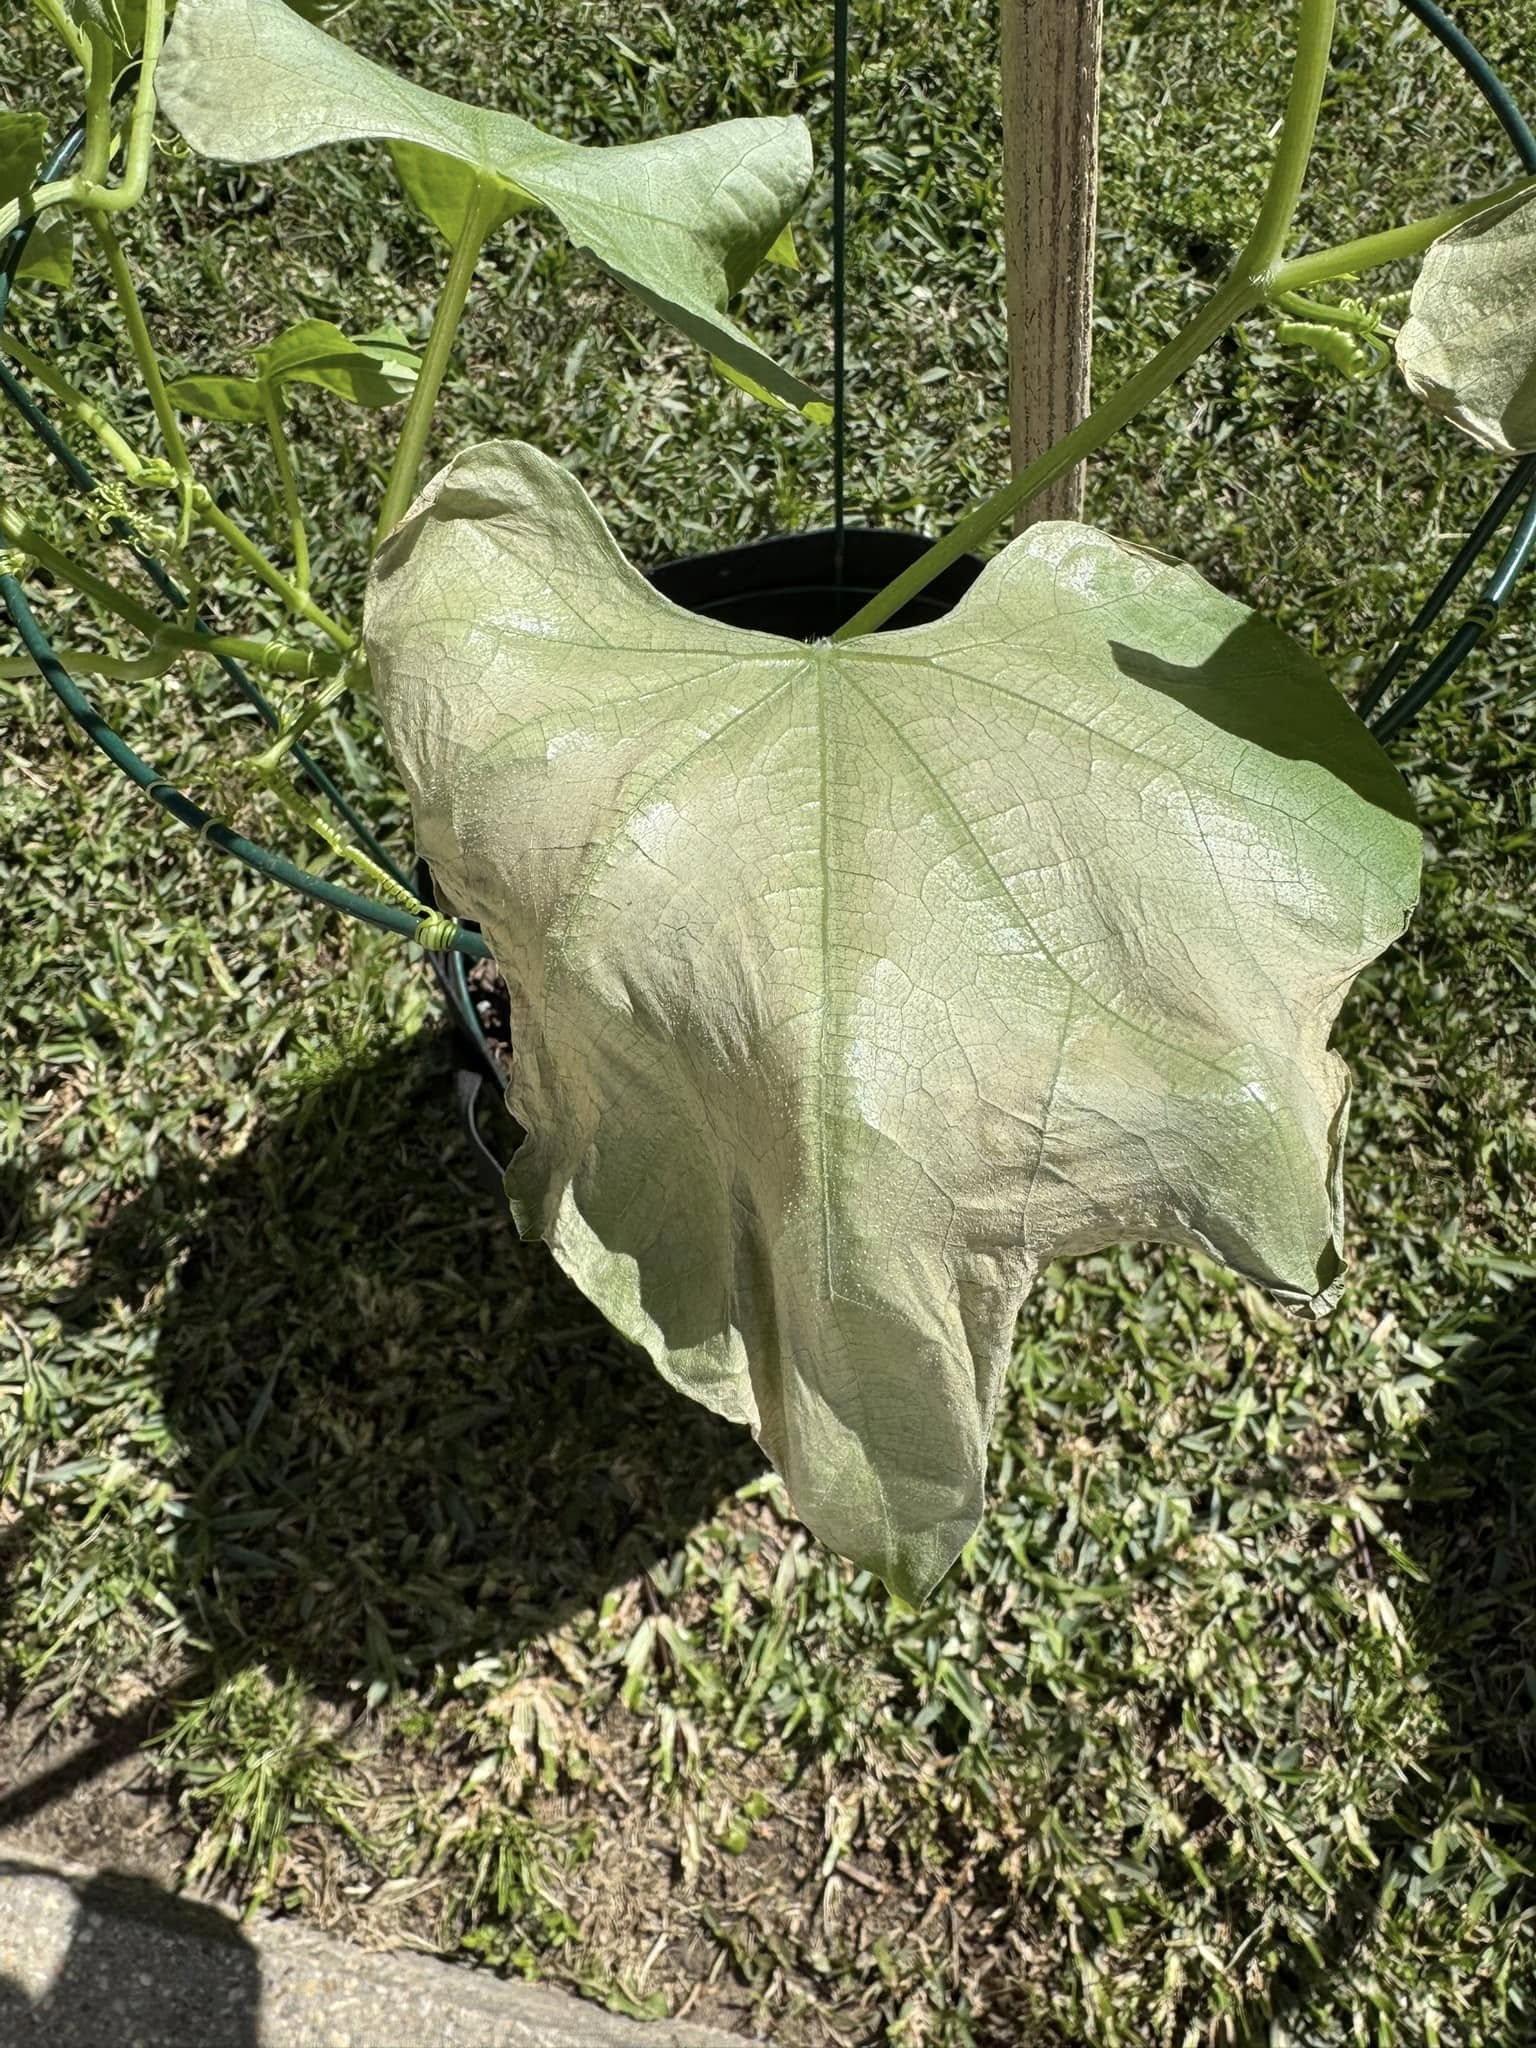
Cold-damaged mirliton leaf.
Freezes and frosts are not the only cold temperatures that can damage mirliton leaves. While not as damaging as frosts, Cold Damage can occur when temperatures drop below 50℉.
Cold damage symptoms often appear several days later and include limp, wilted, or yellowing leaves, and subsequent slowed growth. Light cold damage can generally be outgrown by an established vine, but young, newly transplanted plants are more vulnerable. So protect them by covering them with tarps or buckets and even adding a heating element.
by Lance Hill | Mar 8, 2026 | How To, Mirliton, Uncategorized

Many people want to grow their own mirliton (chayote) vine but find it difficult to find locally grown mirlitons. Because of their frustration, some people try to grow mirlitons by purchasing and planting one from the produce department in a grocery store, or online from seed stores. There are two reasons why this is not ideal.
First, all mirlitons sold in grocery stores and markets are imported varieties. They are grown and imported only as produce, just like all the other vegetables that you purchase. The USDA tried to grow these varieties a century ago and concluded that high-altitude plants have tremendous difficulty growing in low altitudes. This is because these varieties have adapted to the altitude, pests, diseases, and ultraviolet exposure in their native environment. The patterns of light and temperature influence when and if the variety will flower and fruit. Moreover, an imported variety may not have acquired resistance to diseases or disease pressures that occur in its new environment.
All imported mirlitons will sprout and send up a shoot, but most imported mirlitons will not flower and set fruit. We have received reports of this problem from hundreds of growers over the years, and I had the same disappointing experience when I tried to grow a vine using imported mirlitons.
Second, even if you could grow an imported mirliton, you may introduce new diseases that have devastated mirlitons elsewhere. Local mirliton varieties adapted to U.S. conditions have been grown for over two centuries in Louisiana and California. These were originally brought from low-altitude coastal areas in the Caribbean and Central America. In horticulture, these local varieties are called landraces —cultivars that growers have improved through traditional agricultural methods. The Louisiana heirloom mirliton is the U.S. mirliton landrace that has adapted to the regional climate, diseases, and pests through generations of trial and error. They are a reliable and healthy variety.
But they are vulnerable to new diseases. Many mirliton diseases have not reached the U.S, and some, like the destructive Chayote Mosaic Virus (CMV), are transmitted inside infected mirliton fruit without any sign of infection (seedborne and sapborne diseases). The U.S.D.A. does not screen imported chayote for diseases becuase, rightfully so, they assume that it will be eaten, not planted. If you purchase infected imported mirlitons that carry the disease and then plant them, you may spread the disease to the Louisiana heirloom mirlitons.
There is no cure for CMV and other viral plant diseases, and planting imported, unscreened chayote can potentially destroy all U.S. varieties. That applies to both grocery chayote and chayote of unknown origin sold online. Read about CMV here.
Plant diseases are constantly evolving and afflicting chayote. In Brazil, scientists have discovered two new plant diseases in chayote. One is a new fungus that causes anthracnose disease in mirlitons — another soilborne and sapborne disease that can be spread through imported chayote. Read the article here.
Read the article about the new seedborne fungal pathogens that cause anthracnose discovered in Brazilian chayote herel https://www.mdpi.com/2309-608X/10/12/847
And another has been discovered: Cowpea Mild Mottled Virus (CPMMV). Read about it here.
To summarize: Imported mirlitons may not grow and fruit in the U.S., and if they do, they may have disastrous consequences for U.S. mirlitons landraces.
Recent Comments