by Lance Hill | Jul 1, 2024 | How To, Mirliton
Here’s a proven method of planting a spring sprout that you got too late for ground planting. Homer Baham told us about this simple method of container planting the mirliton for the summer and transplanting it into the ground in the fall. Then he mulches it for the winter and it comes back and produces a spring crop. Here’s what Homer writes:
“I have successfully done this many times, including last year after losing my 6-year-old vines in the heat dome. You should plant the sprouts in two-gallon pots and let them root and grow in the pots throughout the summer (they can be pruned back if necessary). After the 1st of September when the worst of the summer heat is over, plant them into a prepared raised bed garden or your garden. After they get over the transplant shock (1 to 2 weeks), they will start growing.
Feed them weekly with water-soluble miracle grow. Let them grow and vine wherever they will (you can use a tomato cage if necessary). They should show prolific growth. You will not get a fall crop but may see flowering. This allows the plants to establish a good root system. Before the first predicted fall frost, cut them back to 4 to 6 inches and cover them with 12-14 inches of leaves. ( I put an inverted plastic flower pot over them so I can find them later without damaging them).
In January when we start getting warm days, uncover them and expose them to the sun and warm weather. Water them and feed them with Miracle-Gro. Be prepared to cover them back up in the event of frost or freeze but leave them exposed as long as no frost or freeze. You should see growth very soon. Let them vine and grow, caring for them as normal with regular feedings and adequate water. Stop feeding the plant in April and you see them flowering and setting fruit by May.
I have never missed getting some spring crop when I follow this procedure!”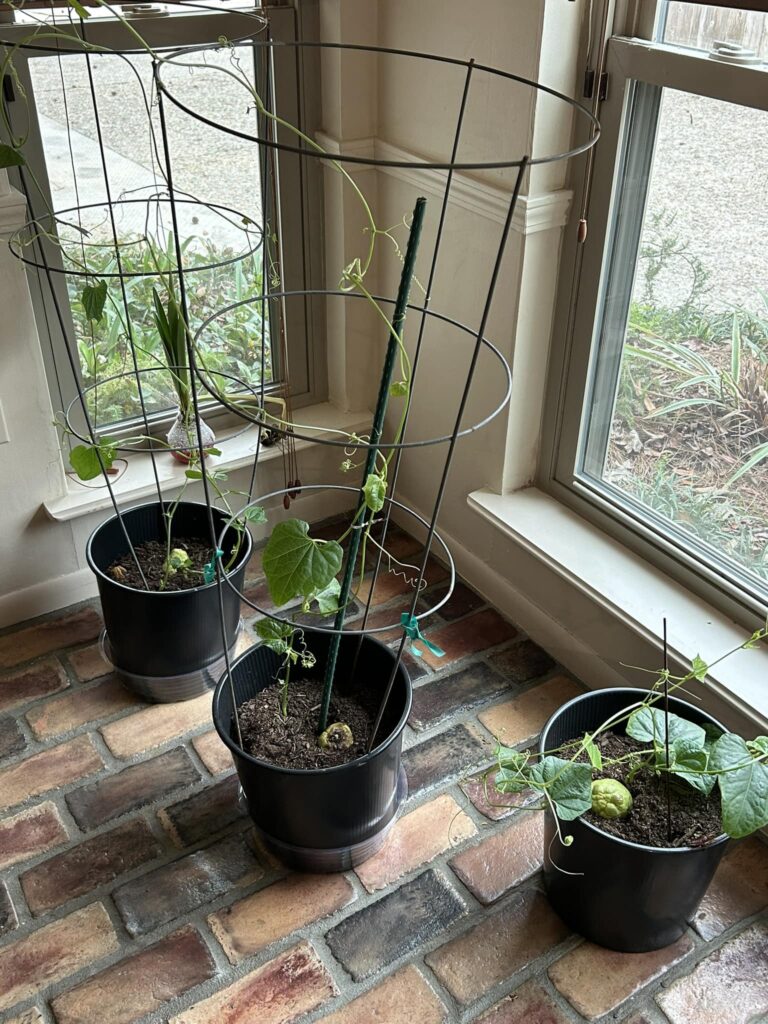
by Lance Hill | Jun 9, 2024 | How To, Mirliton
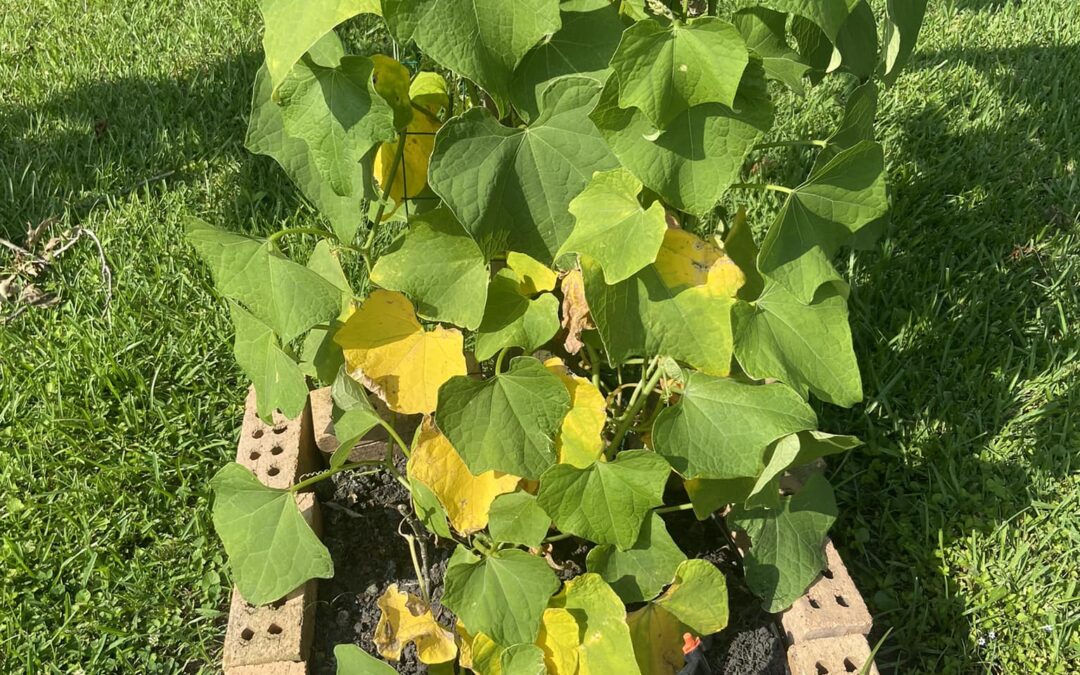
Yellowing of a few leaves on a mirliton vine is normal and not necessarily caused by anything the grower did wriong. It’s usually caused by the stress of widely fluctuating soil moisture–intensive rains and droughts. You can’t control rain. Adding fertilizers won’t help and may hinder.
Yellowing of the bottom leaves on mature plants is another matter. It can happen because fungus splashes up from the soil and causes anthracnose disease. If the yellowing begins to move up the vine, it’s probably anthracnose. But there is nothing you can do to prevent that. There is no known preventative or cure for anthracnose. The fungus that causes it is in your soil all the time. The disease tends to flare up in hot, wet months, like August, but the vines usually recover by the fall. The good news is that each time your vine gets anthracnose, it will also develop increased immunity to the disease. So, an old plant is a healthy plant.
The main thing you can do to prevent disease is not over-water or under-water the vine—and the best way to avoid this is to test soil moisture with a soil sampler. Of course, you can grow a healthy mirliton without testing and knowing your soil moisture. But knowing your soil moisturel increase the odds of success in your favor.
Finally, should you remove the yellow leaves? Some people do and some don’t. I know of no scientific study about the benefits of removing the leaves. But if you think it helps, then prune off the dead leaves.
by Lance Hill | Apr 1, 2024 | How To, Mirliton
Many people don’t have access to yard space, so they are attempting to grow mirlitons in containers. That’s difficult to do along the Gulf Coast–but not impossible. In 2020, James Cobb in Houma, Louisiana, was the first person I knew of who grew a mirliton to fruition in the state. In 2023, Bonnie Landry Palumbo and her husband Butch also successfully got mirlitons to set fruit in pictured 22 ½ -gallon containers in Jeanerette, Louisiana. I don’t know anyone else in Louisiana who has grown one in a container, though it’s a common way to grow them in drier climates like the West Coast.
The difficulty in our region is that intensive rains saturate containers, and droughts dehydrate them, and this stress disrupts flowering and fruiting. The solution is to use a large enough container to moderate the wide fluctuations in soil moisture. Bonnie and Butch did that by dividing 55-gallon containers into two 22 ½ -gallon ones. (If you don’t have a 55-gallon container handy, I would recommend the 40-gallon oval Tuff Stuff tub at Tractor Supply.)
Some people are experimenting with fabric grow bags. The principal challenge is that they tend to dry out quickly and the soil moisture fluctuations disrupt flowering and fruiting. Some growers have tried to remedy that with wicking and automatic watering systems.
The Palumbos used the “Miss Clara” certified mirliton variety. They proved that you don’t need a yard to grow mirlitons; it will be difficult–but not impossible. You can grow them on a patio, driveway, or balcony. You can use a vertical trellis if you don’t have space for a horizontal. The container has to be at least 22 ½ gallons, relatively shallow and raised a few inches off the ground to ensure drainage. You will need a soil sampler to closely monitor soil moisture.
by Lance Hill | Mar 12, 2024 | How To, Mirliton

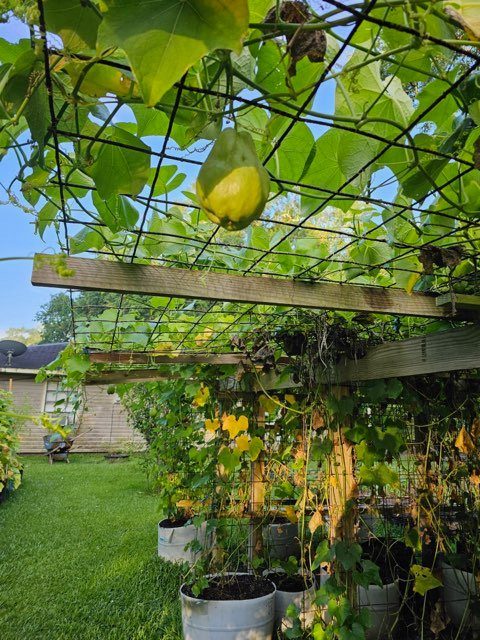
I used to believe that mirlitons could be grown in full sun. Not anymore. Intensive heat waves in the last few summers destroyed most vines that had been grown in full sun. The only ones that survived were in natural shade or had shade cloths. We learned the hard way that mirlitons need partial shade when there is prolonged heat above 95 degrees. That, along with substantial ground irrigation, can get us through another Heat Dome or intensive heat wave.
Build your trellis so you can easily mount a shade cloth over the vine. You won’t need it unless the temperatures stay above 95°. It can be thrown over the vine or mounted over it. Shade cloths come in different shading percentages, and we recommend 40% cloth with grommets so it does not blow away. They are available at Amazon and most big box stores. Shop around online to find one that will last for years. An Amazon link is here.
by Lance Hill | Feb 28, 2024 | How To, Mirliton
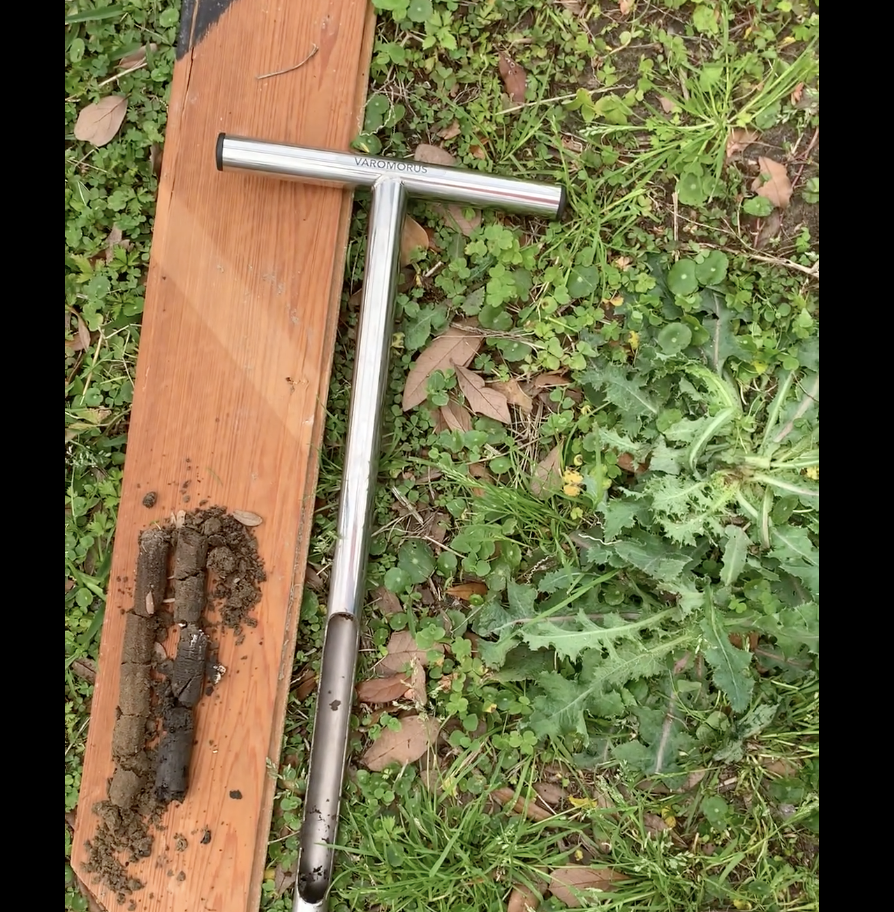 The soil sampler is the simplest way to see how much moisture your mirliton roots are getting. It’s the quickest and most inexpensive way to determine if you have overwatered or underwatered your vine. Knowing what is happening several inches below the surface is even more important during droughts — many growers lost their vines during the heatwaves in 2023 and 2024 because the soil was starved of moisture.
The “knuckle” method of sticking your finger into the soil only tells you what the soil moisture is near the surface; that method does not work with mirlitons because the roots extend downward 8″. Electric meters are also ineffective because they measure electrical conductivity–not soil moisture. The only way to know the available soil moisture beneath your mirliton is to see and touch it, and that’s exactly what a soil sampler allows you to do. Mirliton growers in Brazil have used this method for years.
James Leblanc demonstrates how to take a sample and check moisture levels at all root zone levels. First, pull a core sample and then examine the soil by pressing down on it in the sampler at intervals of about every inch. Feel for moisture and how it compresses. That will indicate the amount of moisture present at each level. If it’s bone dry and crumbly, it needs more watering. If it’s muddy–it has too much. After a while, you will be able to easily take a reading by touch and sight. The soil will generally be moist at the surface level, and should even out as you go down about 8 inches.
See how James does it here
Buy a soil sampler here..
Mirliton rootzone:

Recent Comments