by Lance Hill | Apr 1, 2023 | How To, Mirliton
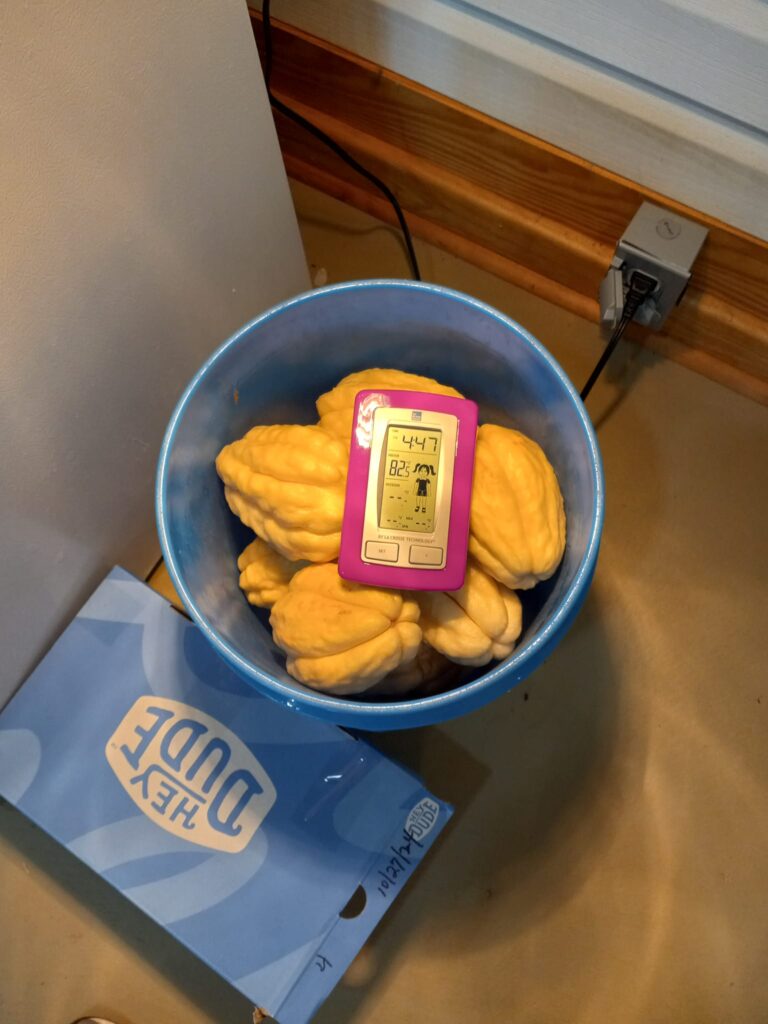
Angela Joan incubated her mirlitons in a 5-gallon bucket with a 125w heat lamp above. They sprouted in 11 days.
Growers typically attempt to delay mirliton sprouting by placing new fruit in paper bags and storing them in a cool part of the house. Cool temperatures promote dormancy and prevent sprouting. But you may want to promote quick sprouting so you can plant them immediately in the ground or container, especially if you want to plant them in the fall. Normally, you would place the mirliton in the warmest part of your house — on top of the refrigerator. But if it hasn’t sprouted within a week or two, here’s an “incubation” trick that Joseph Boudreaux of Broussard taught me that speeds up sprouting.
You can incubate them inside your home in the fall or winter using a small plastic trash can and a heat lamp. Put the mirlitons in a 5-gallon bucket and place a thermometer on top. You can cover the bucket with cardboard, as shown in the photo below, but it’s not necessary.
You want to maintain a temperature of 80°-85°F. You may have to experiment with the distance between the lamp and the bucket. When kept warm in this manner, the fruit will typically begin to sprout within 7-14 days. Sprouting is defined as when the internal seed pushes its way to the large end of the seed (“sticks its tongue out) and a small green shoot emerges. Alternatively, you can place a heating pad underneath the container.
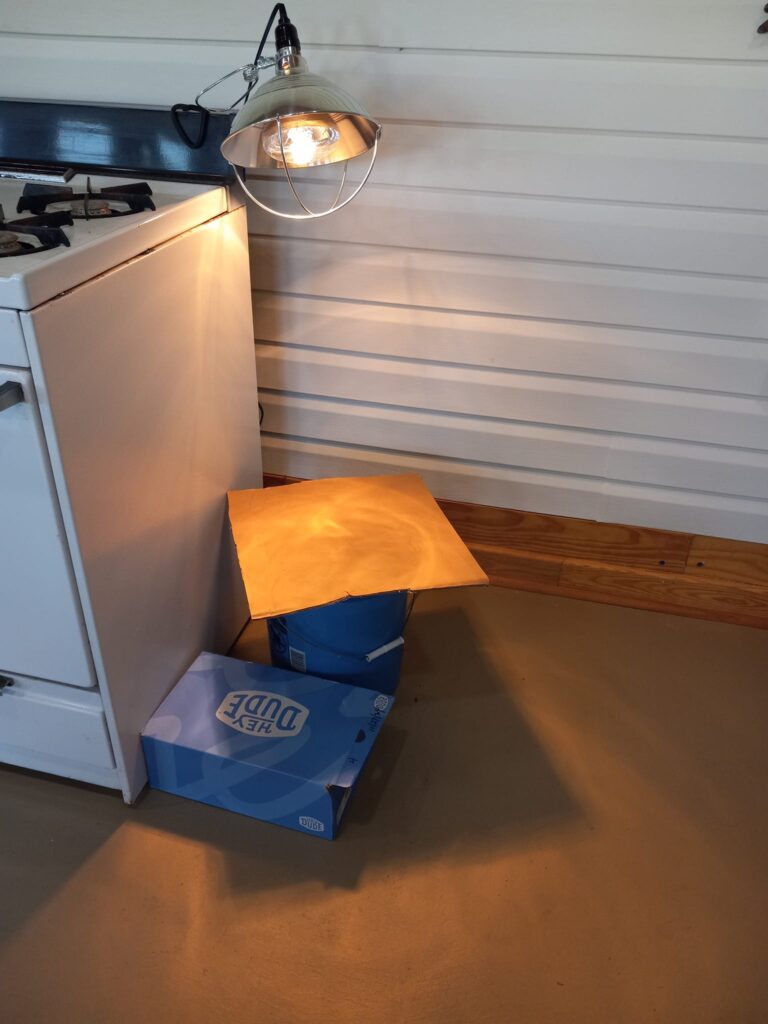
Angela covered the bucket with cardboard, used a remote thermometer, and kept it at 85 degrees.
If the outside temperatures are in the 90s, you can do this outside in a cardboard box without a heating pad. Once you pick the fruit, place it in a shaded warm area with a constant temperature of at least 75-80°F to encourage sprouting. If storing them outside, use chicken wire or netting to protect the seed from pests that enjoy eating the new sprouts.
Once a mirliton sprouts, it means the seed is viable and can be planted. It’s important not to distribute or sell the seed until it has sprouted because sometimes, especially with Spring mirlitons, the fruit can look healthy but have not been properly pollinated and will not sprout and grow a new vine (it’s called parthenocarpy). That occurs more frequently in the spring when there are fewer pollinators and they have more flowers to distract them from the mirlitons.
by Lance Hill | Mar 28, 2023 | How To, Mirliton
There has never been a scientific study for home gardeners on how to best fertilize mirlitons, so we get to invent the science ourselves. Any balanced fertilizer like 8-8-8 or Miracle-Gro is a good choice. A couple of tablespoons at planting and again in July is sufficient, as long as the vine is vigorously growing and green.
But there are two important fertilizing principles I have learned from experienced growers:
(1) Use a slow-release fertilizer such as manure. A mirliton’s nitrogen needs vary throughout the growing season. You don’t want to jolt their tender young roots when you first plant them. They like a buffet where they can eat light but return for more help when they need it. Manure provides that. Ideally, work into your soil or planting pit before you plant, but you can side-dress throughout the season. Rabbit manure is the best choice, but any manure will do the job.
(2) Generally, don’t fertilize after July–unless necessary. If you are using fast-release fertilizers with a high nitrogen content, stop fertilizing in July, before the flowering season begins. A strong dose of nitrogen-rich fertilizer can delay and disrupt flowering. It will cause the vine to direct all its energy into new vegetative growth rather than into reproduction (flowering).
However, sometimes if your vine failed to develop an adequate canopy over the summer and you think you need more canopy for more fruiting, go ahead and apply a light foliar spray of nitrogen in August. Many growers have done that and not experienced delays in flowering. It may be at the expense of flowering, but it may be a tradeoff you are comfortable with.
You can also treat the vine in August and September with a high-phosphate fertilizer (0-45-0), which does increase blooms.
I asked our home gardener, Mirliton scientists, last year to tell us how they fertilized mirlitons. What were the signs it was helping or hurting? Did you do the experiment with different techniques? I got these thoughtful responses. Click here to read them.
by Lance Hill | Feb 25, 2023 | How To, Mirliton
- Select a plant site. The most important thing to keep in mind is that water-saturated soil can drown a young mirliton. Even if your plant survives intense rains, excessive soil moisture later in the summer will stress the plant leading to anthracnose. Choose the best well-drained site on your property–away from roof run-off and preferably near a tree drip line. The vine does not have to initially be in full sun because mirlitons are sun-seekers and will follow a trellis to available sunlight. Ensure you have sufficient space for an overhead or vertical trellis.
- Make a bed or a pit. Mirlitons thrive in loamy, well-drained soil. If you have that, prepare a bed at least 10′ x 10′ which will allow for an overhead trellis that can double as an enclosure for frost protection. Till the soil and add amendments if necessary (if you are using a raised bed, tilling the soil beneath is imperative to ensure bed drainage). But most growers are not fortunate to have good soil and certainly don’t want to waste a $10 seed on a $1 hole. In that case, I recommend a planting technique taught to me by Ishreal Thibodeaux of Opelousas: the pit method. It has been successfully used around the world wherever gardeners have clay or any poor soils. With this pit method, you essentially build a container below ground and fill it with your preferred soil mixture, just as you would for house plants. First, dig a pit 2′ x 2’ x 18” deep. Then fill it with a mix of equal parts: (1) the topsoil you removed from the hole, (2) commercial garden soil, (3) compost, and (4) manure (rabbit, if available). The wider the pit, the better the vine will do. Make enough mixture to also build the hill on top (below). If you choose to simply fill the pit with commercial garden or potting soil, make sure to blend it together with the topsoil that you removed (piling garden soil into the hole can create a “water barrier” where the ground soil cannot absorb excess moisture).
- Build a hill. Make a 2’ x 2’ hill on top of the pit using the same mix. Transplant your mirliton into that in late March after the normal last frost date and add a wire cylinder trellis so the vine can climb to the overhead trellis.
- Harden off the transplant: If you are planting a container plant that you have had inside or in a shaded area, ensure you place it in full sun for a few hours a day for five days before transplanting it into the ground. Sudden exposure to a full day of direct sunlight can burn the plant.
- Planting a Sprout? If you decide to directly plant the sprout instead of a containerized plant, skirt the surface and initial trellis with wire cloth to protect it from squirrels:
Steel wire squirrel protection. Wire mesh can also be used with ground plantings to prevent rodents from digging up the vine.
- Assemble your defense force. Prepare now for rain, pests, and diseases. We suggest you buy a: (1) rain gauge, (2) a soil sampler for testing soil moisture (3) potassium bicarbonate for powdery mildew, (4) BT for preventative management of vine borers, (5) sevin for preventative management of stink bugs, and (6) a shade cloth for the first two months of the plant.
Links:
Soil Sampler for Testing Soil Moisture
Potassium bicarbonate
BT Concentrate
Sevin

by Lance Hill | Jan 25, 2023 | How To, Mirliton
The video at the bottom of this post explains in 60 seconds the simple bamboo skewer stick soil moisture technique that will prevent you from drowning your young mirliton.
If you get a mirliton sprout and it’s too early to ground-plant it, we recommend that you plant it in a 3-5 gallon container or grow bag filled with potting soil. It can remain in the container for more than a year and can be pruned back if necessary. Watering is the main problem you may encounter. The mirliton needs very little water the first several weeks because it comes with its own water source–the fruit. You should initially thoroughly water it and leave it alone for a few weeks so you don’t drown the roots. The only way the container will lose water is through evapotranspiration—by natural evaporation of the soil and loss of small amounts of water through the leaves (transpiration).
The best way to check the soil moisture in a 3-gallon container is the bamboo skewer stick test. It works better than any expensive electronic tester. Insert and withdraw the skewer quickly and visually examine it. It will provide you with a graduated reading–each particle of soil represents the available moisture at that specific level. The bottom of the stake will show the moisture at the deepest level. If a few soil particles adhere to the skewer, that means they are moist, which means you have good soil moisture. If it comes out clean and dry, it needs water. If it comes out smeared and muddy, that’s too much moisture. After visually examining it, run the skewer between two fingers to feel the moisture at the different levels. You will develop a good sense of when it’s not drenched or dehydrated.
Then, leave the stick out to dry for the next test.
Using this “sight and feel” method is similar to the one that soil labs use to assess clay content for a soil sample–they roll the soil between their fingers and use their senses to judge the clay content. We don’t advise that people use the knuckle method, where you insert a finger into the soil. That will tell you if the top inch of soil is moist but not if the rest of the container is drenched.
When you move the plant outside, it may lose moisture and need to me monitored more regularly. Here’s the quick and simple video: bit.ly/3w6vJ8o
In addition, you can use the skewers to help peel the mirliton! View the 60-second tutorial here.
by Lance Hill | Oct 14, 2022 | How To, Mirliton
Sprouted Mirliton
If you have just harvested or obtained a new seed, you have two options: (1) store it as a sprout for several months, or (2) overwinter it in a 3-gallon container.
To store it as a sprout, place it in a cool, dark location in a brown paper bag, and it will sprout and remain viable for several months. You could then plant it in the ground in March.
However, we recommend that you get the plant growing in a container as soon as possible, because that will create a strong root ball for transplanting in March and produce a spring crop! To achieve a spring harvest and a strong plant going into the next summer, you will need to sprout the seed and immediately plant it in a 3-gallon container.
Here are the steps:
1. Mirlitons should be sprouted (germinated) before planting. If your mirliton has not sprouted, (fig. 1) place it horizontally on top of the refrigerator– the warmest part of your house. If it does not sprout within two weeks, you should speed up the process by “incubating” the sprout (explained here)

Fig. 1. Unsprouted mirlitons.
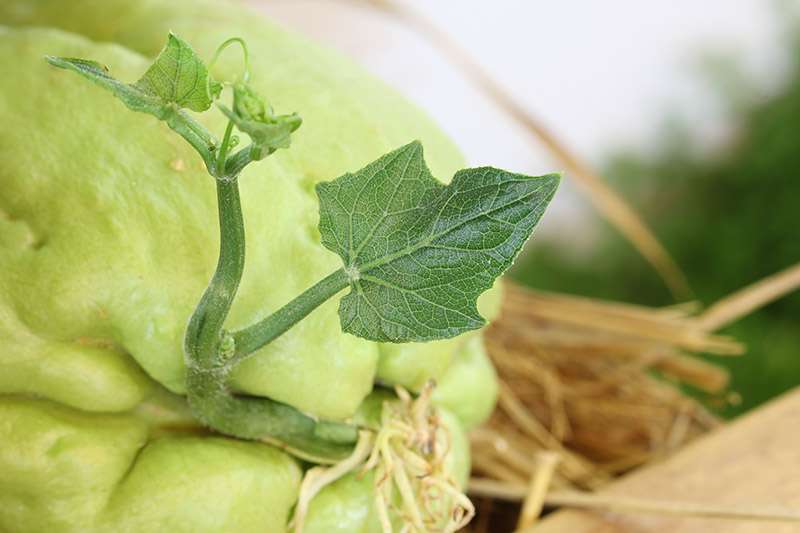
2. If your mirliton has already begun to sprout (tongue sticking out) (fig. 2), you are ready to overwinter it to help it develop a root ball.

Fig. 2. Sprout first emerges (above) and shoots extending (below). These are ready to plant.

3. Over-wintering: Once your mirliton is sprouted, you plant the whole fruit at a 45-degree angle about 2/3 of the way down with the sprouting end down in a 3-gallon plastic or cloth container filled with good potting soil (fig. 3). Water thoroughly the first time. Mirlitons don’t need much water during the overwintering. Here’s how to use a bamboo skewer to test soil moisture. Or you lift the container slightly every few days to gauge if the soil is drying out, and only water if it is noticeably light. David Hubbell has an excellent video on overwintering a mirliton here.

Fig. 3. Sprout planted “sprouting end down” at a 45-degree angle with about 2/3 underground in a 3-gallon container.
4. Trellising: Use a 24” – 36″ tomato cage as a trellis. Let it climb the cage, but you can safely prune it back to keep it compact—a plant in a 3-gallon container can last for up to a year (see diagram below). Overwinter it inside in a sunny area. Or, if the weather permits, you can keep it outside in full sun and bring it in when there is a risk of frost or freeze. You can also store it inside using grow lights (natural light or a full-spectrum grow light set to sunrise and sunset). The goal is to develop a good root ball. When you transplant it into the ground in the spring, you can unwind the vine from the tomato cage and attach the canopy to your garden trellis (see the images below).
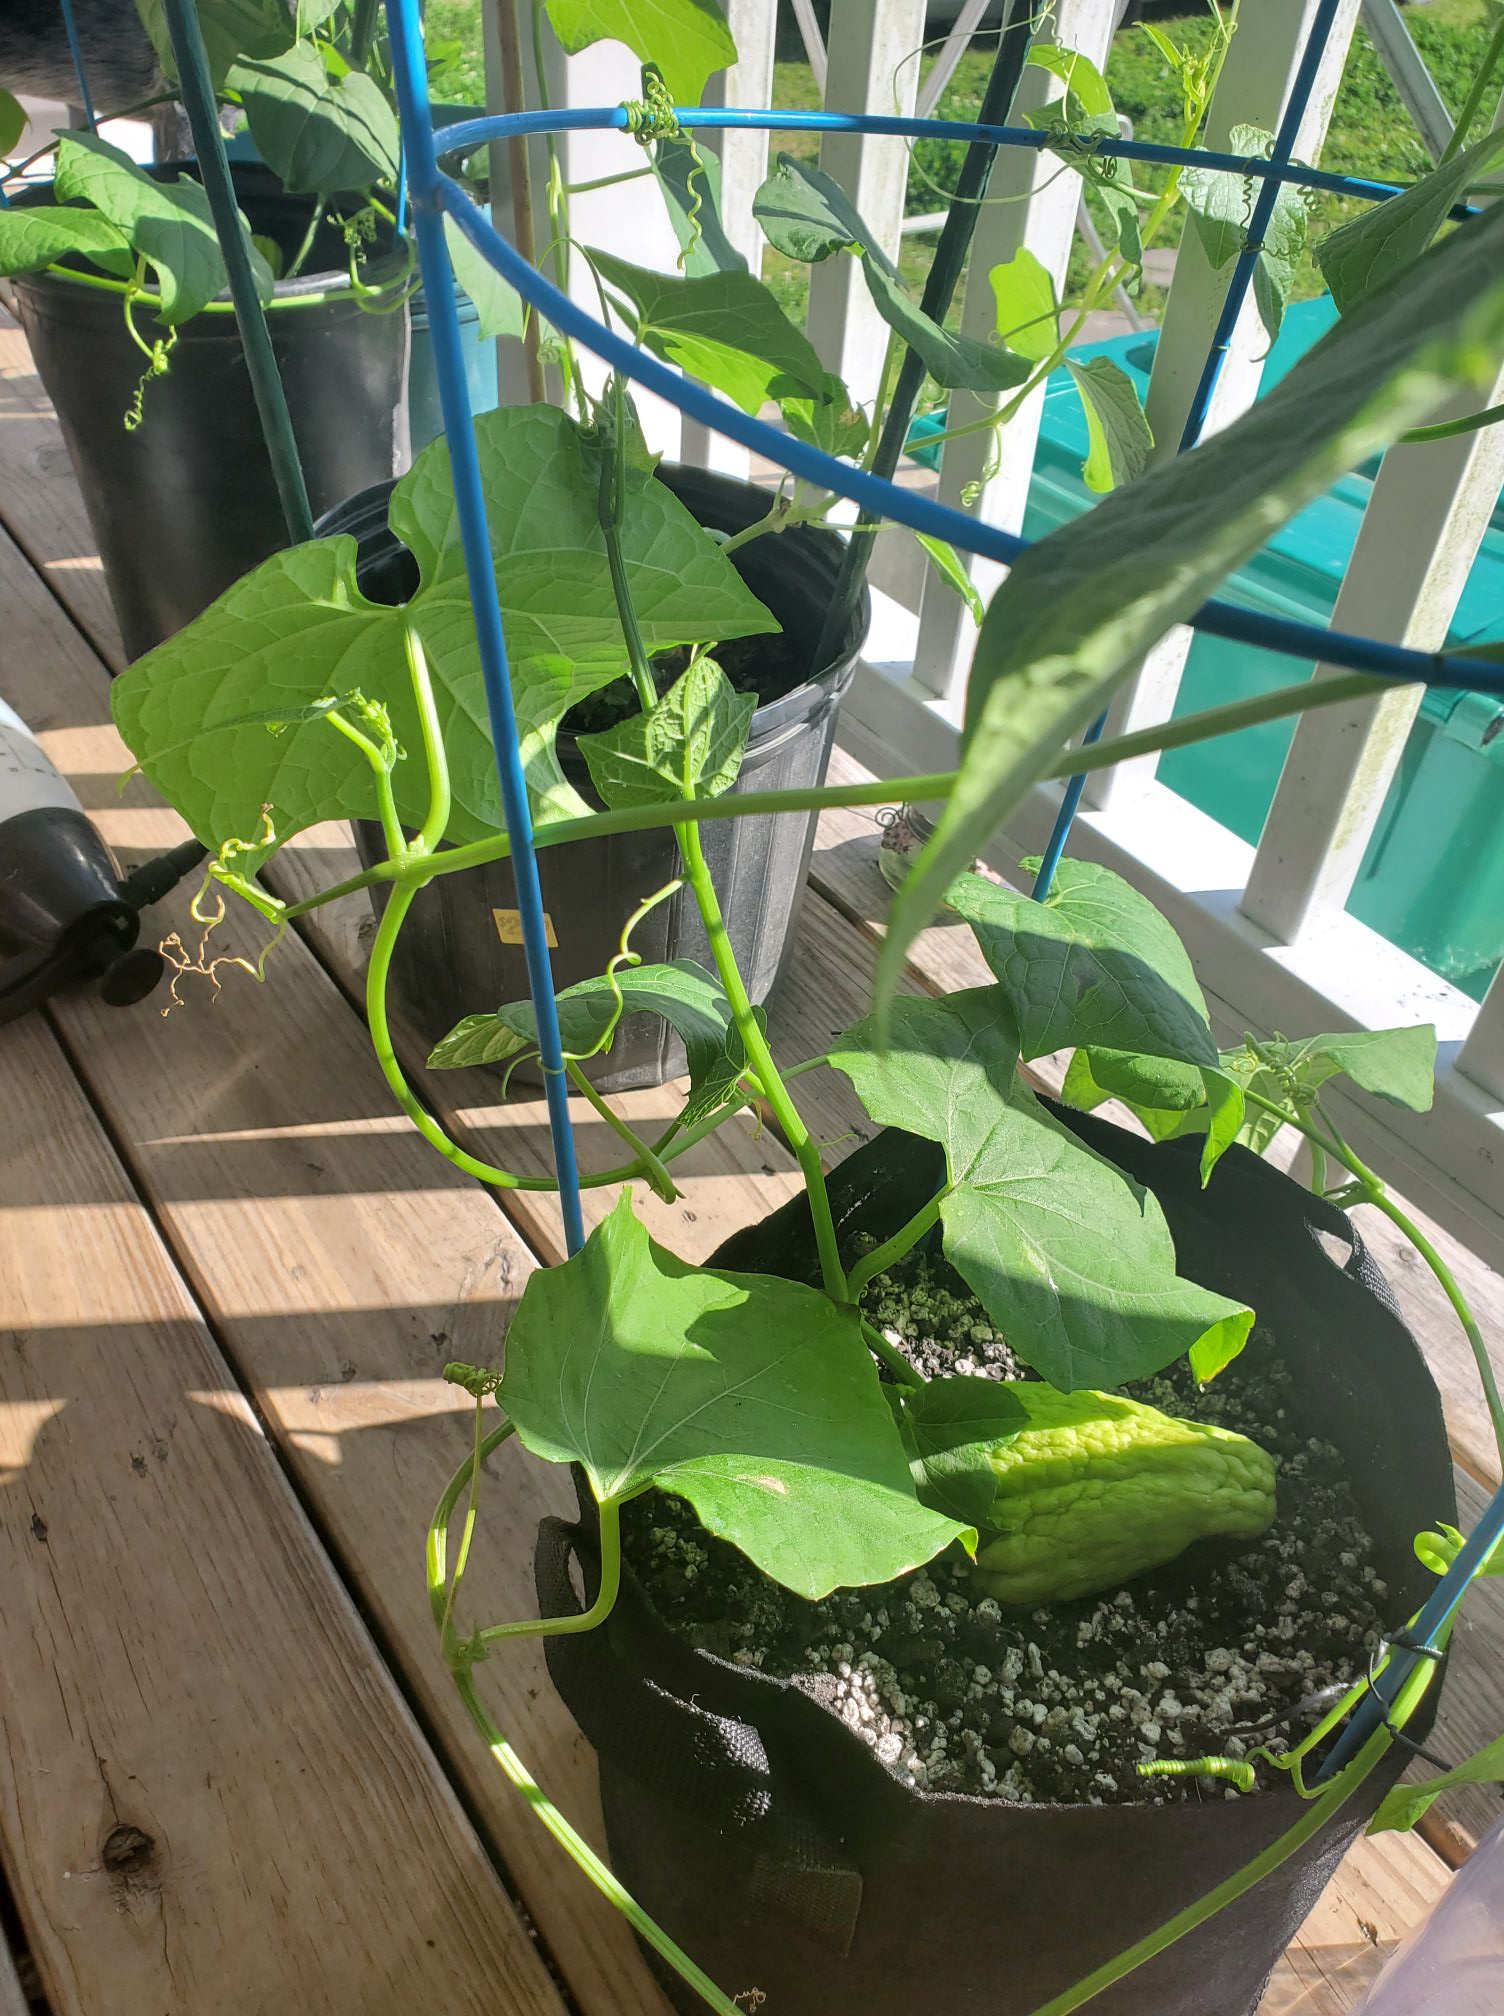
Mirlitons trellised on tomato cages.
If you choose to prune the plant to keep it compact — rather than trellis it — you can cut back the top growth, but leave at least three nodes with shoots above the soil line.
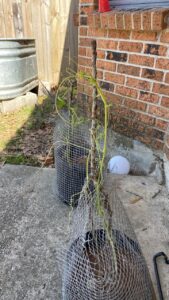
5. Give the container plant as much sun as possible, preferably outside, and bring it in when temperatures drop below 42 °. If you have rodent problems, protect it with a wire cage:

Steel wire squirrel protection. Make the mesh guard at least 3′ high to protect new growth. Wire mesh can also be used with ground plantings to prevent rodents from digging up the vine.
6. Transplanting: If you don’t want a spring crop, transplant your container plant into your ground site or raised bed in April after the threat of frost. If you want a spring crop, you need to transplant in the first week of March. Be prepared to cover it with a bucket or tarp in case of a frost. Harden it off for a few days before transplanting into full sun. See the Quick Guide for instructions on building a grow site and general procedures for watering, fertilization, shading, and plant pests and diseases. Join the national mirliton gardeners Facebook Group to post questions and follow the progress of other Mirliton gardeners here.
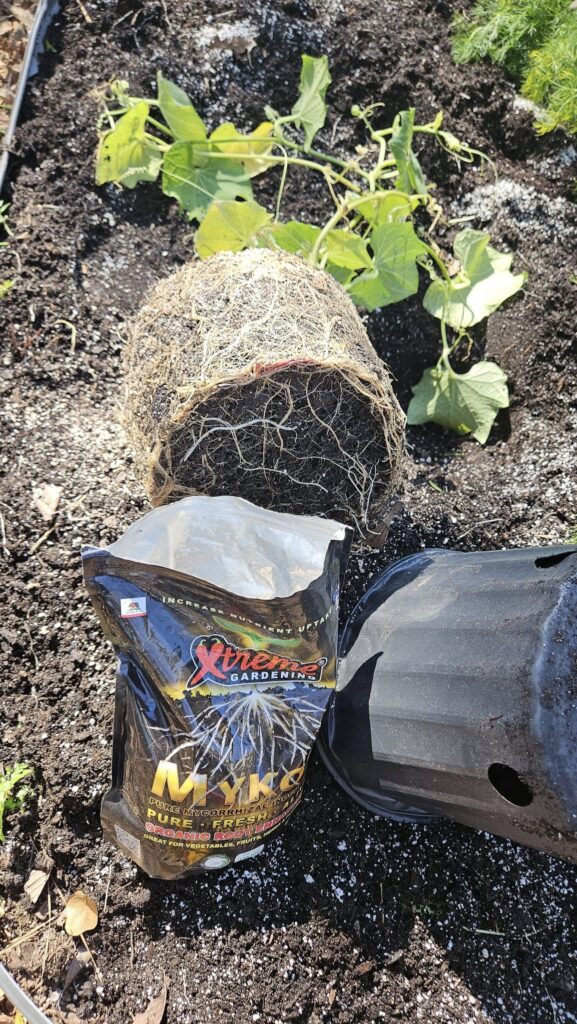
Well-developed root ball on a 3-gallon plant ready to transplant into the ground.
by Lance Hill | Sep 2, 2022 | How To, Mirliton
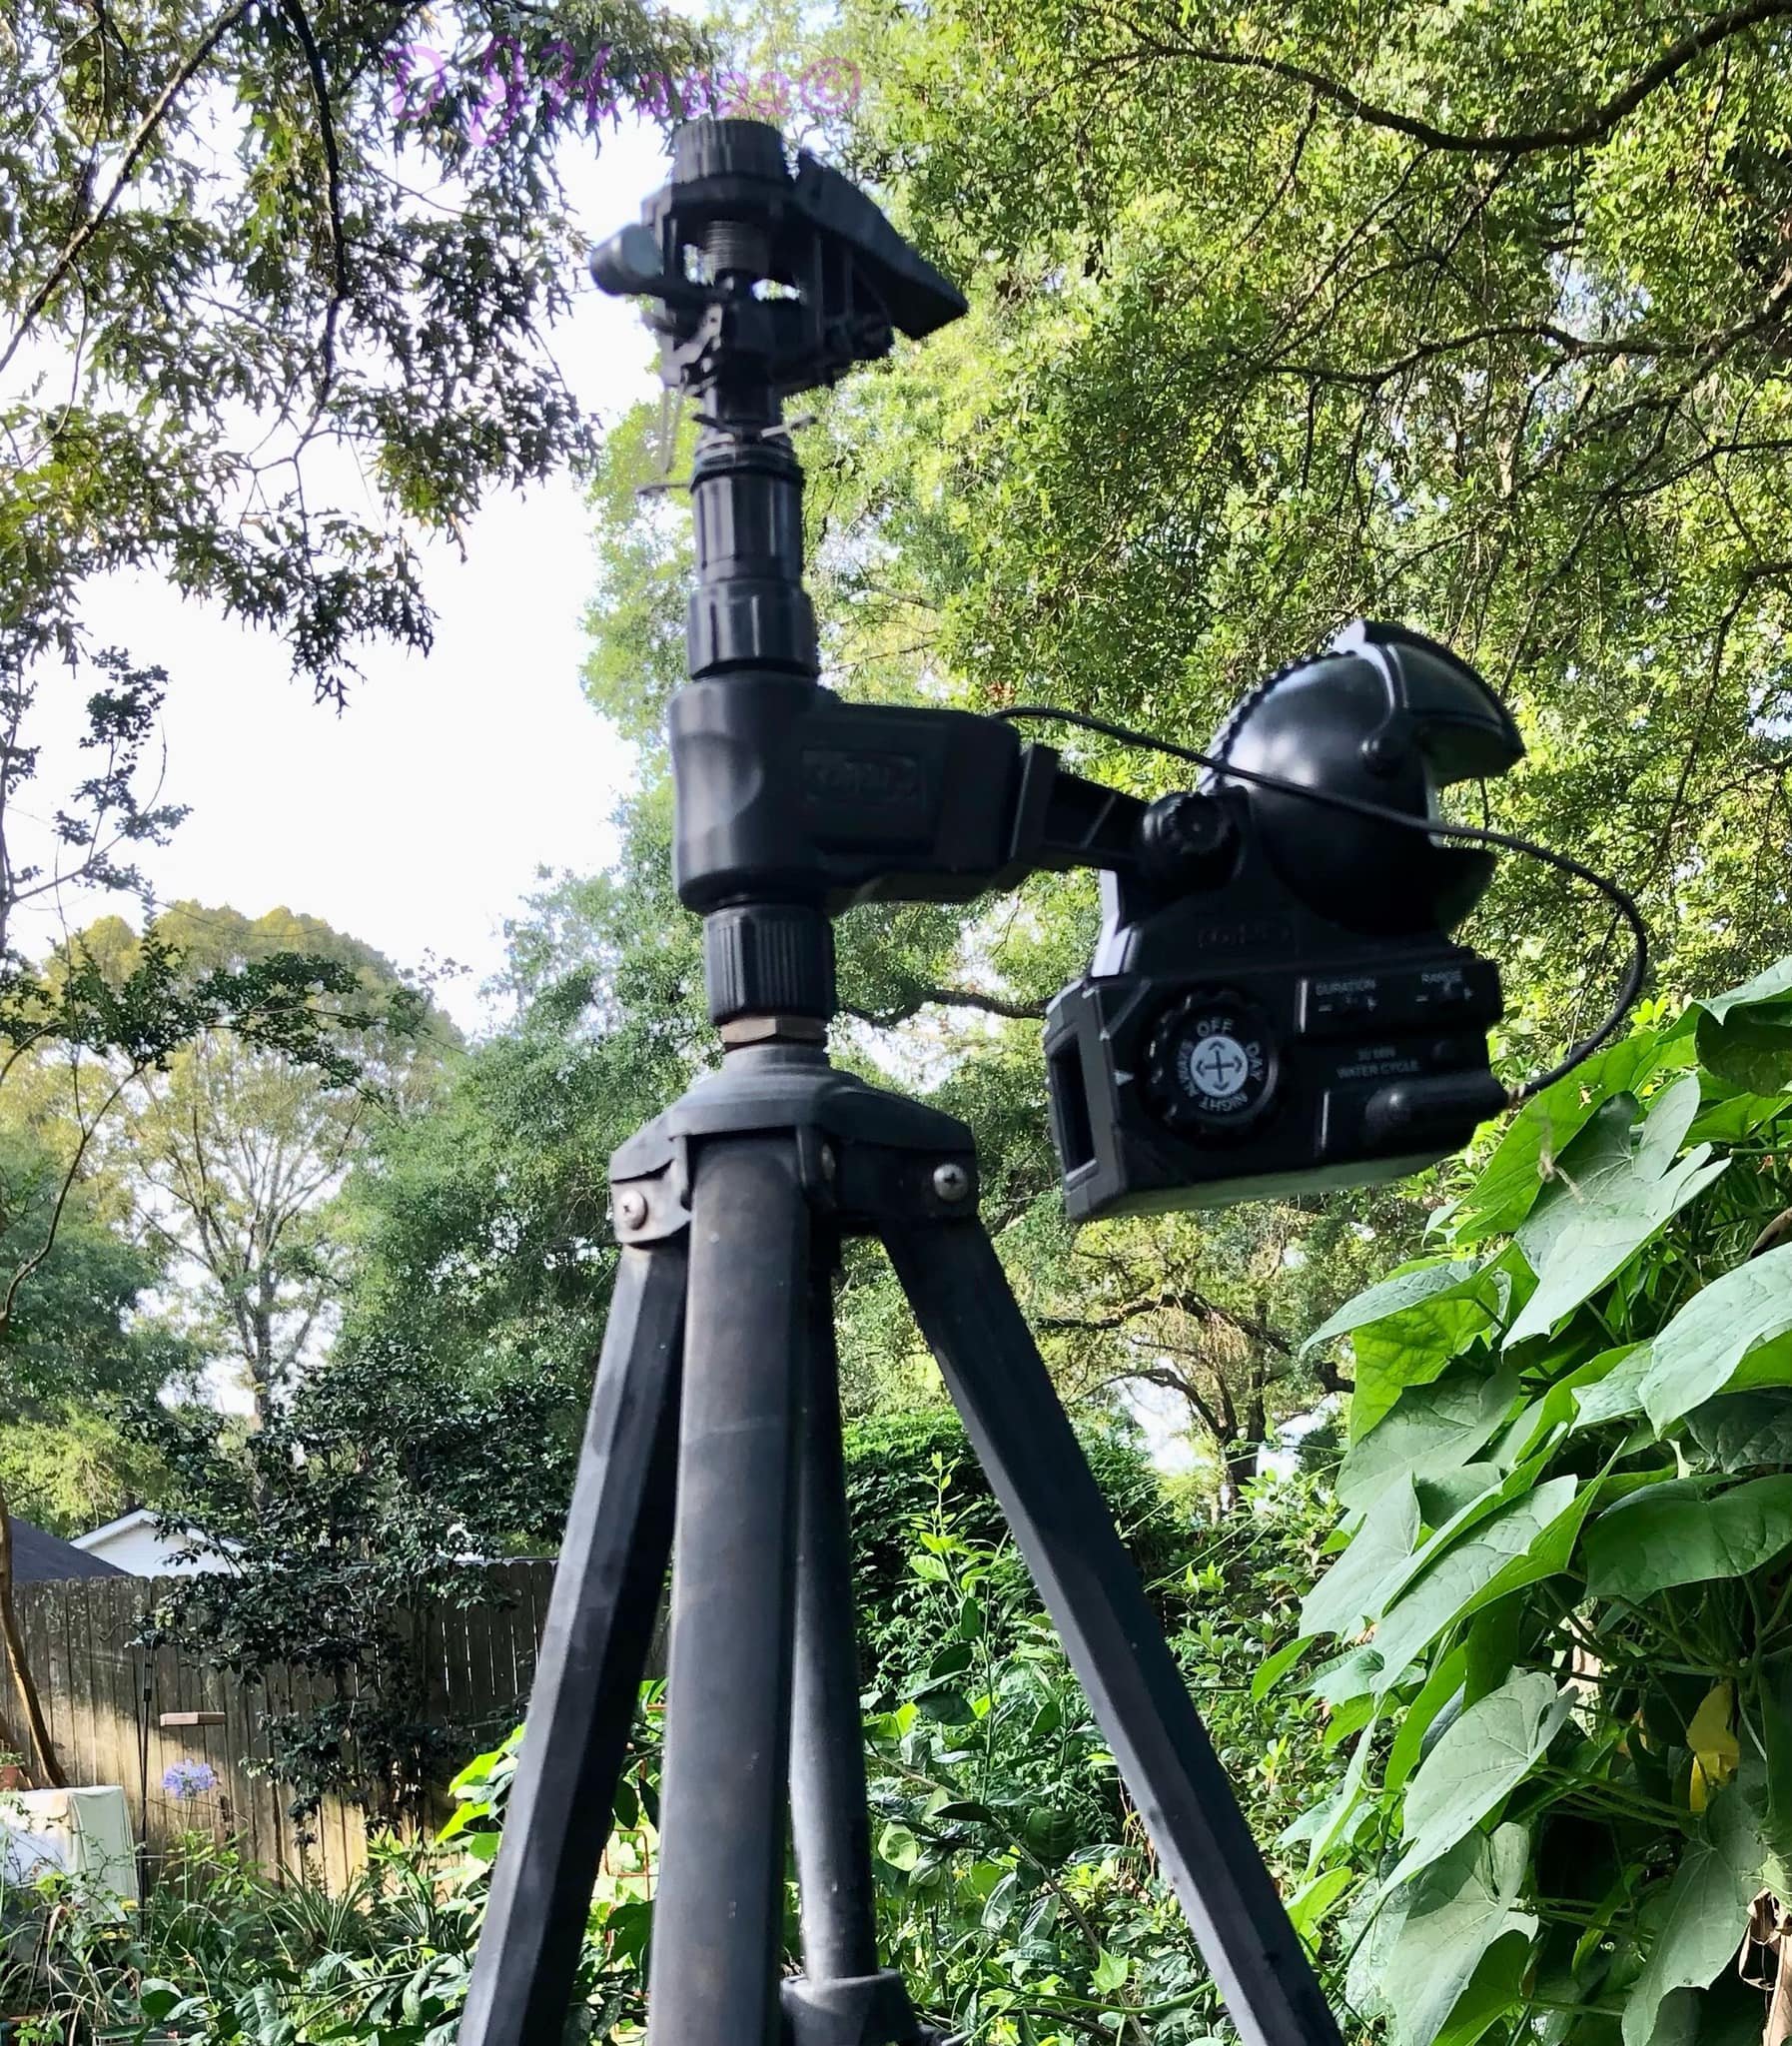
Meet The Squirrelator
Well, it doesn’t eliminate them, but it does scare them off, and anyone who has ever grown mirlitons knows that squirrels eat the vine endings and steal the fruit. What to do? A wise old extension agent in Mississippi once said, “If there are 100 cures for something, probably none of them work.” I tried a 100 for squirrels: CDs, noise repellers, and cayenne on the bird seed (the Cajun squirrels loved it). None of them worked. This motion-activated sprinkler shoots a short burst of water in an arc over your vine.
David Hubbell tested it for the last two years– complete with a game camera that he used to monitor it. The thing works. It is based on the simple principle: Did you ever see a squirrel dancing in the rain?
They work for other crops and will also keep your neighbors from pilfering your garden at night.
It’s available at most online stores, but here’s the Amazon link.
(If you are trying to protect a container plant or a new small plant, a wire mesh guard will also work.)
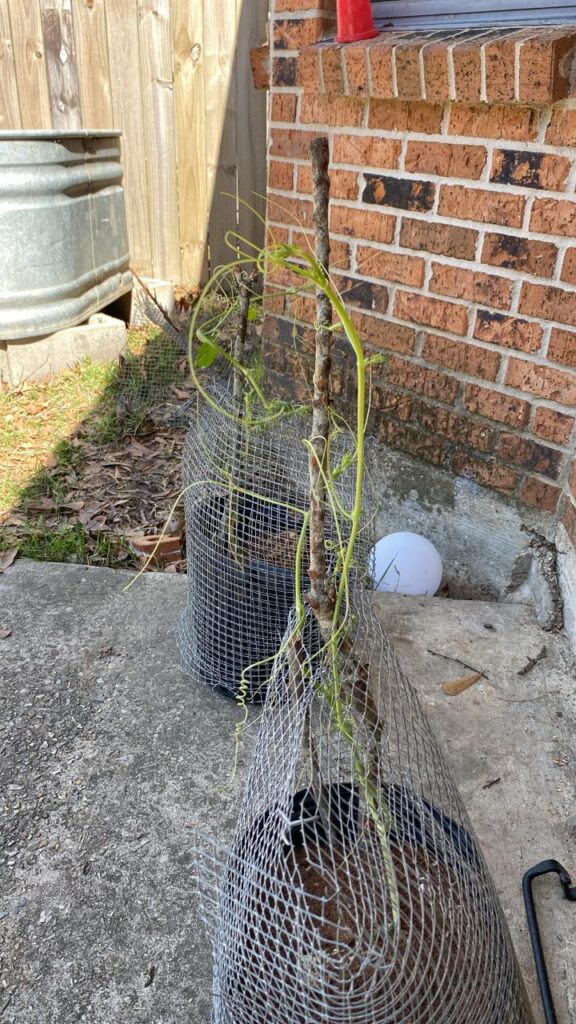
Wire mesh guard for protection against squirrels.
Recent Comments