Many people want to grow their own mirliton (chayote) vine but find it difficult to find locally grown mirlitons. Because of their frustration, some people try to grow mirlitons by purchasing and planting one from the produce department in a grocery store. There are two reasons why this is not ideal.
First, all mirlitons sold in grocery stores and markets are imported varieties. They are grown and imported only as produce, just like all the other vegetables that you purchase. The USDA tried to grow these varieties a century ago and concluded that high-altitude plants have tremendous difficulty growing in low altitudes. This is because these varieties have adapted to the altitude, pests, diseases, and ultraviolet exposure in their native environment. The patterns of light and temperatures influence when and if the variety will flower and fruit. Moreover, an imported variety may not have acquired resistance to diseases or disease pressures that occur in its new environment.
All imported mirlitons will sprout and send up a shoot, but most imported mirlitons will not flower and set fruit. We have received reports of this problem from hundreds of growers over the years, and I had the same disappointing experience when I tried to use imported mirlitons to grow a vine.
Second, even if you could grow an imported mirliton, you may introduce new diseases that have devastated mirlitons elsewhere. Local mirliton varieties that are adapted to conditions in the U.S. have been grown for over two centuries in Louisiana and California. These were originally brought from low-altitude coastal areas in the Caribbean and Central America. In horticulture, these local varieties are called landraces— cultivars that growers have improved by traditional agricultural methods. The Louisiana heirloom mirliton is the U.S. mirliton landrace that has adapted to the regional climate, diseases, and pests through generations of trial and error. They are a reliable and healthy variety.
But they are vulnerable to new diseases from imported chayote sold as produce in grocery stores. Although no new mirliton diseases have been discovered in the U.S.A., it’s a widespread problem with other imported seeds, such as Tomato brown rugose fruit virus (ToBRFV) in tomatoes. The recently discovered Chayote Mosaic Virus (CMV) can be transmitted inside infected mirliton fruit without any sign of infection (seedborne and sapborne diseases). If you purchase infected imported mirlitons that carry the disease and then plant them, you may spread the disease to the Louisiana heirloom mirlitons. There is no cure for CMV, and you can potentially destroy all U.S. varieties. Read about CMV here.
In Brazil, scientists have recently discovered new fungi that cause anthracnose disease in mirlitons–also another soilborne and sapborne disease that can be spread through imported chayote. Read about it here.
To summarize: Imported mirlitons may not grow and fruit in the U.S., and if they do, they may have disastrous consequences for U.S. mirlitons landraces. It is best to wait until you find one of the Certified Louisiana Heirloom Mirlitons available on Mirliton.Org.
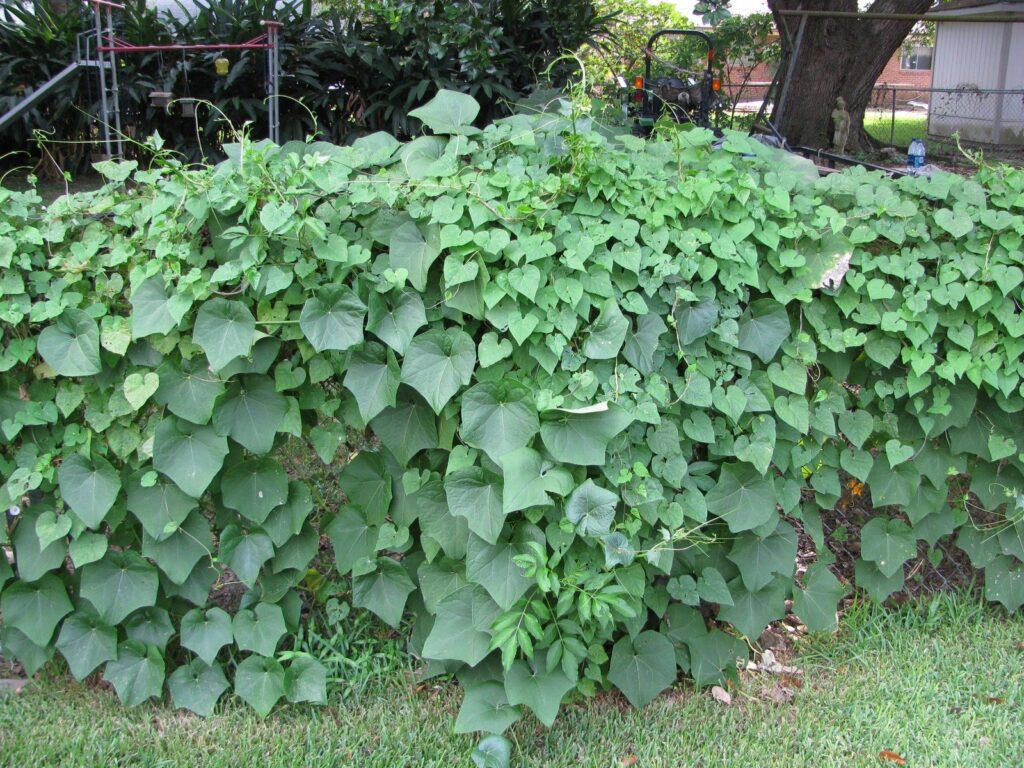
Mirlitons evolved for 26,000,000 years in the full sun of the Mesoamerican mountain sides. They tolerate and flourish in both full shade and partial shade. They are “sunseekers” in the sense that they will always grow from shade to full light. You can plant them in partial shade, and as long as the trellis guides them toward more sun, they will follow that. I have seen them start in nearly full shade beneath a large oak, and they followed the fence trellis until they found full sun.
But, in these weather conditions of heat domes and intense heatwaves, we have found that it is absolutely necessary to use a 40% shade cloth when the temperature is excessively high–95℉ for several successive days. That is why we advise growers to build a structure along with the trellis where they can quickly and easily mount a shade cloth.
John White’s Militon vine growing in full sun.
Sister Morgan’s Mirliton vine growing under the shade of a large oak. It followed the fence toward greater sun.
Angela Joan’s shade cloth draped over the vine on support poles.
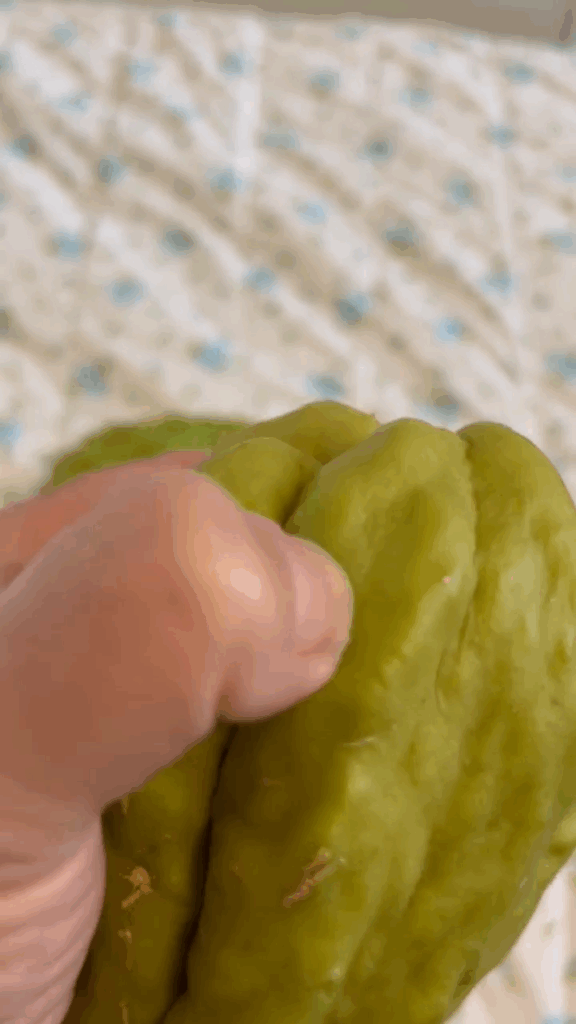
Tedra Erikson Stanley performing the thumbnail test.
Mirlitons are typically ready to harvest when they reach approximately 8 ounces, although size and weight can vary. The most reliable method for testing for harvesting is the thumbnail test.
Start by pushing on the fruit skin with your thumbnail. If the fruit skin dents or even seeps a little moisture, the fruit is still immature and will be too watery. If it is firm and does not dent, you are ready to pick. The old growers used to say, “My mirlitons are hard now and ready to pick.”
See Tedra Stanley’s video on how to do the test here.
At the hard stage, they are also mature enough to sprout and or use as seed. But once they begin to sprout, they’re too tough to cook.
The spring harvest of mirlitons has increased in recent years due to advancements in growing techniques. The question is: How do we plant them?
There are two options: container-grown plants or planting them directly in the soil.
First, in either case, the fruit needs to be spouted. This ensures the seed is viable, and a sprouted mirliton means the roots and shoots are ready for soil and will quickly root and grow. You can expedite sprouting by incubating the fruit. If kept warm, they will sprout within 7 to 14 days. Read how to do it here. (We encourage growers to also incubate their sprouts before selling or gifting them, for the same reasons.)
Once the seed has sprouted:
Container planting: Plant it in a 3-gallon container and keep it outside in the shade for the summer. Use a small tomato cage for a trellis. Mirlitons can be easily pruned back to maintain a compact shape if desired. Transplant them into the ground in September, after the danger of the heatwave has passed. Cut it back and mulch it in November, or tent and heat it for the entire winter. Either way, you’ll get a good spring crop. Use the bamboo stake technique for gauging watering needs.
Mirlitons trellised on tomato cages.
Direct planting: This is a little more tricky. You can plant sprouts in May or June, but they will need to be initially shaded from the heat of direct sunlight. Place a milk crate over the plant, covering it with a 40% shade cloth or a piece of cardboard to protect it from the sun’s rays. After it starts to grow foliage, remove the crate and shade. Read about shading it here. Use the standard methods for bed preparation in the quick guide
Many gardeners attribute plant failure to manure or compost that may have been contaminated with Grazon or other herbicides. A professional laboratory test is too expensive for the average gardener, but there is a simple, inexpensive test you can do at home. You can do it before using the compost or manure, or after you have already planted:
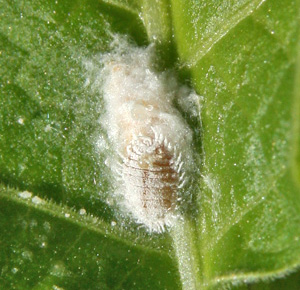
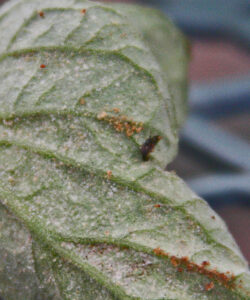
Spider mites and mealybugs tend to plague mirlitons that are planted in containers, especially when kept indoors during overwintering.
You can manage mealybugs by soaking a cotton swab with 70% isopropyl rubbing alcohol and dabbing it directly on the bugs. Alternatively, you can dilute the alcohol with water at a 1:10 ratio (one part alcohol to 10 parts water) and spray it on both the top and bottom of the leaves. (Sevin claims to control mealybugs, but there’s evidence that it is not as effective as alcohol.) If you are spraying the solution on an established plant outside, do a patch test first to ensure that the alcohol won’t harm the leaves (spray only a few leaves and then check the next day). Additionally, spray the plant in the evening.
If the mites are on a seed, sprout, or container plant that you are keeping inside or not in direct sun, you can dust it with “flowable sulfur.” It’s very effective, but it can damage the sprout/plant if applied outside in direct sunlight or heat, so be cautious with it.
Mites can be controlled with the same alcohol spray, neem oil, or insecticidal soap (follow the instructions on the label).
Sprays will only kill the living mites, so you may need to repeat the spraying process weekly for a few weeks.
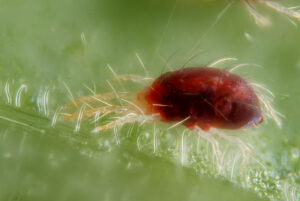
Red spider mite clusters.
Click here for a short fact sheet on how to identify signs of mites.


Recent Comments