Mirliton How-To Tips
Search tips by keyword:
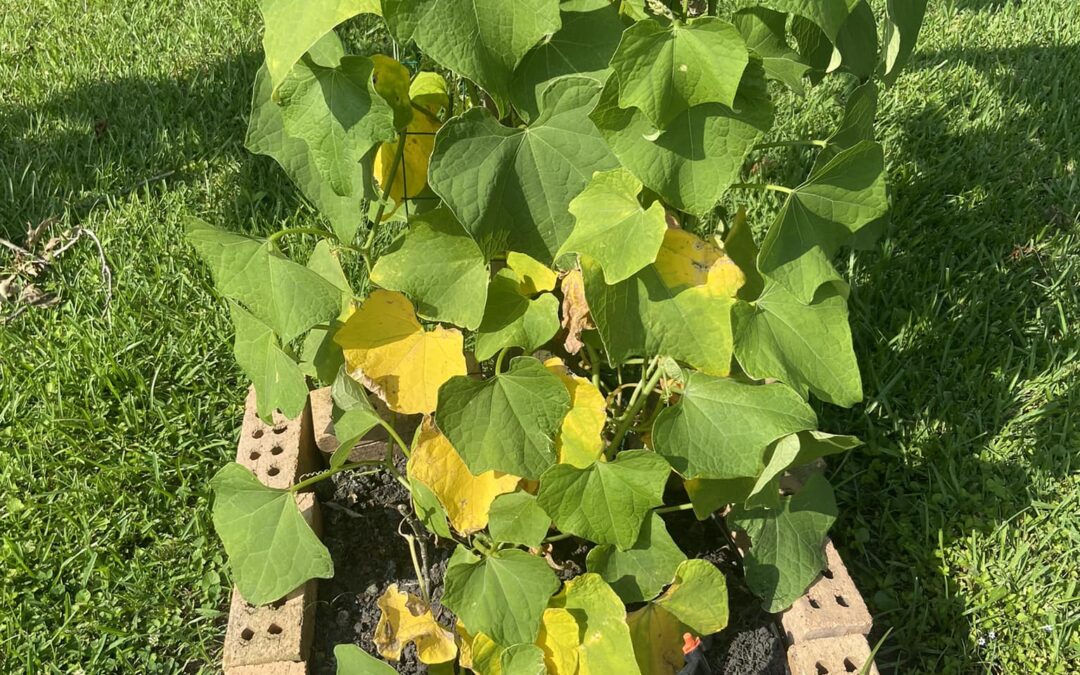
Why Are My Mirliton Leaves Turning Yellow?
Yellowing of a few leaves on a mirliton vine is normal and not necessarily caused by anything the grower did wriong. It’s usually caused by the stress of widely fluctuating soil moisture–intensive rains and droughts. You can’t control rain. Adding fertilizers won’t help and may hinder.
Yellowing of the bottom leaves on mature plants is another matter. It can happen because fungus splashes up from the soil and causes anthracnose disease. If the yellowing begins to move up the vine, it’s probably anthracnose. But there is nothing you can do to prevent that. There is no known preventative or cure for anthracnose. The fungus that causes it is in your soil all the time. The disease tends to flare up in hot, wet months, like August, but the vines usually recover by the fall. The good news is that each time your vine gets anthracnose, it will also develop increased immunity to the disease. So, an old plant is a healthy plant.
The main thing you can do to prevent disease is not over-water or under-water the vine—and the best way to avoid this is to test soil moisture with a soil sampler. Of course, you can grow a healthy mirliton without testing and knowing your soil moisture. But knowing your soil moisturel increase the odds of success in your favor.
Finally, should you remove the yellow leaves? Some people do and some don’t. I know of no scientific study about the benefits of removing the leaves. But if you think it helps, then prune off the dead leaves.
Mirliton Water Uptake Root Diagram

Mirliton Root Structure: The roots extend about 12” deep. This diagram shows water uptake in increments of 4″.
As you can see, 70% of the water uptake occurs in the top 8″.
This is why, if you are doing a ground planting, you will need a metal soil sampler that can penetrate the soil down 8′ to get a useful core sample. (A bamboo stake as a moisture gauge will do if you have a raised bed filled with porous potting or garden soil, since bamboo can easily penetrate it)
And here’s a correction to my previous writings based on new information I have learned about mirliton root structure and moisture uptake: Although mirlitons have a few long, superficial roots a few inches below the soil surface that can extend laterally for up to 6 feet, they only take up a small percentage of the available moisture and nutrients. Most of the soil moisture uptake occurs within a few feet of the plant base.
This correction means it is possible to grow a healthy vine in an area smaller than 12 feet in diameter or 6 feet in length. A raised bed that’s the standard 3′ x 6′ is adequate, but it will still need to be at least 3′ deep to avoid excessive soil saturation and waterlogging.
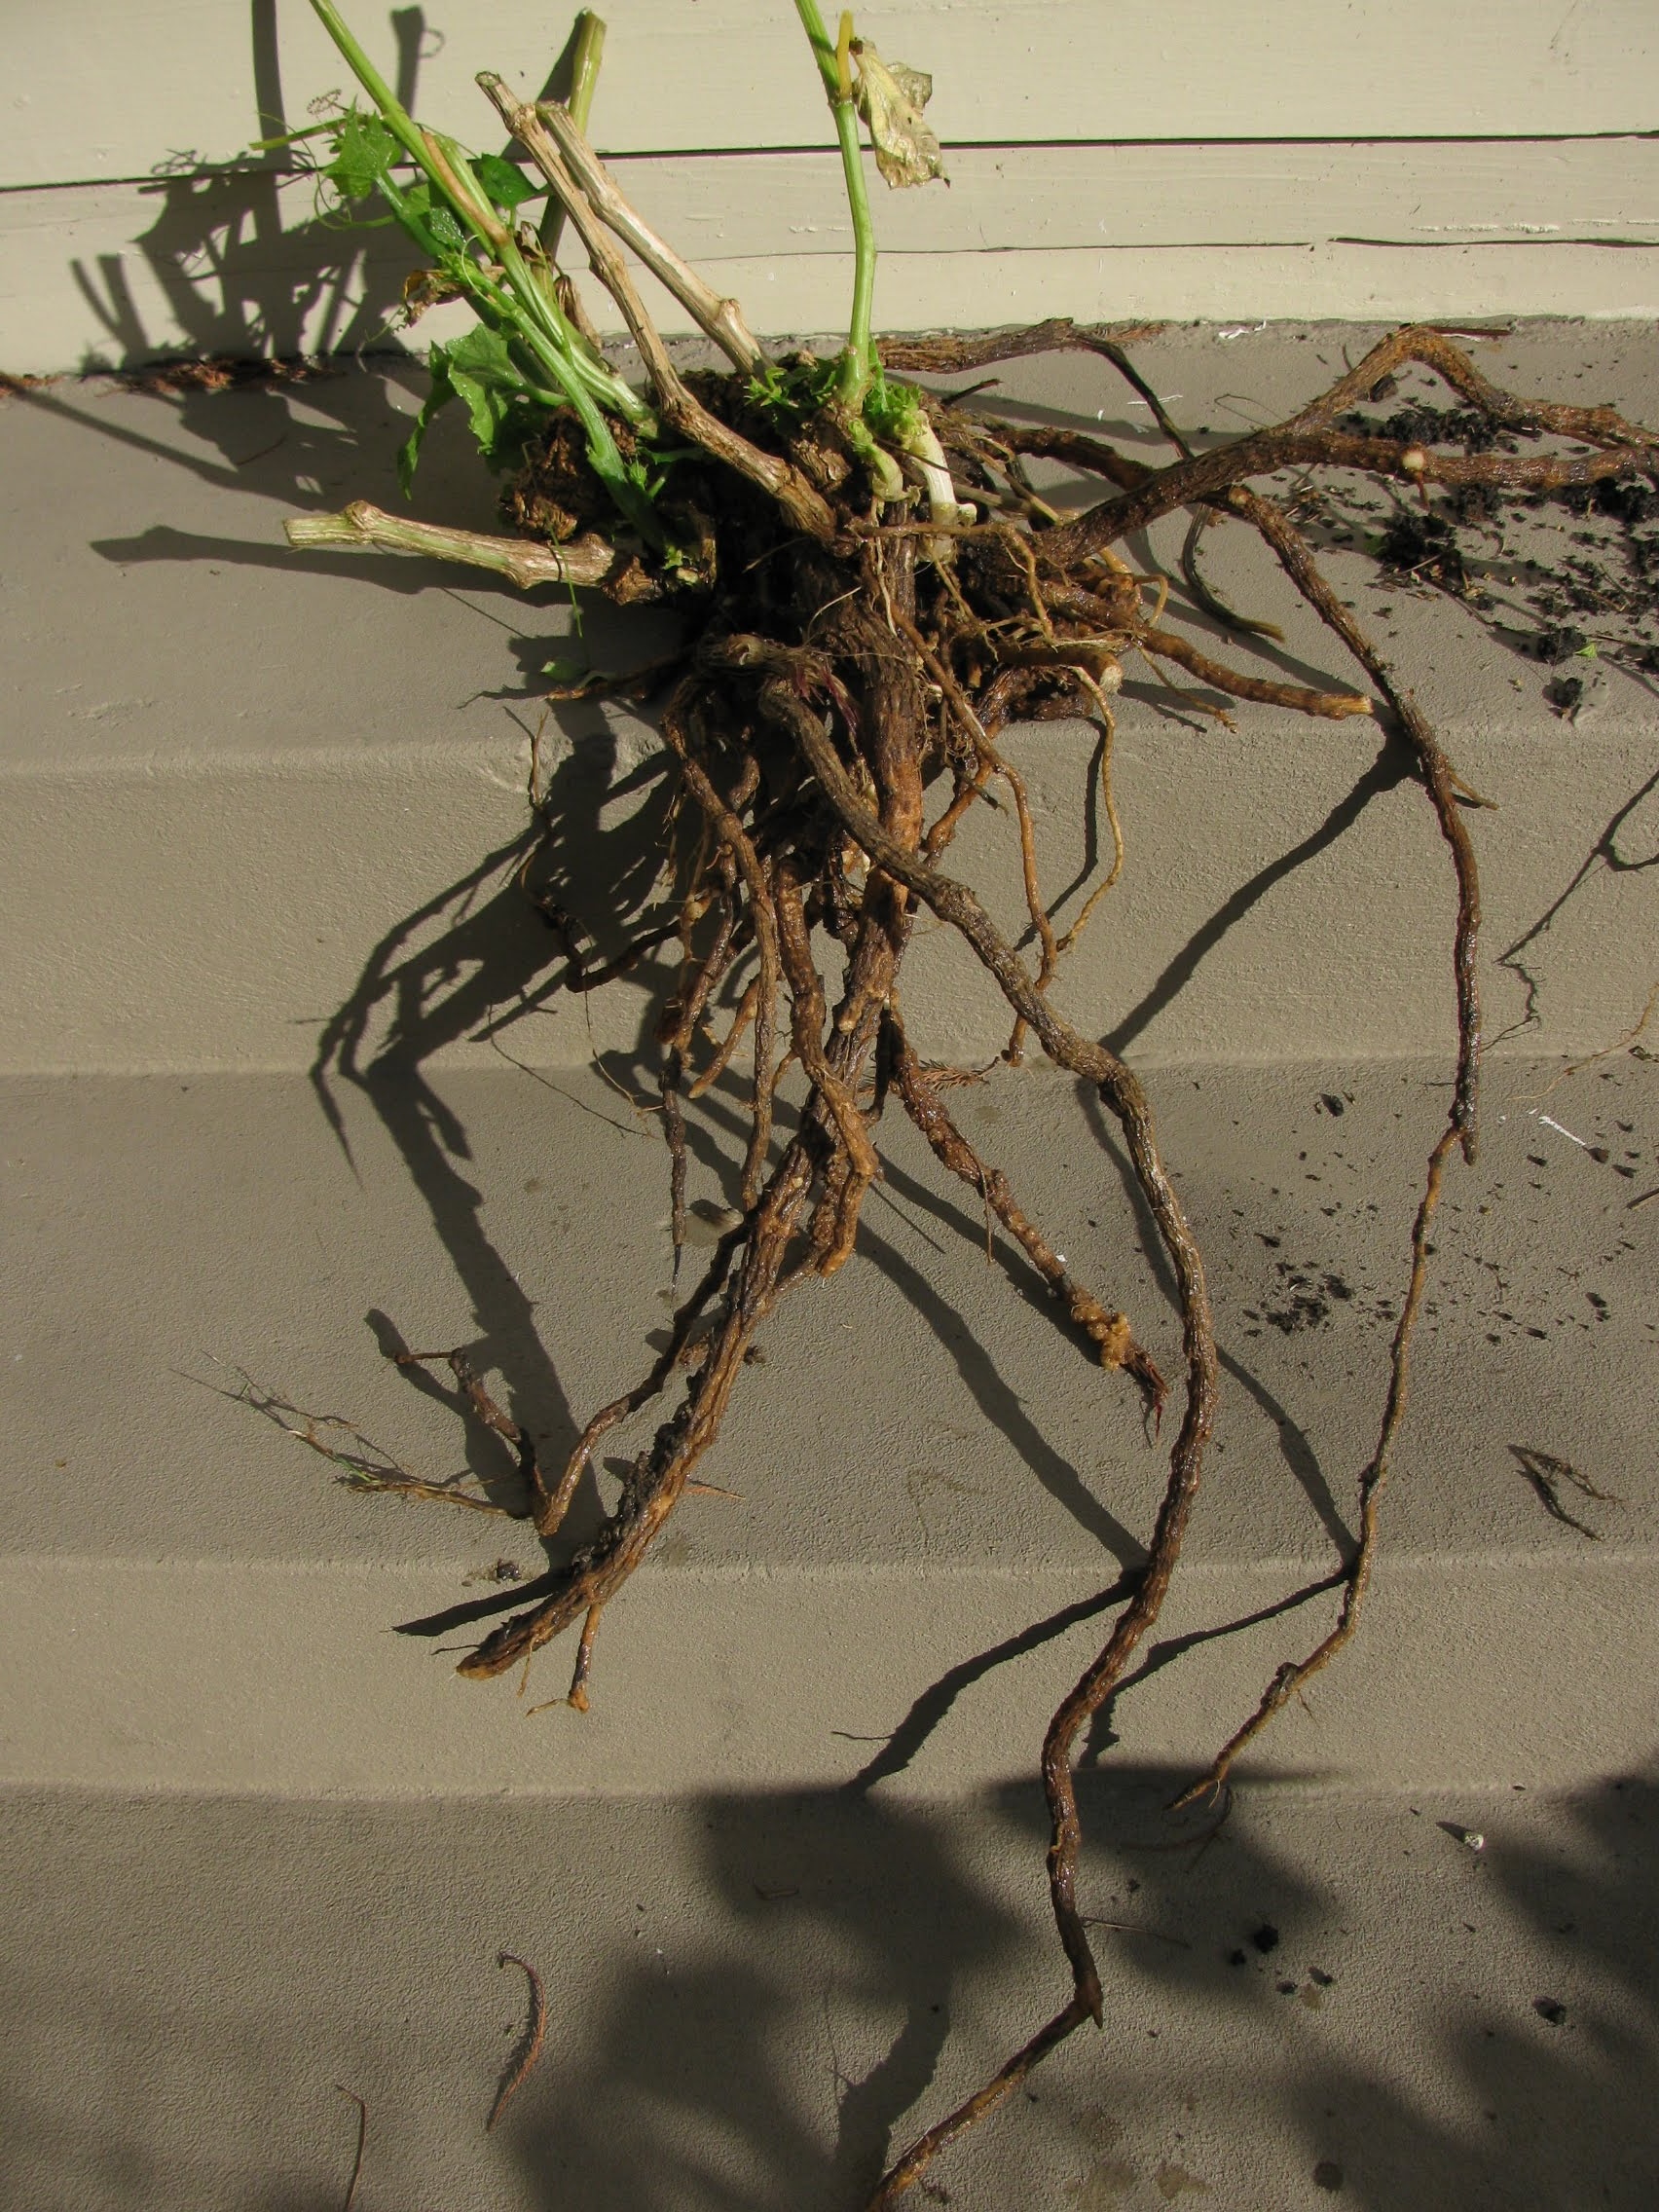 A first-year mirliton that was excavated with the roots intact. The roots were more spread out horizontally in the soil, so they are not as deep in the soil as they appear in the steps.
_________________
How To Grow a Mirliton in a Container on the Gulf Coast
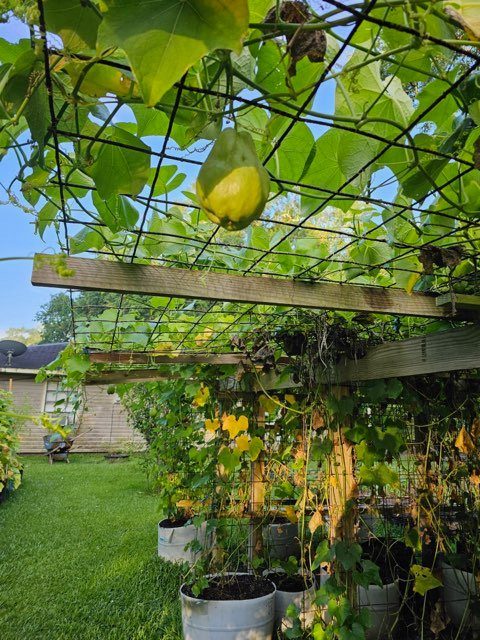
Many people don’t have access to yard space, so they are attempting to grow mirlitons in containers. That’s difficult to do along the Gulf Coast–but not impossible. In 2020, James Cobb in Houma, Louisiana, was the first person I knew of who grew a mirliton to fruition in the state. In 2023, Bonnie Landry Palumbo and her husband Butch also successfully got mirlitons to set fruit in pictured 22 ½ -gallon containers in Jeanerette, Louisiana. I don’t know anyone else in Louisiana who has grown one in a container, though it’s a common way to grow them in drier climates like the West Coast.
The difficulty in our region is that intensive rains saturate containers, and droughts dehydrate them, and this stress disrupts flowering and fruiting. The solution is to use a large enough container to moderate the wide fluctuations in soil moisture. Bonnie and Butch did that by dividing 55-gallon containers into two 22 ½ -gallon ones. (If you don’t have a 55-gallon container handy, I would recommend the 40-gallon oval Tuff Stuff tub at Tractor Supply.)
Some people are experimenting with fabric grow bags. The principal challenge is that they tend to dry out quickly and the soil moisture fluctuations disrupt flowering and fruiting. Some growers have tried to remedy that with wicking and automatic watering systems.
The Palumbos used the “Miss Clara” certified mirliton variety. They proved that you don’t need a yard to grow mirlitons; it will be difficult–but not impossible. You can grow them on a patio, driveway, or balcony. You can use a vertical trellis if you don’t have space for a horizontal. The container has to be at least 22 ½ gallons, relatively shallow and raised a few inches off the ground to ensure drainage. You will need a soil sampler to closely monitor soil moisture.
Corking: Another way to Verify You are Getting An Authentic Heirloom Mirliton
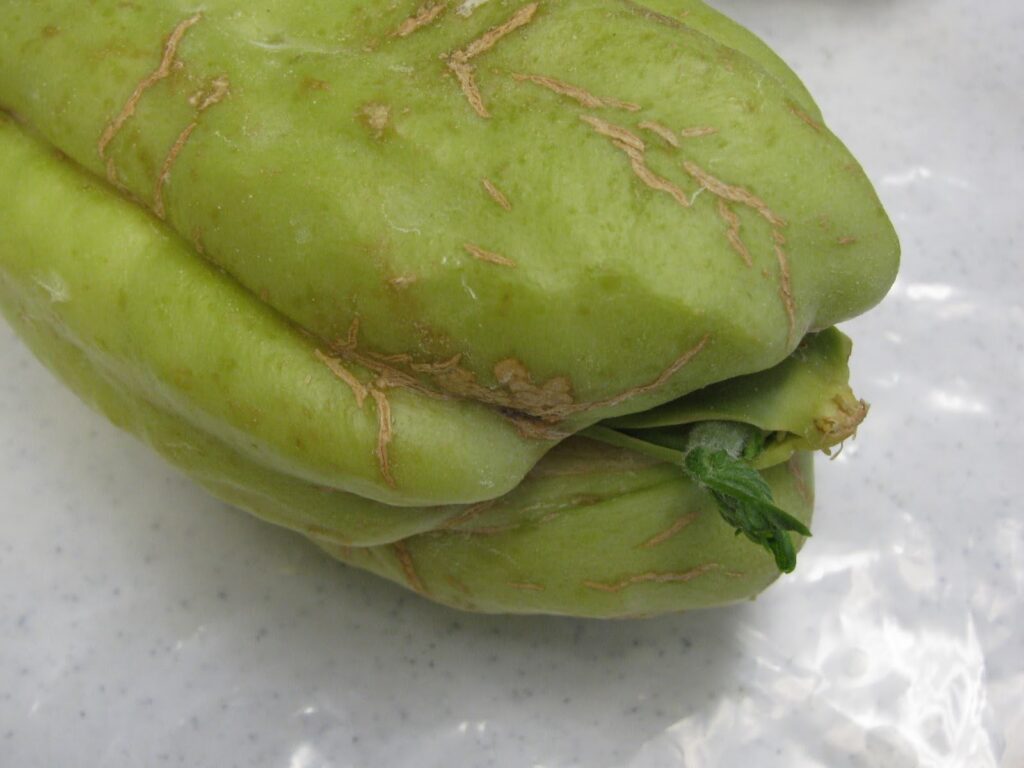
Did you ever notice the brown lines on some mature mirlitons? They’re a fairly reliable way of knowing if the mirliton is a locally grown Louisiana heirloom. Dr. Jorge Cadena Iñiguez, a leading world expert on chayote (mirlitons), recommends we use the term Corking or Cork lines for the brown, cork-like lines that sometimes appear on the skin surface of mirlitons.
Corking in mirlitons is a form of “lignification” and is composed of lignin, the same substance that comprises bark cell walls. It probably develops to protect the fruit from pests and disease. What is important for us is that only mature mirlitons develop cork. So, if someone is selling or gifting a mirliton with cork lines, it was probably locally grown. (Imported chayote is never left on the vine long enough to develop cork lines.)
Not all locally grown mirlitons will have cork lines; they may have been picked fresh off the vine. But if you see corking, it’s another reason to believe it’s an authentic Louisiana Heirloom mirliton.
Made In the Shade: Shade Cloths Protect Mirlitons and Increase your Harvest!
I used to believe that mirlitons could be grown in full sun. Not anymore. Intensive heat waves in the last few summers destroyed most vines that had been grown in full sun. The only ones that survived were in natural shade or had shade cloths. We learned the hard way that mirlitons need partial shade when the heat is prolonged above 93 degrees. That, along with substantial ground irrigation, can get us through another Heat Dome or intensive heat wave.
We also discovered that shade cloths may increase the amount of fruit that the vine produces! Not only does shade protect the vine from solar radiation and make it healthier, but it also makes it more bountiful.
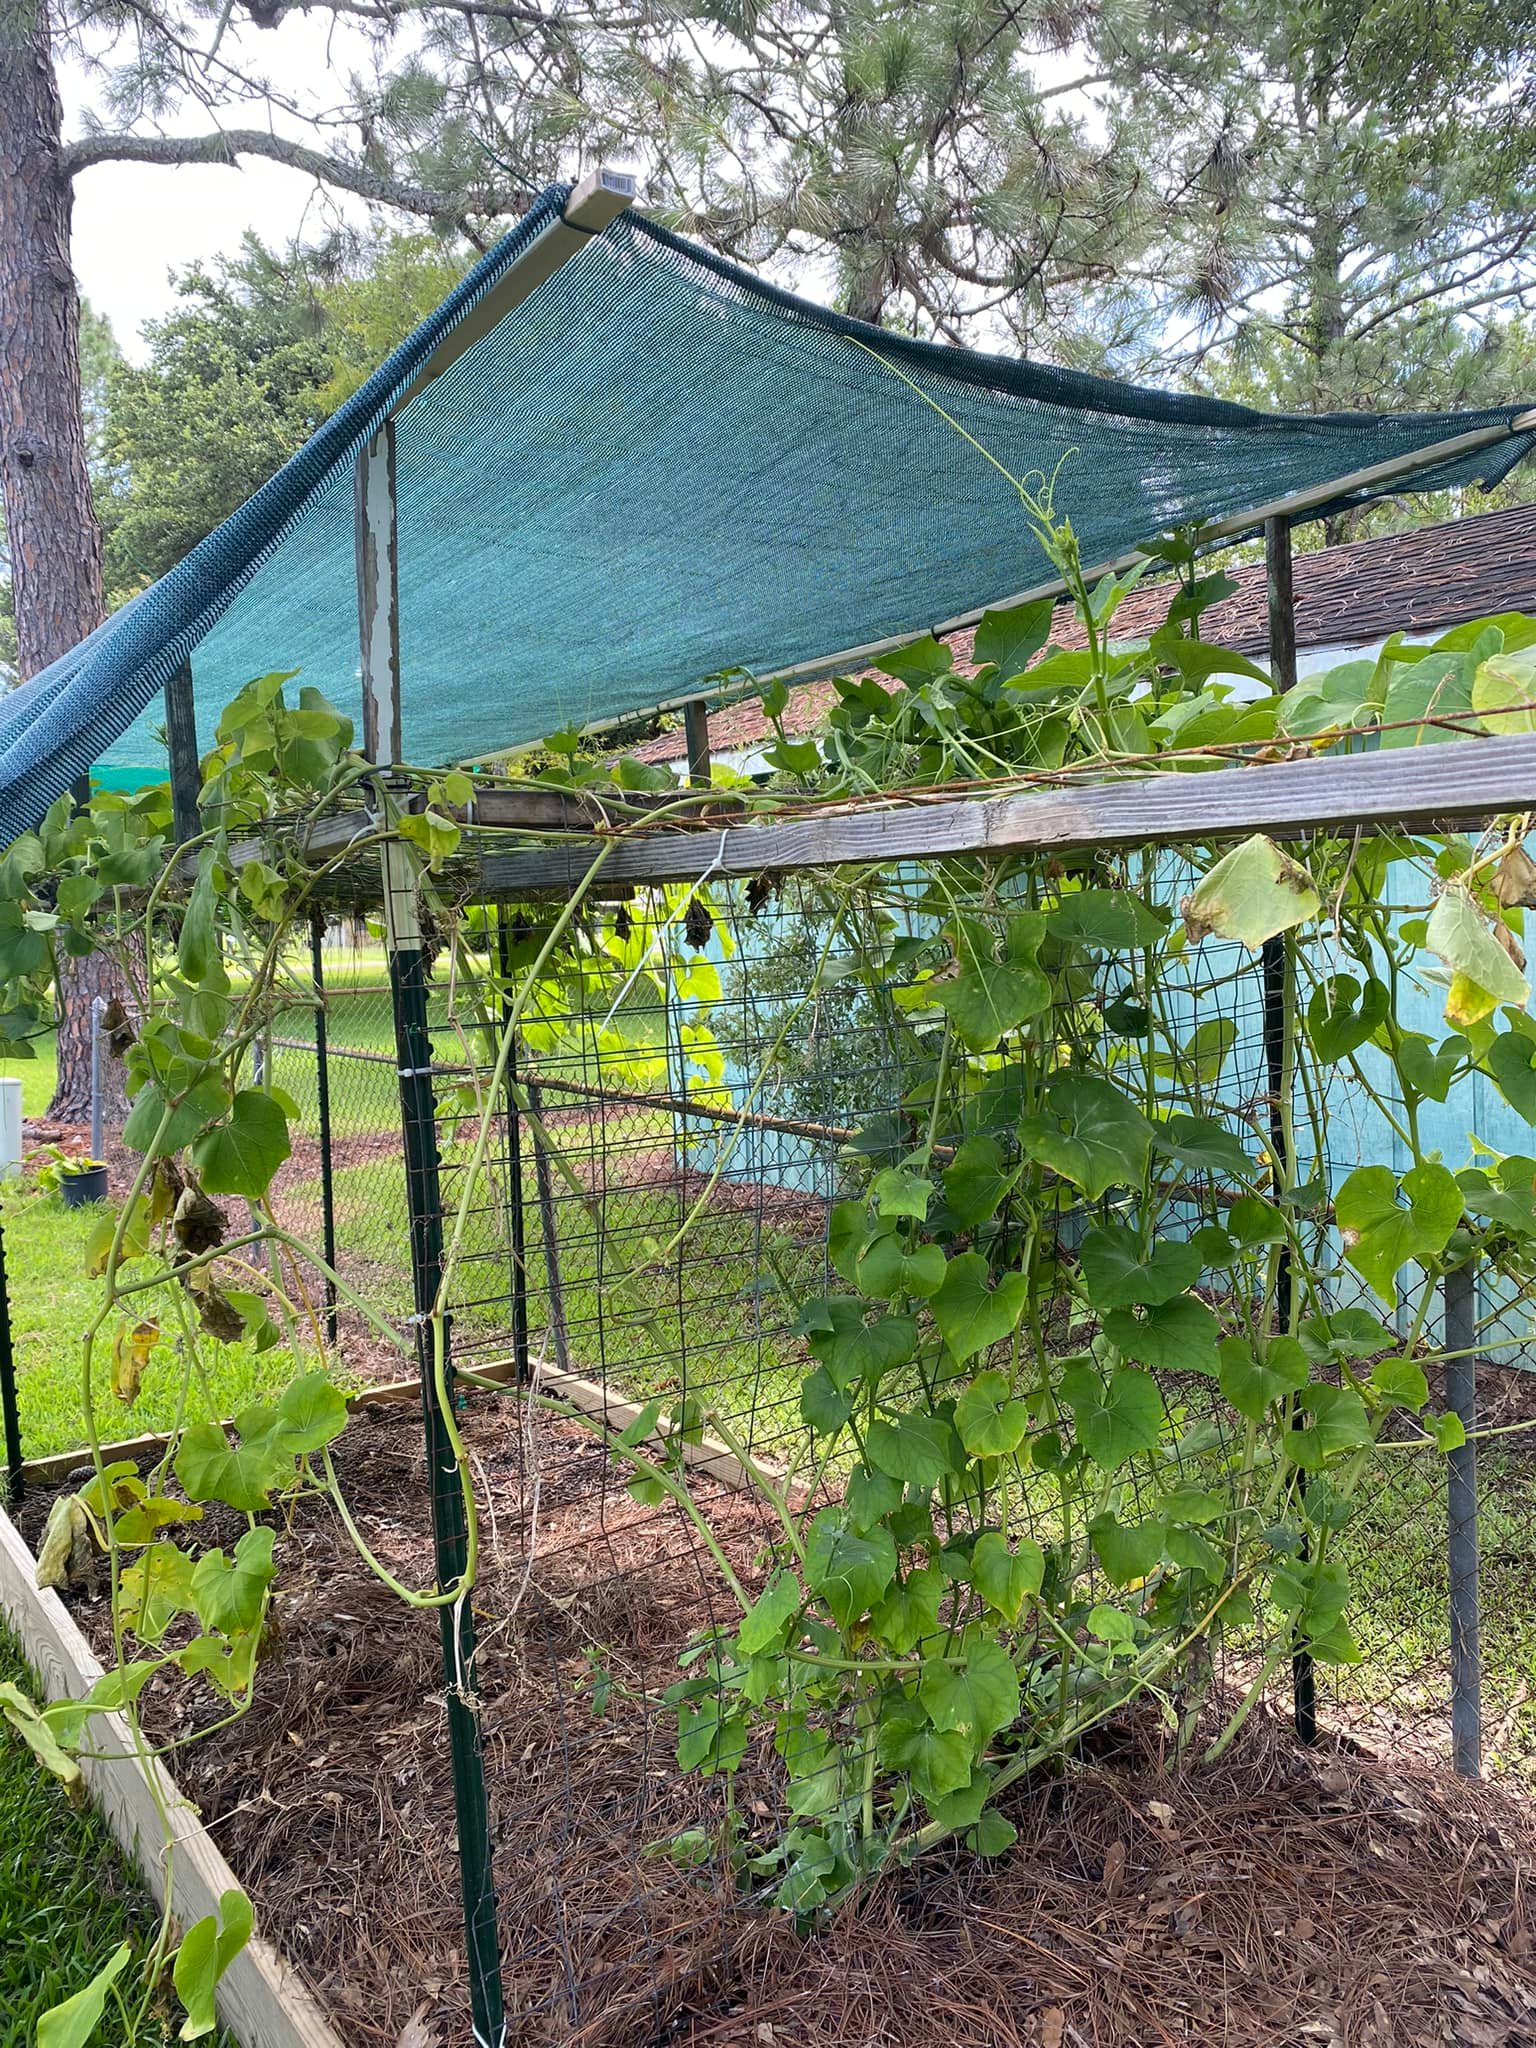
Build your trellis so you can easily mount a shade cloth over the vine.
It can be thrown over the vine or mounted over it. Shade cloths come in different shading percentages, and we recommend 40% cloth with grommets so it does not blow away. They are available on Amazon and at most big-box stores. Shop around online to find one that will last for years. An Amazon link is here.
Mount the shade cloth at least 24″ above the main trellis so that the vine can still grow unimpeded.
Shade cloths are only for extreme weather events. You won’t need it unless there is a heatwave with temperatures above 93° for several consecutive days. Too much shade, especially in the spring and early summer, can be detrimental to the vine. The leaves need sunlight for photosynthesis, which provides energy for the plant. Sunlight is a natural fungicide that prevents some plant diseases. Moreover, full sun also dries and hardens the leaves, making it more difficult for the fungi that cause powdery mildew and anthracnose to get a foothold on the vine.
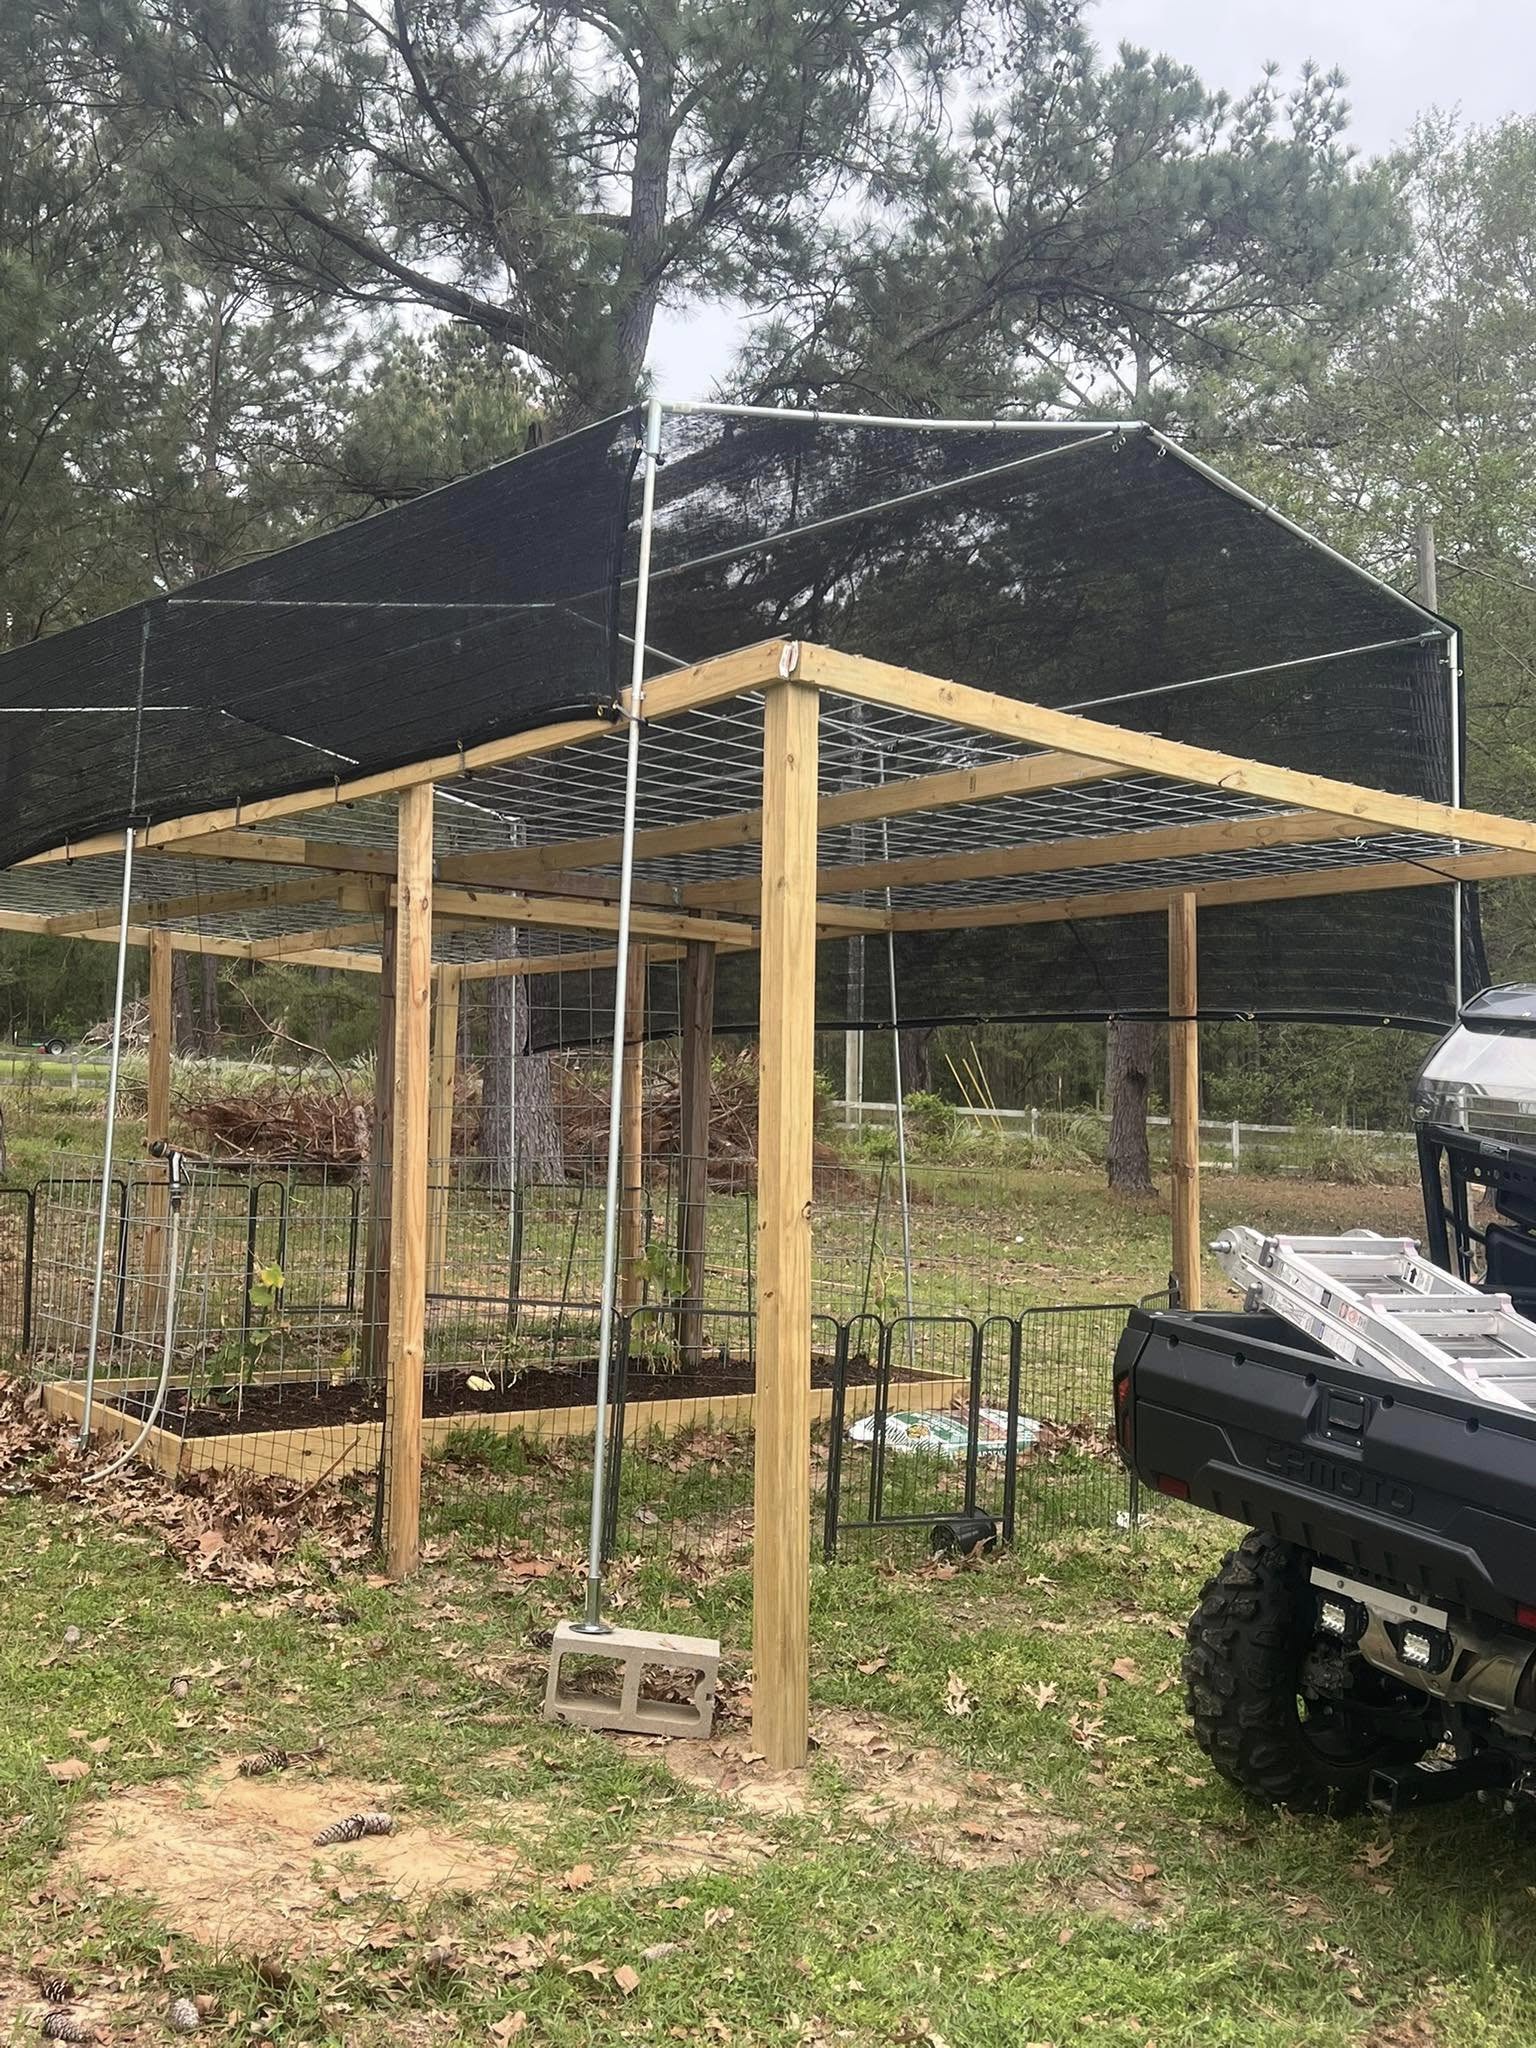
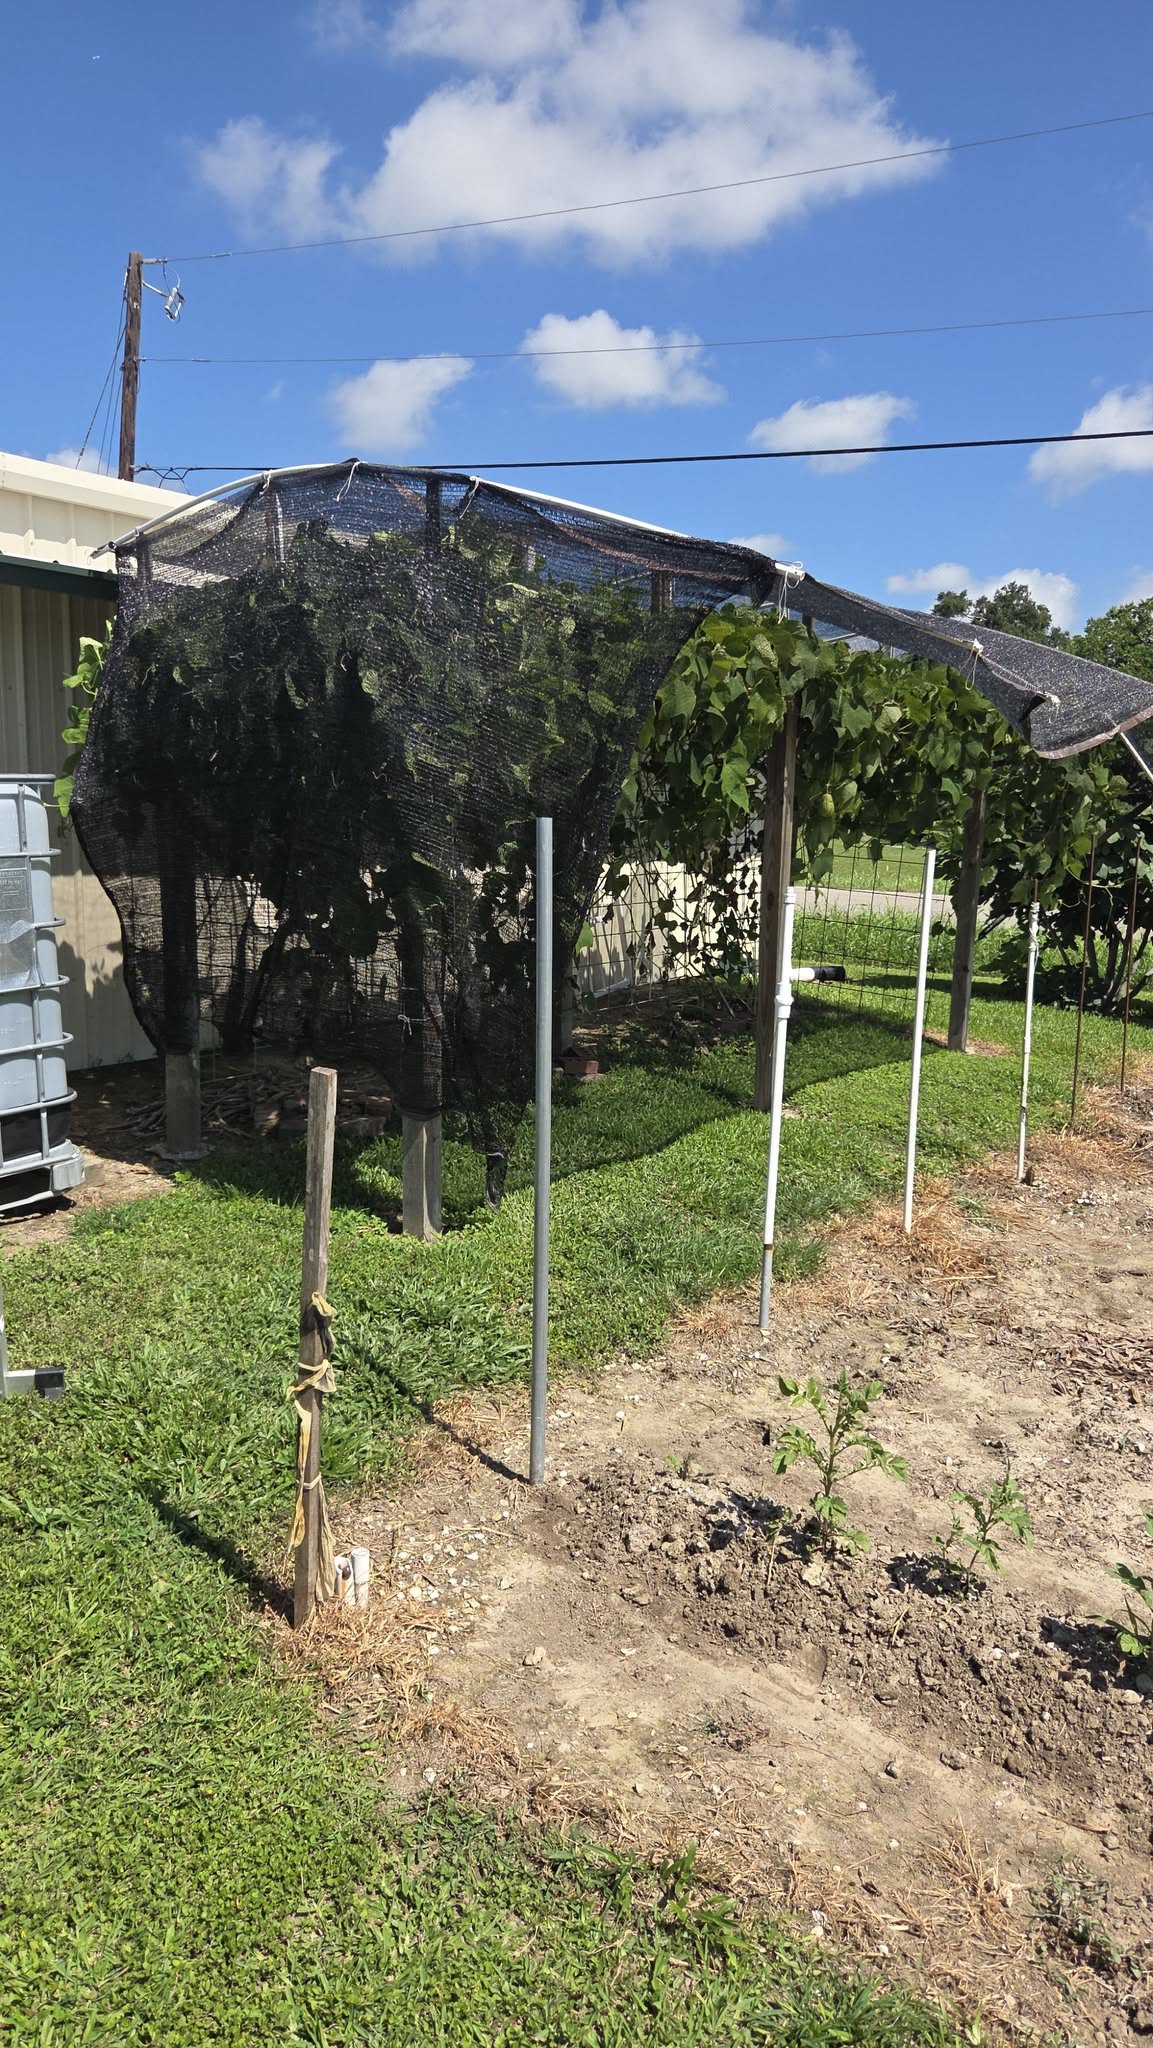
Buster Avera’s Shade Cloth.
Preventing Cross-Pollination in Mirliton Varieties
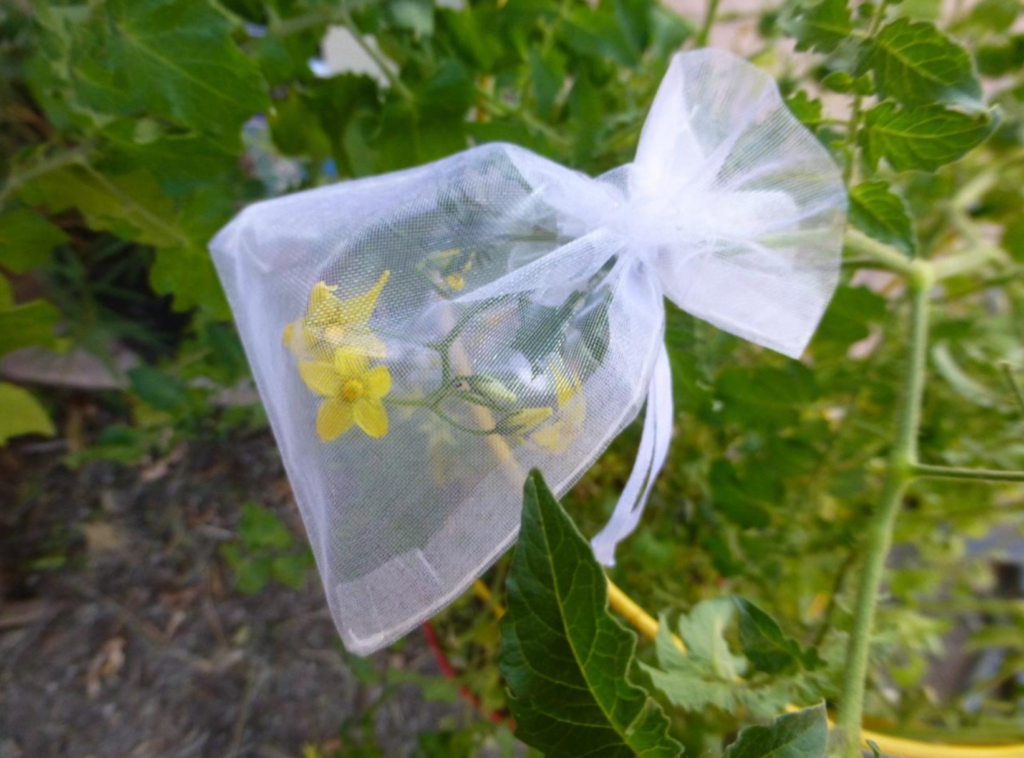
There are no scientific studies on cross-pollination in mirlliton varieties, so we can’t speak with any certainty about the chances of cross-pollination. Mirlitons are self-pollinating plants and are primarily pollinated by bees. Honey bees are systematic foragers; they will focus on one plant until they have collected all the nectar. That means they are less likely to carry pollen from another plant, thus reducing the risk of cross-pollination.
Because of this, generally, you can grow two different varieties with little risk of cross-pollination. If you grow only one variety at a time, you will have even less risk. But if you want to ensure that the offspring of a plant will be true-to-type, there is a simple way to do that: controlled pollination.
Using controlled pollination will guarantee that the specific fruit you picked from your vine will grow the same variety. Click here to see how to do it.
Mirliton Seed Online Store
 Lee Flynn created and manages the Mirliton Seed Online Store, which she does as a volunteer. The store sells only certified Louisiana Heirloom Mirlitons. They are sold at cost, depending on the price that the grower charges (some are donated). Mirlitons are only available in season, and the quantity per order is limited so that everyone can obtain one. If we are out of stock, you will be put on a waiting list and be notified immediately when available. Click here for the store.
Additionally, people advertise heirloom mirlitons when they are in season (Spring and Fall) on our Mirliton.Org Facebook Group.
Frost Protection
 Frost Protection
There is a possibility of a damaging frost whenever the temperature drops below 38 degrees. You can protect your mirliton with either a minimum or maximum plan.
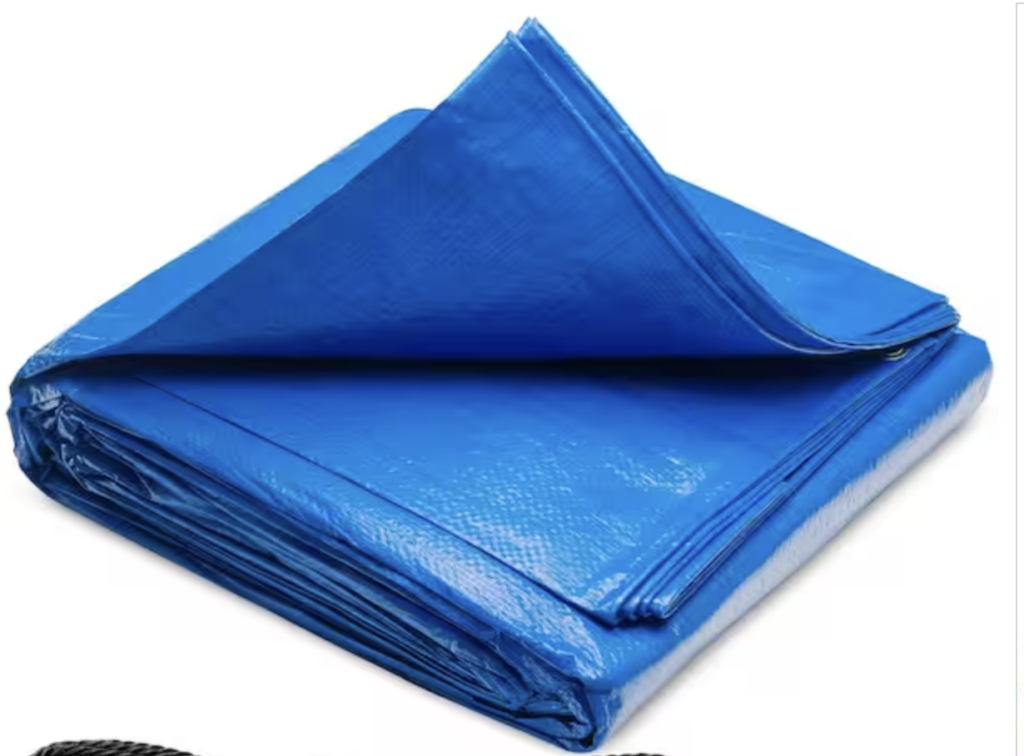
Minimum plan: Tent the vine the day before with a tarp or 6-mil plastic cover. A FEMA tarp will work well. Weight down the edges of the tarp with bricks (you are trying to trap the heat from the soil inside the enclosure). This will raise the temperature a few degrees and may avert the frost. (This will also work to prevent “cold damage,” which can occur when the temperatures drop into the low 40s. Read about cold damage here.)
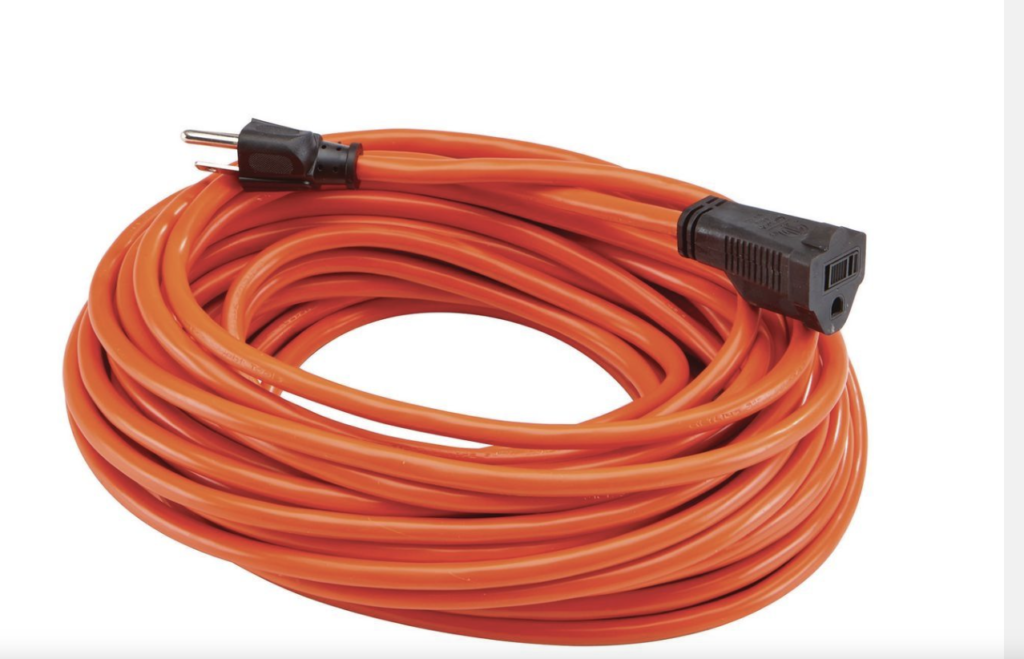
Maximum plan: Add heat to the tent. You will need an extension cord and a small space heater. A space heater will raise the tent’s internal temperature several degrees, which will protect the vine if temperatures dip to 32 degrees. There are also portable gas heaters. Buy a remote thermometer and place the sending unit in the tent enclosure and you will be able to see exactly what the internal temperature is. Remote thermometers will permit you to see what the temperature is in the tented trellis from the comfort of your home. They are the best defense against a freeze–and cost only
$20. Buy it here.


Rethinking The Mirliton Planting Schedule: Winter Vines and Summer Shade
The Louisiana Mirliton Two-Step
Because of increased extreme weather events like Heat Domes and frequent hurricanes, we need to think entirely differently about when and how to grow mirlitons. We have two chances at a mirliton crop: Spring and Fall. We need to especially take advantage of our cool months, October through May.
Step One
Plant your mirliton seed or container plant in the fall and build a trellis for the vine to grow on all winter. When necessary, temporarily cover it with 4-mil plastic and warm it with a portable heater to protect it on frost/freeze days. By the following spring, the vine will have a large canopy to support flowering–and you will get a spring crop.
Step Two
To help your vine get through the summer, use the same trellis to support a 30% shade cloth to shade the vine from June through August, if necessary. That will give you a a good chance at another crop in the Fall
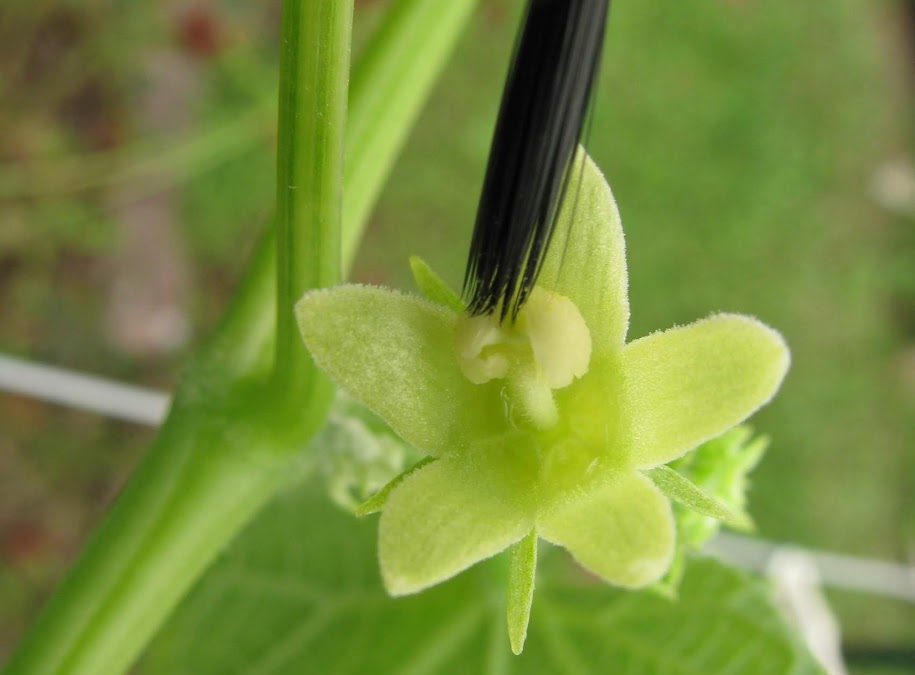
How to Hand-Pollinate Mirlitons
Sometimes bees and other pollinators are not doing their job, and you want to ensure that your female flowers are pollinated. Gardeners are often advised to remove male flowers and apply them to the females. But this destroys the male nectar, which attracts pollinators. Instead, the simplest way is to hand-pollinate with a slender artist’s brush with dark horse hair bristles (the nylon brushes won’t work). The bristles make it clear that you have collected yellow pollen from the males. Using a brush means you do not destroy the males and can return to them for additional pollen.
Click here to see how to do it.