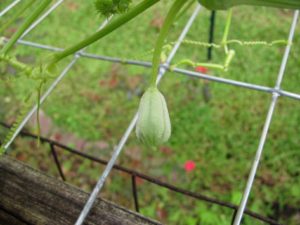
How to Grow True-To-Type Mirliton (chayote) Varieties

How to Grow True-To-Type Mirliton (chayote) Varieties


You can grow two different varieties of mirliton in the same garden and still ensure that select seeds will produce the same plant as their parent variety.  In botany, we call this true-to-type seed—a seed that carries the expected, desired characteristics and qualities of the parent plants. It’s easy to do.

First, the basics of mirliton reproduction. A seed is created through fertilization. Fertilization requires pollination. Pollination is the transfer of pollen from the male part of the flower to the female part of the flower. Remember, pollination happens within the same species level, not between species. A mirliton and a pumpkin cannot cross-pollinate; only varieties of the mirliton species, Sechium edule can interbreed. Mirlitons are monoecious plants because they have both male (staminate flowers) and female (pistillate flowers). The pollen from the male flowers can fertilize the female flowers. This will produce fruit that ensures you will have identical offspring: true-to-type seed. 

The problem is that bees, the primary mirliton pollinator, travel several miles foraging flowers and they may introduce pollen from another nearby variety. Some think that if they plant a mirliton fruit, the vine that it makes will produce fruit identical to the planted seed. This is not necessarily true. The confusion arises because plants do not reproduce the same way that humans do. When two humans mate, the immediate offspring is comprised of half the genes of both parents. Mirlitons are different. The characteristics of the fruit on the vine are determined by the genes of the mother plant, regardless of how it was pollinated.

The color, shape, and skin surface of every fruit growing on the vine are created by the genetics of only the mother plant producing the fruit. The father’s genes from the pollen are embedded deep in the inner soft seed that you see when you cut open the mirliton. This inner soft-seed is called the embryo and it contains both the mother’s and father’s genes, but at this stage, the pollen–the father’s genes– don’t affect the fruit characteristics. 

The mother plant’s ovary controls the characteristics of the fruit enveloping the embryo, the fruit that we eat which includes the skin type and color. For example, assume that a smooth skin mother plant female flower is cross-pollinated by a spiny-skin male plant flower. The fruit that grows that year will still be a smooth skin fruit. The male pollen does not affect the first generation of fruit. But all the spiny genes are locked into the soft seed in the middle of the fruit, and if you pick that fruit and let it sprout and plant it, the fruit of that plant will have spines if spines is a dominant trait. 

So how do you ensure that fruit from your mirliton will be a copy of the mother plant? The answer is simple: use isolation to guarantee a true-to-type seed. If you protect a female flower from pollen from a distant mirliton, you can create a true-to-type seed. You only have to protect a few flowers because you only need the true-to-type seed of the mother variety to grow the next year or to give to another grower. It’s like my dentist used to tell me, “Only floss the teeth you want to keep.” 

How to Isolate flowers to Propagate True-To-Type Seed:

 The goal is to ensure that the female flowers on the vine receive only pollen from the male flowers on the same vine. Mirlitons normally first produce an abundance of male flowers in anticipation of the females. Male flowers are easy to recognize; they are little yellow flowers with no appendage (tiny fruit) between the flower and the stem (captioned photos are at the bottom of this article). They tend to grow clusters.  After the males appear, watch for female flowers to emerge; they will be far and few between but along the same vine as the males. The female flower petals do not initially open but they have a distinct bulge beneath the flower—a baby mirliton on the peduncle (stalk) between the flower and the vine. 

As soon as you identify a female flower and before it begins to open (see attached photos ), enclose it with a small transparent pollination bag to protect it from unwanted pollen. Tie the bag at its base. Then tie a piece of red yarn around the base of the flower to mark it as “control pollinated.” When the female flower is completely open, use an artist’s paintbrush to gather some pollen from the male flowers. You will see the yellow pollen on the brush. Take that pollen to the female flower and dab it onto the pistil and retie the bag. 

If the flower is successfully pollinated and fertilized, the petals will fall off the female flowers in three days, leaving the tiny mirliton fruit. You can remove the bag but leave the red yarn as a marker to indicate it is a true-to-type fruit. When mature and sprouted and planted, this seed will produce a plant that is true-to-type. 

Materials: Pollination bags: https://www.nativeseeds.org/products/sss006 

How to Propagate True-to-Type by Stem Cuttings Mirlitons:

True-to-type mirlitons can also be grown from stem cuttings (vegetative propagation) which will ensure that the plant is a copy of the mother plant. Growing from cuttings is the normal way mirlitons are propagated in Latin America since it (1) ensures uniformity in plant characteristics from generation to generation and (2) cuttings, unlike fruit, are free. Vegetative propagation requires more time and work than controlled pollination, but if you are interested, see the instructions for stem cuttings on the photo page here.

Read the research article on cuttings at: https://www.mirliton.org/wp-content/uploads/2019/11/Mirliton_Vine_Cuttings_Aricle.pd

(Special thanks to Dr. Joe Willis of the LSU AgCenter for his indispensable contributions to this article.) 

Male flowers first emerging and opening in clusters.

Unopened female.

Female with opened flower.

Collecting pollen from male.

Brush with pollen on tip.

Dabbing pollen onto female.

Dropped petals on female indicate it was successfully pollinated.

A pollination bag is used to protect female flowers from cross-pollination.

Can My Mirliton (Chayote) Interbreed With Other Squash?

Many people have asked if there is a danger of interbreeding (cross-pollination ) if they grow mirlitons with other squash like Cucuzza and luffa. That’s understandable because the vines look and flower similarly.  The short answer is no, mirlitons and other squash species can’t cross-pollinate. 

Mirlitons can only pollinate other mirlitons, and other squash can’t pollinate mirlitons. 

But here’s an easy way to determine the danger of interbreeding with any combination of plants. 

We usually use common names for plants, but the key to knowing if they can interbreed is knowing the scientific name, called  “binomial name” which consists of the two words; genus and species. It is analogous to your personal name; your last name is your genus (family name) and your first name is specifically who you are in the family (specie). 

To determine the possibility of interbreeding, simply google the common name followed by the words “binomial name.” For example, if you google mirliton and “binomial name,” your first return is Sechium edule, which is the binomial name you are looking for.  Then google Cucuzza and “binomial name” and it will return Lagenaria siceraria. Now you know the genus and species of both.

Mirliton:
Genus: Sechium
Species: S. edule

Cucuzza:
Genus: Lagenaria
Species  L. siceraria

The two vines are in a different genus (genera is the plural), and different genera seldom interbreed

What if you have two plants in the same genus? Then look at the second name—the species. If they are the same species, they can generally cross-pollinate—that’s how botanists define species—any plants that are capable of interbreeding.  There are exceptions, but to be safe, don’t plant them together until you contact a plant expert who can advise you.

Now, practice the method on another plant: 

Find the scientific names (binomial names) for mirliton and cucumber. Compare them. Are they the same genus? If not, then it’s safe to plant them together.


Identifying and Contolling Powdery Mildew in Mirlitons

Powdery Mildew on a leaf in the early stages of the infection. The best time to diagnose powdery mildew is in the early stage on mostly green leaves. It starts as irregular pale yellow blotches that combine until the whole leaf is yellow.

Powdery mildew is a troublesome plant disease, but thankfully, it is never lethal.  It’s largely a Spring disease because it thrives in cool, damp weather, so it’s the first disease you will see in the mirliton growth cycle. The good news is that there’s an effective organic fungicide that manages the disease. 

The signs of powdery mildew on mirlitons are not the same as on most other plants.  Gardeners are often advised to look for a white powder on the leaf surface. But that seldom appears on mirliton leaves–probably because the spring rains wash off the leaves.  The most obvious signs will be yellowing, dead leaves, and by that time, the infection will have advanced. And yellowing leaves can also be caused by overwatering.

So, what’s the best way to spot the disease?  The most accurate way to identify powdery mildew in its early stages is to examine the seemingly healthy green leaves near yellowing ones.  The early signs of mildew are irregular, faded yellow blotches like those in the photo above. That is the fungus forming little colonies that will eventually turn into bright yellow leaves. 

If you find signs of the disease, there is a highly effective organic fungicide that can control it:  potassium bicarbonate. It can completely eradicate the disease in three weeks and works on downy mildew as well.

We recommend L.D. Carlson’s potassium bicarbonate because the manufacturer has verified with a Certificate of Authority (COA) that it is at least 99.5% pure. It’s generally sold in one-pound quantities, which is more than you will need, but it has a long shelf life, and you can share it with other growers. Click here to order online.

L.D. Carlson’s potassium bicarbonate.

If you are using a 99.5% pure potassium bicarbonate product, mix one tablespoon with a gallon of water and shake vigorously. Then spray only in the evening and thoroughly wet the tops and bottoms of all leaves. Apply once a week for three weeks until there are no signs of early infection (faded yellow blotches on green leaves).

For a more thorough article on powdery mildew and mirlitons, see my paper here.

Making Spring Mirlitons Sprout

Sprouting mirliton.

We occasionally get a Spring mirliton crop and decide to gift or sell them to others to grow. You could plant them in small containers and sell them that way, but that would mean that potential growers would have to transplant them into the ground during the full heat of the summer. That would be risky. That’s why we recommend that growers sell their fruit as sprouts as soon as possible after picking them.  Sprouts can be safely planted in May-June with a simple shade technique (click here). So how do you expedite sprouting?

Mirlitons sprout (germinate) in response to warm weather. Joseph Boudreaux taught me the simple technique for incubating mirlitons in May: Place them in a warm place outside and they’ll sprout within 10-14 days. It’s best to place them away from the direct sun and inside a container such as a milk crate where varmints can’t get them (squirrels, possums, and rats). As soon as they begin to sprout, you can assure people that they are viable seeds and ready to plant.

How To Read Mirliton Leaves for Vine Watering Needs

How To Read Mirliton Leaves for Vine Watering Needs

Guttation forming on leaf tips and edges

Your mirliton will tell you every morning how much water its roots are accessing. It is called “guttation.” If there is more than adequate soil moisture available at night, mirlitons will send the excess to the leaves where it will be visible in large droplets on the margins of the leaves. The water exudes from glands at the tip of the leaves. Guttation means the plant has more than enough water; if you don’t see guttation for several days, then it’s probably time to water.  Click here for a link to instructional photos of guttation and how to read it (click on each photo for explanations).

Watering Mirlitons

Watering Mirlitons

I could have titled this “How To Water Your Mirliton” but that would be like asking, “How To Care for a Child.” There’s no single answer because each child is different and has different needs at different times in their life. Plants are the same. So this is a set of guidelines instead of rules for watering mirlitons during their three distinct stages in their life cycle.

It used to be said that mirlitons “take care of themselves” and need little care; the increase in hurricanes, floods, and intensive rain days means that is no longer true. Now they need intensive care. No watering technique can remedy a flawed plant site. Mirlitons need quickly draining, well-aerated soil. That means you may have to install drainage (ditches, French drains) in your ground planting; in raised beds, you need lateral exit routes for excess rain, such as side holes or subsurface corrugated pipe. Rapid and wide fluctuations in soil moisture content in your raised bed can stunt growth and hinder flowering and fruiting. These guidelines will generally apply to both planting methods.

Steps to take Before You ever Turn on the Hose:

Get a rain gauge. Place it next to your vine and check it daily. The weather person has no idea how much it rained in your yard—you need to know it for your vine’s health.

Don’t guess about the vine’s water needs. The soil and the leaves will tell you exactly what you need to know if you scout them daily. Learn to read the bamboo stake or soil sampler and the mirliton leaves. They will tell if the vine needs water, and too much water can create a sick vine.

Use a Bamboo Stake or Steel Soil Sampler to gauge soil Moisture: Learn how to use a ½-inch bamboo tomato stake to test soil moisture in the root zone. It will tell you instantly if your vine has too much or too little available moisture. There’s a link at the end of this article to how to read the stake. Or buy a stainless steel soil sampler that allows you see and feel moisture levels beneath the surface (link below)

Check Guttation Daily: Mirlitons will tell you every day if they are quenched or thirsty. Guttation is the droplets of water that form on mirliton leaf edges early in the morning. The presence of guttation means the vine has more than enough available water in the root zone. Three days without guttation mean it probably needs watering. Check the vine first thing in the morning for guttation. Learn to read your mirliton leaves at the link below.

Wilting Does not Mean Water the Vine. A daily wilt in hot weather is normal and healthy mirliton. It’s called “leaf flagging” and it reduces exposure to direct sunlight and toughens the leaves against plant diseases. Watering mirlitons as a reaction to temporary wilt can actually harm the plant. When you see a daytime wilt, wait until the evening and probably see that it recovers.

Never give your vine a shower. That’s a surefire way to start an anthracnose epidemic. The anthracnose pathogens are primarily carried primarily by water through splash-up from the soil or splashed from leaf to leaf. Water gently at ground level with a hose on low, or use drip irrigation.

The Three Stages in the Mirlton Life Cycle:
1. Toddler:
Be careful with the baby. The first impulse when we see a young plant droop is to water our way out of the problem. Don’t do it At the toddler stage, mirlitons are most sensitive to soil moisture issues because their young roots are just emerging. Overwatering is the leading cause of premature death in mirlitons. Prepare for your toddler by installing gentle drip irrigation or an olla. Use the stake and read the leaves daily.

2. Sprawler:
Once the vine is established, it will begin to climb and sprawl. A larger canopy means they need more water. Daily summer showers should provide enough water, but don’t guess–use the stake and read the leaves.

3. Fruiter
The fall is fruiting season and water needs may increase, but use the stake and read the leaves.

Final Thoughts
Watering is not something you simply do to a mirliton vine; it’s something you do with it. It’s a partnership in which both parties have something to say. Listen to your vine.

Bamboo stake instructions here.
Steel Soil Sampler here.
Read the Mirliton Leaves here.

Deep Roots

Debra Voelker (photo by Renee Lapeyrolerie)

By Renee Lapeyrolerie

Debra Voelker is Jazz Fest, Mardi Gras, costumes, and mirliton. She has roots on St. Ann Street and Ursulines Avenue. Her dad grew mirliton on Orleans Avenue and her maw maw stuffed them on Canal Street. About six years ago, Debra got mirliton seed from a friend who’d shared on a social media post that she’d put them ‘out for the taking’ from her front porch. The supplier said that she had gotten seed from an elder whose vine survived Hurricane Katrina’s winds, although we have not been able to verify the source nor the location.

However nice that would be to know, Debra’s vine has produced multiple years and she was even gifted a crop in the Summer of 2021. Surely, a Louisiana heirloom due to its reliable production and physical characteristics. Debra made a sweet mirliton pie and a soup with her bonus crop. It’s the Fall yield though that brings back memories of her mirliton-filled youth. Her maternal grandmother, or maw maw, who lived on Canal Street just two miles from where Debra now lives, stuffed her mirliton mixture back into the shells for baking, some with ground meat and others with shrimp. Debra makes a traditional stuffing and has added mozzarella, an idea she picked up from a friend. Her father’s sister used to cut mirliton up into big chunks and pickle them that way, after all, mirliton was plentiful in the family.

Debra’s dad grew a vine on the hurricane fence of the home she was raised in on Orleans Avenue near North Carrolton Avenue. She remembers the vine growing all along the fence and sometimes over the garage. She has vivid memories of accompanying him up the street to put bags of mirliton on the neighbors’ stoops. “There would be Schwegmann’s bags of them,” she said, “it was wild!” That is a common unit of measure among mirliton growers during the century-long era of a popular supermarket chain in the New Orleans region.

As we swapped stories about caring for our respective vines she lamented, “I don’t remember my dad doing a damn thing to his vine.” But she does remember a time that a mirliton tendril grabbed onto her hair. When Debra retrieved the mirliton from her friend, they were off-the-vine. She had to wait for them to sprout, she potted them, and got the vine going. For two years the vine produced fruit until a jealous dog interrupted progress in year three. She made another raised bed across the backyard and now both vines have produced and are thriving. Like most growers in the path of Hurricane Ida, her vine support was toppled, but she left it in place because she had fruit.

Anthracnose

Mirliton leaf infected with anthracnose. Unlike powdery mildew, which yellows uniformly and wilts the leaves, anthracnose starts as yellow wedges between the leaf veins. It then turns the leaf tissue brown and leaves a distinctive “shot hole” in the middle of the brown patches. This is because the anthracnose fungus feeds on both living and dead tissue.

Seasons change, and diseases change.  For mirlitons (chayote), the cooler, drier spring is time for the airborne mildews (powdery and downy), but the hot rainy months July through August—bring anthracnose season.  Being prepared for it can significantly reduce the damage the disease might do. 

First, know the enemy.  The above photo shows all the classic signs of anthracnose: a yellow wedge that turns into dead, paper-like tissue, with a shot hole in the middle. If you got these, you got anthracnose.

Anthracnose is a disease caused by the fungi Colletotrichum lagenarium or Colletotrichum orbiculare in mirlitons. There are many fungi that cause anthracnose disease, but for our purposes, we’ll call Colletotrichum lagenarium the “anthracnose fungus.”  Unlike mildews, which are carried by air, the anthracnose fungus is waterborne. That means it is carried by water droplets, splashing up from the soil and then from leaf to leaf. That’s important because it means that while you might be able to wash off some fungi with a good shower from your hose, the same shower will splash anthracnose fungus all over your vine and cause a massive anthracnose infection. 

Three Steps to Manage Anthracnose:

  1. Don’t give your vine showers.  Water from the bottom of the vine with a hose set on low or drip irrigation.
  2. Don’t drown the vine. Too much soil moisture stresses mirliton and makes it difficult for it to fight fungi. Make sure your raised beds and ground plantings have adequate drainage; if they don’t, add it now.
  3. Don’t worry; Be Happy. As horrible as anthracnose looks, infected vines normally recover in September and flower and fruit. Plus, they acquire increased resistance to the disease.
  4. We are testing a new biofungicide, Timorex Act, and will report on our findings when the trials are complete


Here’s a more complete fact sheet on anthracnose and how to protect your plant by prepping your planting site or raised bed::Here

A Master Class in Mirlitons

Ervin Crawford And his Mirliton Vine

In 2008, I was searching for a Louisiana heirloom mirliton to replace the variety I had grown since 1983.  The hurricane Katrina flood had killed almost every mirliton in New Orleans.  The usual suspects had given me all the normal bad advice: “Buy one at the grocery store.  A mirliton is a mirliton.  They’ll grow fine.”  Nope. I planted, they died; I planted, they died. Over and over.  

After a little research, I discovered there were scores of varieties—perhaps hundreds—each adapted to the particular climate and altitude.  I had to find the one traditionally grown in Louisiana.  I discovered that the Louisiana Department of Agriculture’s monthly Market Bulletin was digitally archived years back. I went through it looking under “fruits and vegetables for sale” and saw one name repeatedly; Ervin Crawford, Pumpkin Center.  It was a long shot because the advertisements were decades old, but I called the number.  Ervin Crawford answered.

I immediately drove to Pumpkin Center and met him. On that first visit, Ervin gave me about 20 mirlitons and with those 20 plants, I started Mirliton.Org.  Ervin played a crucial role in saving the Louisiana heirloom mirliton.

Visiting Ervin’s farm is a pilgrimage everyone should make.  He’s a retired airline mechanic and knows more about mirlitons than anyone I know. He has been growing them for five decades, first in Peal River where he was raised, and later in Pumpkin Center where he bought his 20-acre retirement farm.  He grows everything; pecans, figs, beans, berries, bees, chickens.  

He has a quality found in most successful gardeners–a healthy curiosity. He wanted to know why he had success as well as failures. And failure and mirlitons often go together in the poor sandy pinewoods soil of the area called the Florida Parishes.  I have heard people in the region say, “They won’t grow up here.”  At first, I thought that they were using the wrong variety, or planting them incorrectly.  Ervin taught that the problem was not the soil, it was what was beneath the soil. 

Soil sample tests tell you a great deal, but they won’t tell you what you need to successfully grow mirlitons. Mirlitons are shallow-root plants and they sink or swim depending on subsurface drainage. If the soil doesn’t drain quickly enough, the roots can’t absorb oxygen, and the plant founders or dies. Building a raised bed on top of poorly-drained soil may result in a mud boat. The bed has to have an outlet to either absorb or remove excess water.  So to succeed, you need to know the geology and history of the land you are gardening on–and Ervin asked the right questions when he first got to Pumpkin Center.

Ervin learned that Pumpkin Center’s soil was considerably different from Pearl River, where he had learned gardening. Pearl River was a loamy basin soil, rich and porous. In contrast, Pumpkin Center was in the middle of the great Piney Flats that stretches from Florida to Texas. It was notoriously bad poor soil—sandy and acidic. When he once had some excavation work done, he saw that solid white clay lay a few feet down–a real barrier to drainage.

I realized that I had never asked those questions about where I was gardening.  To grow mirlitons, you have to be part geologist, hydrologist, and historian. You don’t have to become an expert; just enough knowledge to benefit your mirliton.

As I learned more about the history of where I was gardening, I realized that my mirlitons had often thrived in spite of me. I never once had asked what was under that topsoil or what was there 100 years ago.  

I do now, thanks to Ervin.   


How to Plant Spring Mirliton Sprouts in May or June

Spring mirlitons are normally sold unsprouted because they are picked fresh from the vine in early May. The first step before planting is to sprout the mirliton. You can speed the process by incubating it—keeping it as warm as possible. If it is above 80° outside, place the mirliton in a shaded area.  Or you can incubate it inside your home by placing it in a small plastic trash can or 5-gallon container with a lamp or small heating pad on low. The ideal temperature is 80°-85°. This will promote rapid sprouting within 10-14 days. (here is how I did it)

As soon as the seed begins to emerge (sticks out its tongue), it needs to be planted—but differently from the fall ones. In May, temperatures can run in the 90s along the Gulf Coast, and I have found that sometimes they won’t send up a shoot in extreme heat.  Instead, the shoot spirals under the seed. (Figure 1). 

The solution is simple. Plant the sprout as you normally would, but put a temporary shade cover over it —a milk crate with a piece of shade cloth over it or a piece of cardboard on top will work fine. Cover the crate with chicken wire to ward off varmints. Once the shoot emerges, remove the crate and stake up the vine.

Figure 1.

Recent Posts

How to Grow True-To-Type Mirliton (chayote) Varieties

  You can grow two different varieties of mirliton in the same garden and still ensure that select seeds will produce the same plant as their parent variety.  In botany, we call this true-to-type seed—a seed that carries the expected, desired characteristics and...

Can My Mirliton (Chayote) Interbreed With Other Squash?

Many people have asked if there is a danger of interbreeding (cross-pollination ) if they grow mirlitons with other squash like Cucuzza and luffa. That’s understandable because the vines look and flower similarly.  The short answer is no, mirlitons and other squash...

Identifying and Contolling Powdery Mildew in Mirlitons

Powdery mildew is a troublesome plant disease, but thankfully, it is never lethal.  It’s largely a Spring disease because it thrives in cool, damp weather, so it's the first disease you will see in the mirliton growth cycle. The good news is that there’s an effective...

Making Spring Mirlitons Sprout

We occasionally get a Spring mirliton crop and decide to gift or sell them to others to grow. You could plant them in small containers and sell them that way, but that would mean that potential growers would have to transplant them into the ground during the full heat...

How To Read Mirliton Leaves for Vine Watering Needs

Your mirliton will tell you every morning how much water its roots are accessing. It is called “guttation.” If there is more than adequate soil moisture available at night, mirlitons will send the excess to the leaves where it will be visible in large droplets on the...

Watering Mirlitons

Watering Mirlitons I could have titled this “How To Water Your Mirliton” but that would be like asking, “How To Care for a Child.” There’s no single answer because each child is different and has different needs at different times in their life. Plants are the same....

Deep Roots

By Renee Lapeyrolerie Debra Voelker is Jazz Fest, Mardi Gras, costumes, and mirliton. She has roots on St. Ann Street and Ursulines Avenue. Her dad grew mirliton on Orleans Avenue and her maw maw stuffed them on Canal Street. About six years ago, Debra got mirliton...

Anthracnose

Seasons change, and diseases change.  For mirlitons (chayote), the cooler, drier spring is time for the airborne mildews (powdery and downy), but the hot rainy months July through August---bring anthracnose season.  Being prepared for it can significantly...

A Master Class in Mirlitons

In 2008, I was searching for a Louisiana heirloom mirliton to replace the variety I had grown since 1983.  The hurricane Katrina flood had killed almost every mirliton in New Orleans.  The usual suspects had given me all the normal bad advice: “Buy one at the grocery...

How to Plant Spring Mirliton Sprouts in May or June

Spring mirlitons are normally sold unsprouted because they are picked fresh from the vine in early May. The first step before planting is to sprout the mirliton. You can speed the process by incubating it—keeping it as warm as possible. If it is above 80° outside,...